POWER SWITCH REMOVAL
PROCEDURE
-
REMOVE FRONT DOOR SCUFF PLATE LH (for LHD)
-
REMOVE FRONT DOOR SCUFF PLATE RH (for RHD)
-
REMOVE COWL SIDE TRIM BOARD LH (for LHD)
-
REMOVE COWL SIDE TRIM BOARD RH (for RHD)
-
REMOVE FRONT DOOR OPENING TRIM WEATHERSTRIP LH (for LHD)
-
REMOVE FRONT DOOR OPENING TRIM WEATHERSTRIP RH (for RHD)
-
REMOVE NO. 1 INSTRUMENT PANEL UNDER COVER SUB-ASSEMBLY (for RHD)
-
REMOVE INTEGRATION CONTROL AND PANEL ASSEMBLY
-
REMOVE INSTRUMENT CENTER UPPER CLUSTER FINISH PANEL
-
REMOVE INSTRUMENT CENTER PANEL REGISTER ASSEMBLY
-
REMOVE NO. 1 INSTRUMENT PANEL REGISTER ASSEMBLY
-
REMOVE INSTRUMENT SIDE PANEL RH (for RHD)
-
REMOVE INSTRUMENT PANEL LOWER FINISH PANEL (for RHD)
-
REMOVE PUSH START SWITCH (for LHD)
-
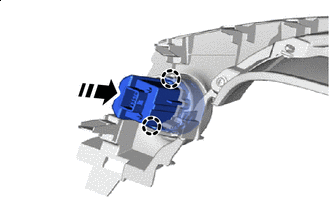

Remove in this Direction Push the push start switch in the direction indicated by the arrows in the illustration and disengage the claw to remove the push start switch from the No. 1 instrument panel register assembly.
-
-
REMOVE PUSH START SWITCH (for RHD)
-
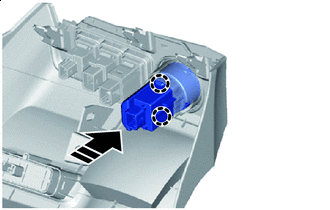
Remove in this Direction Push the push start switch in the direction indicated by the arrows in the illustration and disengage the claw to remove the push start switch from the instrument panel lower finish panel.
-