HYDROGEN DETECTOR(for Hydrogen Tank Side) REMOVAL

PROCEDURE
-
PRECAUTION
Note
-
If the hydrogen detector is dropped or subjected to a strong impact, replace it with a new one.
-
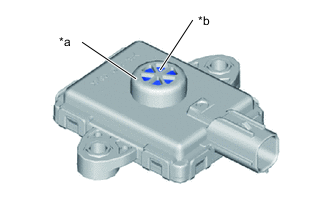
*a Hydrogen Detecting Portion *b Water Resistant Membrane Because water resistance will be degraded and error will be introduced to detection precision, do not poke the water resistant membrane of the hydrogen detecting portion with sharp objects.
-
Because water resistance will be degraded and error will be introduced to detection precision, do not directly spray the water resistant membrane of the hydrogen detecting portion with high pressure water or air.
-
Because water resistance will be degraded and error will be introduced to detection precision, do not expose the water resistant membrane of the hydrogen detector to an environment that is 120°C or higher.
-
Because error will be introduced to detection precision, do not expose the hydrogen detector to environments with high gas or solvent concentration of 4% or more.
-
Because error will be introduced to detection precision, do not directly spray the hydrogen detecting portion with sprays such as preservatives, polishing agents, silicone, or those containing combustible gases such as isobutane, etc.
-
-
REMOVE NO. 2 MOTOR UNDER COVER
-
REMOVE FRONT FLOOR COVER LH
-
REMOVE FRONT FLOOR COVER RH
-
REMOVE FRONT FLOOR CENTER COVER LH
-
REMOVE HYDROGEN DETECTOR
-
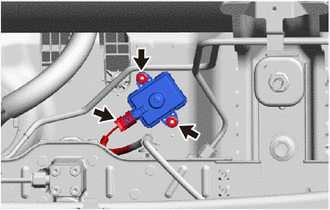
Disconnect the hydrogen detector connector.
-
Remove the 2 nuts and hydrogen detector from the vehicle.
Note
If the hydrogen detector is dropped or subjected to a strong impact, replace it with a new one.
-