CONVERTER ASSEMBLY REMOVAL
CAUTION / NOTICE / HINT
CAUTION:
-
This vehicle contains high voltage circuits standardized with orange colored wiring and connectors, so follow the instructions in this manual to perform the procedures correctly.
-
If the correct procedures are not followed according to the instructions in this manual, there is a danger of electric shock from the high voltage circuits.
-
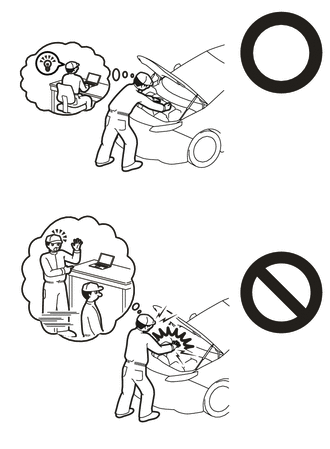
*a Heavy object exceeding the capacity of the engine lifter Because the weight of the FC stack with FC converter assembly is extremely heavy, make sure to follow the work procedures described in the repair manual.
-
If work is not performed according to the procedures described in the repair manual, there is a danger that the engine lifter could drop and components could fall down.
-
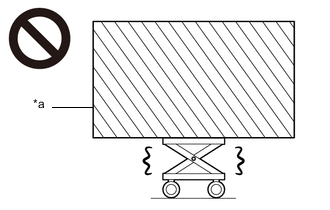
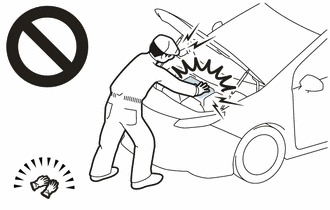
*a High temperature areas Do not touch the FC stack assembly or its surroundings when they are hot.
-
Touching the FC stack assembly or its surroundings when they are hot could result in burns.
-
Be sure to wear insulating gloves when working on high voltage wiring or components.
-
If work is performed without wearing insulating gloves, there is a danger of electric shock.
Note
When the vehicle is parked with the power switch off, if the FC control ECU judges that the FC stack temperature will go below 0°C (32°F), it activates the FC air compressor, hydrogen pump and FC cooling water pump for a maximum of 180 seconds and drains water from the FC stack assembly. When performing inspection or repairs with the power switch off (not on (IG) or on (READY)), disconnect the cable from the negative (-) auxiliary battery terminal before performing work.
PROCEDURE
-
CAUTIONS FOR HIGH VOLTAGE SYSTEM COMPONENTS
-
CAUTIONS FOR COMPRESSED HYDROGEN GAS
-
CAUTIONS FOR COOLANT (FC STACK COOLANT)
-
REMOVE REAR FRAME ASSEMBLY
-
SEPARATE WIRE HARNESS
CAUTION:
Wear insulated gloves.
-
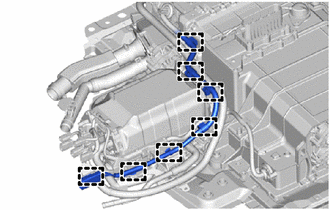
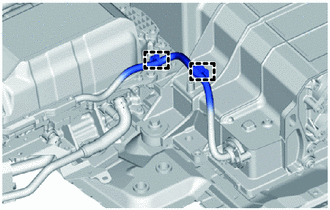
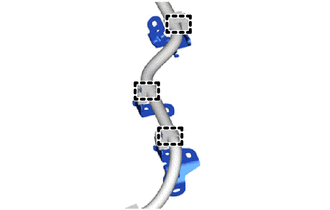
Disengage the 7 clamps to separate the wire harness and connector from the FC converter assembly and FC stack assembly.
Note
When disengaging the clamps, be careful not to damage the clamps.
-
Remove the 3 bolts to separate the 3 wire harness clamp brackets from the FC converter assembly and FC stack assembly.
Note
Do not disengage the clamps before removing the wire harness clamp brackets.
-
*1 Grommet Disengage the 7 clamps to separate the wire harness from the wire harness clamp bracket.
Note
-
When disengaging the clamps, be careful not to damage the clamps.
-
Do not remove the grommet.
-
-

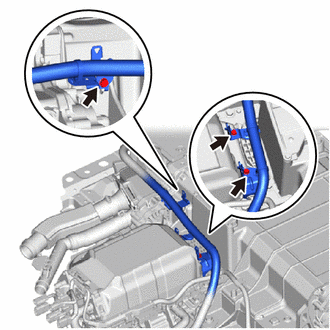
Disconnect the connector.
-
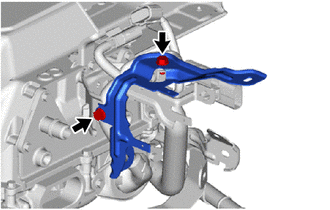
Remove the 2 bolts to separate the FC converter cooling water inlet pipe, together with the wire harness, from the FC converter assembly.
Note
To avoid possibly damaging the clamp, do not disengage the wire harness clamp and FC converter cooling water inlet pipe when not replacing the FC stack assembly.
-
Remove the bolt and wire harness clamp bracket from the FC converter assembly.
-
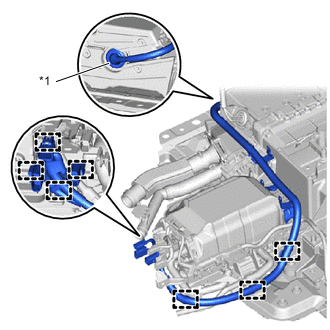
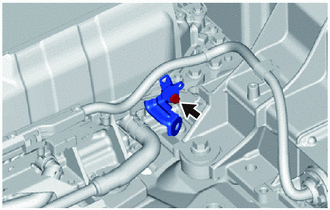
Slide the hose clip and disconnect the FC converter cooling water inlet hose from the FC converter assembly.
-
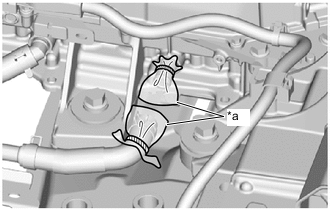
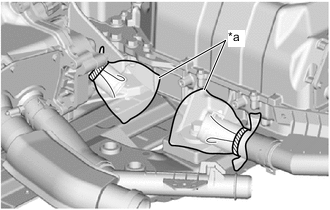
*a Plastic Bag To prevent contamination by foreign matter, cover the connecting portions of the FC converter cooling water inlet hose and FC converter assembly with plastic bags.
-
Disengage the 2 clamps to separate the wire harness from the wire harness clamp bracket.
Note
When disengaging the clamps, be careful not to damage the clamps.
-
-
REMOVE WIRE HARNESS CLAMP BRACKET
-
Disengage the 3 clamps to remove the 3 wire harness clamp brackets from the wire harness.
Note
When disengaging the clamps, be careful not to damage the clamps.
-
-
REMOVE WIRE HARNESS CLAMP BRACKET
-
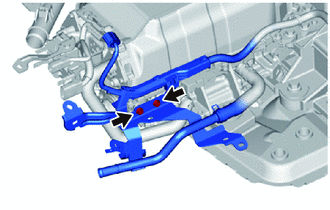
Remove the 2 bolts and wire harness clamp bracket from the FC converter assembly.
-
-
SEPARATE FC STACK COOLING WATER INLET PIPE
-
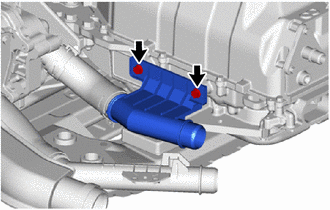
Remove the 2 bolts to separate the FC stack cooling water inlet pipe from the FC converter assembly.
-
-
REMOVE FC STACK COOLING WATER INLET HOSE
-
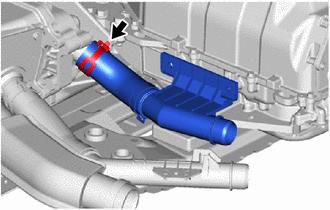
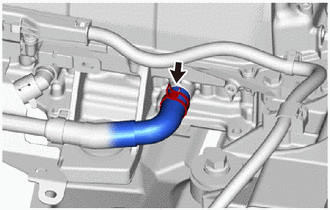
Slide the hose clip and remove the FC stack cooling water inlet hose from the FC stack assembly.
-
*a Plastic Bag To prevent contamination by foreign matter, cover the connecting portions of the FC stack cooling water inlet hose and FC stack assembly with plastic bags.
-
-
REMOVE FC CONVERTER ASSEMBLY
CAUTION:
Wear insulated gloves.
-
To prevent contamination by foreign matter or water droplets, check that the area around the rear FC converter service hole cover has no foreign matter or water droplets, and clean away any foreign matter or water droplets found.
Note
Do not allow foreign matter or water droplets to enter any other components.
-
Remove the 2 bolts and rear FC converter service hole cover from the FC converter assembly.
Note
Be careful that foreign matter or water droplets do not enter the FC converter assembly.
-
Remove the rear FC converter service hole gasket from the rear FC converter service hole cover.
Note
Perform the procedures by hand. Do not use any tools.
-
Using an insulated tool, remove the 2 bolts.
Note
Be careful that foreign matter or water droplets do not enter the FC converter assembly.
-

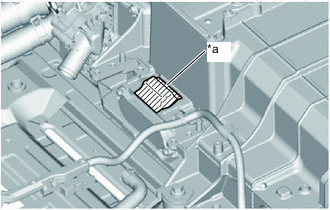
*a Protective Tape To prevent contamination by foreign matter or water droplets, cover the opening of the FC converter assembly with protective tape.
-
Remove the 2 bolts.
-
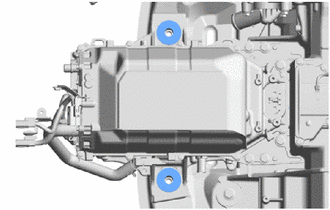
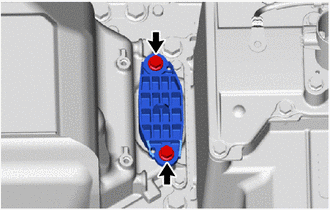
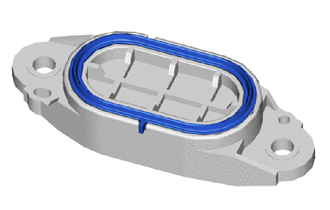
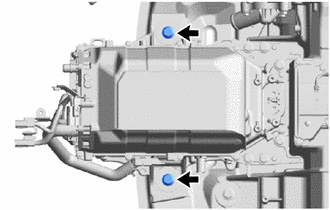
Remove the 2 No. 2 FC stack mounts from the FC converter assembly.
-
*a Protective Tape To avoid damaging the No. 1 FC stack caution label, protect the No. 1 FC stack caution label using protective tape or similar.
-
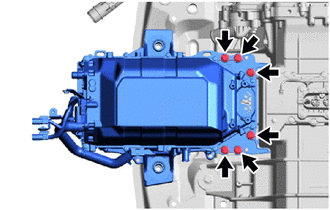
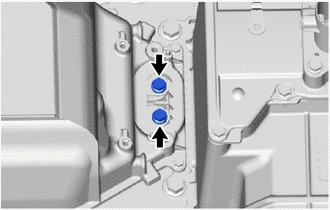
Remove the 6 bolts and FC converter assembly from the FC stack assembly.
Note
-
Do not hold the FC converter assembly by its pipe portion.
-
Be careful that foreign matter or water droplets do not enter the FC stack assembly and FC converter assembly.
-
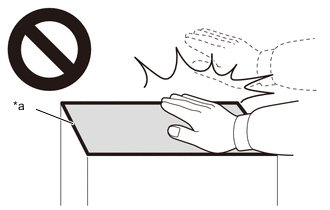
If the FC converter assembly has been dropped, damaged or subjected to a strong impact, replace it with a new one.
-
-
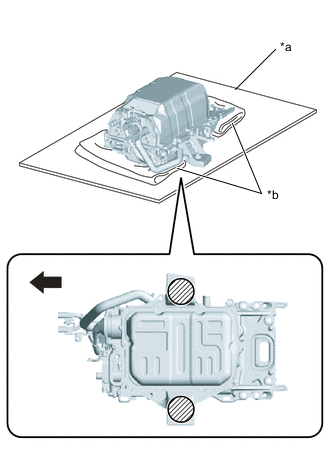
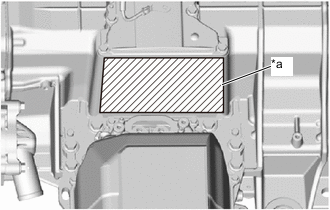
*a Cardboard *b Cloth 
Front Side of Vehicle 
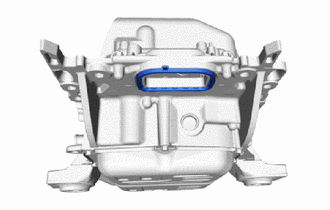
Grounding Location Ground the FC converter assembly in the location indicated by the illustration, and place the FC converter assembly on a piece of cardboard.
Note
-
Do not place the bottom side of the FC converter assembly directly on the floor.
-
Do not place the FC converter assembly upside-down.
-
To avoid damaging or deforming the FC converter assembly, do not ground the FC converter assembly in a location other than the one shown in the illustration.
-
Set so that the FC converter assembly is horizontal and level.
-
To avoid damaging or deforming the FC converter assembly, place a piece of cloth or similar in the location shown in the illustration.
-
-
*a Protective Tape To prevent contamination by foreign matter or water droplets, cover the opening of the FC stack assembly with protective tape.
-
Remove the rear FC converter gasket from the FC converter assembly.
Note
Perform the procedures by hand. Do not use any tools.
-
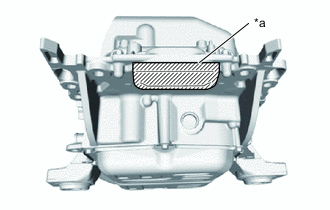
*a Protective Tape To prevent contamination by foreign matter or water droplets, cover the opening of the FC converter assembly with protective tape.
-