TAIL GATE DISASSEMBLY
PROCEDURE
-
REMOVE TAIL GATE SERVICE HOLE COVER
-

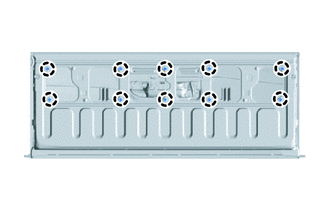
*A for A Deck *B for J Deck 
Remove in this Direction for A Deck:
Remove the 10 screws and tail gate service hole cover.
-
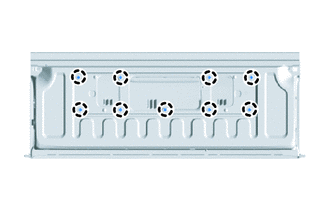
for J Deck:
Remove the 9 screws and tail gate service hole cover.
-
-
REMOVE SCREW GROMMET
-
for A Deck:
Detach the claw and remove the 10 screw grommets.
-
for J Deck:
Detach the claw and remove the 9 screw grommets.
-
-
REMOVE CENTER STOP LIGHT ASSEMBLY
-
REMOVE REAR TELEVISION CAMERA ASSEMBLY (for A Deck, w/ Rear View Monitor System)
-
REMOVE REAR BODY TAIL GATE GARNISH (for J Deck, w/ Rear View Monitor System)
-
REMOVE TAIL GATE LOCK CONTROL LINK LH (for A Deck)
-
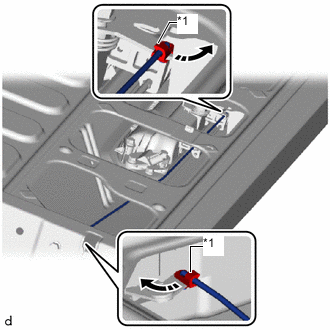
*1 Control Link Snap Remove in this Direction Rotate the control link snaps in the directions indicated by the arrows in the illustration and detach the control link snaps from the tail gate lock control link LH.
-
Remove the tail gate lock control link LH.
-
-
REMOVE TAIL GATE LOCK CONTROL LINK RH (for A Deck)
Tech Tips
Use the same procedure described for the LH side.
-
REMOVE TAIL GATE HANDLE ASSEMBLY (for A Deck)
-
Remove the 4 bolts.
-
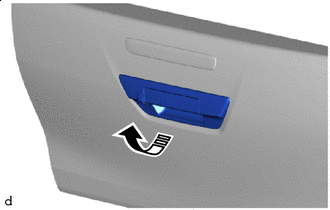
Remove in this Direction Remove the tail gate handle assembly as shown in the illustration.
-
-
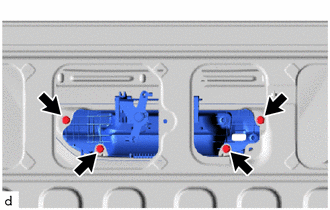
REMOVE TAIL GATE LOCK ASSEMBLY LH (for A Deck)
-
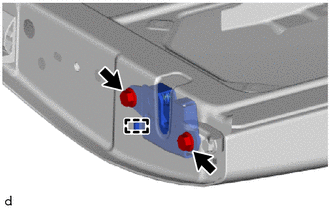
Remove the 2 bolts.
-
Detach the guide and remove the tail gate lock assembly LH.
-
-
REMOVE TAIL GATE LOCK ASSEMBLY RH (for A Deck)
Tech Tips
Use the same procedure described for the LH side.
-
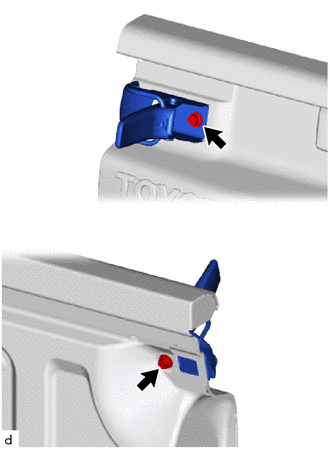
REMOVE NO. 1 TAIL GATE LOCK HINGE STOPPER (for A Deck)
Tech Tips
Use the same procedure for both No. 1 tail gate lock hinge stoppers.
-

Remove the bolt.
-
Detach the guide and remove the No. 1 tail gate lock hinge stopper.
-
-
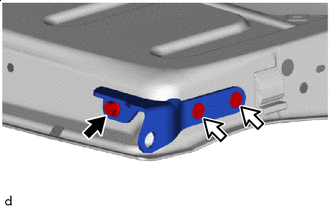
REMOVE REAR BODY TAIL GATE LATCH ASSEMBLY (for J Deck)
Tech Tips
Use the same procedure for both rear body tail gate latch assemblies.
-
Remove the 2 bolts and rear body tail gate latch assembly.
-
-
REMOVE TAIL GATE HINGE ASSEMBLY LH
-

Bolt 
"TORX" Bolt Using a T40 "TORX" socket wrench, remove the 2 "TORX" bolts.
-
Remove the bolt and tail gate hinge assembly LH.
-
-
REMOVE TAIL GATE HINGE ASSEMBLY RH
Tech Tips
Use the same procedure described for the LH side.
-
REMOVE TAIL GATE STAY STOPPER
Tech Tips
Use the same procedure for both tail gate stay stoppers.
-
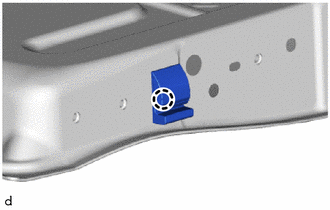
Detach the claw and remove the tail gate stay stopper.
-