HOOD REASSEMBLY
PROCEDURE
-
CONNECT WASHER HOSE
-
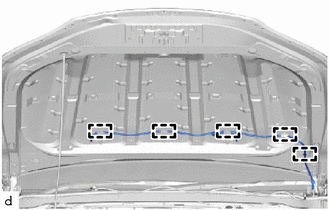
Attach the clamp to connect the washer hose.
-
-
INSTALL WASHER NOZZLE SUB-ASSEMBLY
-
INSTALL NO. 1 HOOD BULGE PROTECTOR (w/ Hood Bulge)
-
Clean the No. 1 hood bulge protector installation surface with a non-residue solvent.
-
Apply primer to the No. 1 hood bulge protector installation area on the hood bulge.
Note
Apply primer evenly so that there are no uncoated areas.
-
Remove the peeling paper on a new No. 1 hood bulge protector while making sure not to touch the adhesional surface.
-
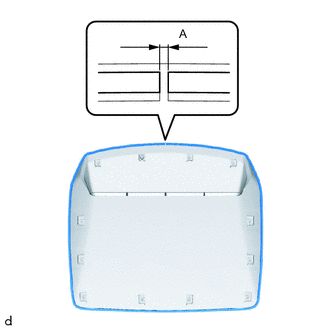
A 0 to 2.0 mm Install a new No. 1 hood bulge protector to the hood bulge.
-
Remove the peeling paper from double-sided tape and press the double-sided tape to the side of the hood bulge.
-
Install a new No. 1 hood bulge protector in the position shown in the illustration.
Note
-
Press the double-sided tape on the No. 1 hood bulge protector firmly to attach.
-
After the primer dries (3 minutes or more), install the No. 1 hood bulge protector.
-
After applying primer, reapply primer after 24 hours elapse.
-
-
-
INSTALL HOOD BULGE (w/ Hood Bulge)
-
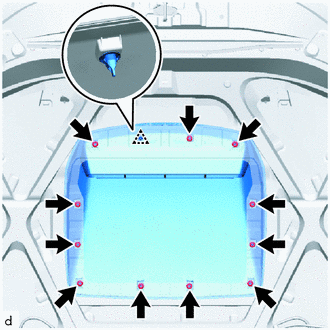
Attach the clip to install the hood bulge with the 11 nuts.
- Torque:
- 3.0 N*m { 31 kgf*cm, 27 in.*lbf }
-
-
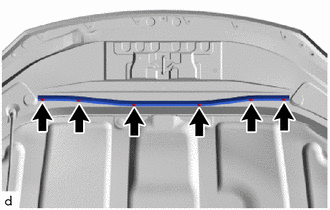
INSTALL HOOD AIR INTAKE SEAL (w/ Hood Bulge)
-
Attach the clip to install the hood air intake seal.
-
-
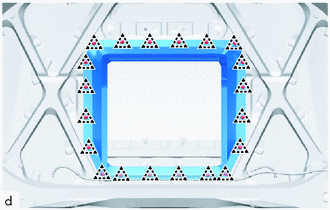
INSTALL HOOD INSULATOR
-
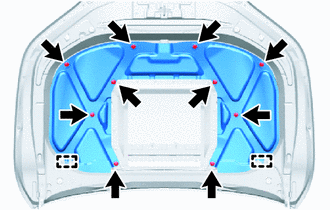
w/ Hood Bulge:
Attach the guide to install the hood insulator with 10 new clips.
-
w/ Hood Insulator:
Attach the guide to install the hood insulator with 12 new clips.
-
-
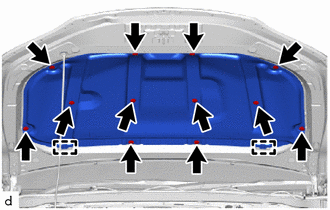
INSTALL HOOD TO RADIATOR SUPPORT SEAL
-
Install the hood to radiator support seal with the 6 clips.
-
-
INSTALL FRONT HOOD MOULDING ASSEMBLY
-
INSTALL FRONT HOOD MOULDING PAD
-
INSPECT WASHER NOZZLE SUB-ASSEMBLY
-
for LHD:
-
for RHD:
-
-
ADJUST WASHER NOZZLE SUB-ASSEMBLY