COMPRESSOR(for 1GD-FTV, 2GD-FTV) REMOVAL

PROCEDURE
-
RECOVER REFRIGERANT FROM REFRIGERATION SYSTEM
-
REMOVE FAN AND GENERATOR V BELT
-
for 1GD-FTV:
-
for 2GD-FTV:
-
-
REMOVE GENERATOR WITH CLUTCH PULLEY
-
for 1GD-FTV:
for 80A Type: Click here
-
for 2GD-FTV:
for 80A Type: Click here
for 100A Type: Click here
-
-
REMOVE FRONT WHEEL LH
-
REMOVE FRONT FENDER APRON SEAL LH
-
for 4WD, for Pre-Runner:
Remove the 6 clips and front fender apron seal LH.
-
for 2WD:
Remove the 5 clips and front fender apron seal LH.
-
-
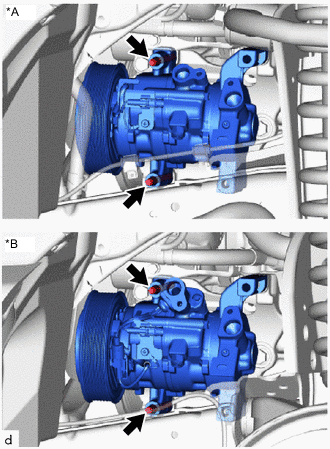
DISCONNECT NO. 1 COOLER REFRIGERANT DISCHARGE HOSE
-
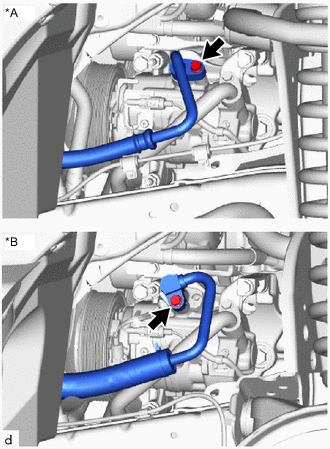
*A w/o Thermostat *B w/ Thermostat Remove the bolt and disconnect the No. 1 cooler refrigerant discharge hose from the compressor assembly with magnet clutch.
-
Remove the O-ring from the No. 1 cooler refrigerant discharge hose.
Note
Seal the openings of the disconnected parts using vinyl tape to prevent moisture and foreign matter from entering them.
-
-
DISCONNECT SUCTION HOSE SUB-ASSEMBLY
-
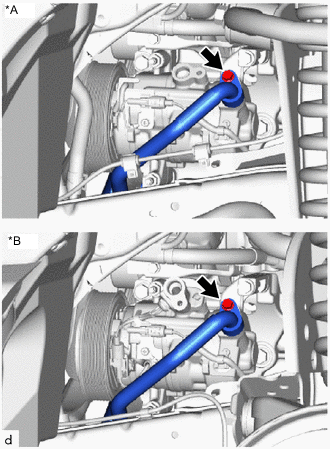
*A w/o Thermostat *B w/ Thermostat Remove the bolt and disconnect the suction hose sub-assembly from the compressor assembly with magnet clutch.
-
Remove the O-ring from the suction hose sub-assembly.
Note
Seal the openings of the disconnected parts using vinyl tape to prevent moisture and foreign matter from entering them.
-
-
REMOVE COMPRESSOR ASSEMBLY WITH MAGNET CLUTCH
-
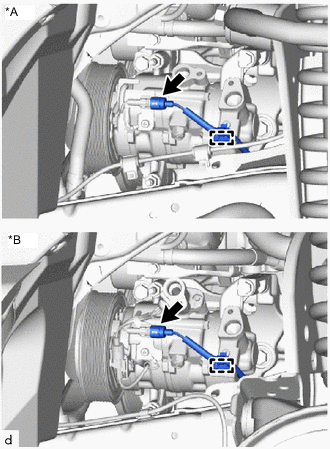
*A w/o Thermostat *B w/ Thermostat Disconnect the connector.
-
Detach the clamp.
-
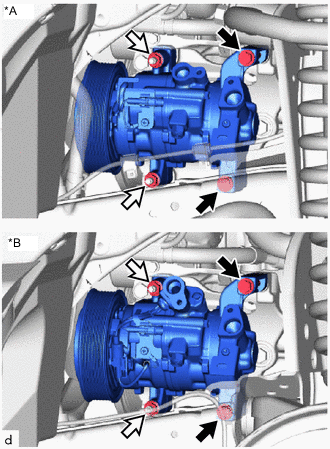
*A w/o Thermostat *B w/ Thermostat 
Bolt 
Nut Remove the 2 bolts and 2 nuts.
-
*A w/o Thermostat *B w/ Thermostat Using an E8 "TORX" socket wrench, remove the 2 stud bolts and compressor assembly with magnet clutch.
Tech Tips
Remove the compressor assembly with magnet clutch from the vehicle with the stud bolt remaining in the compressor assembly with magnet clutch.
-