REAR SEAT ASSEMBLY(for Seat Cushion 60/40 Split Type) REMOVAL
CAUTION / NOTICE / HINT
CAUTION:
Wear protective gloves. Sharp areas on the parts may injure your hands.
PROCEDURE
-
REMOVE REAR SEAT ASSEMBLY
-
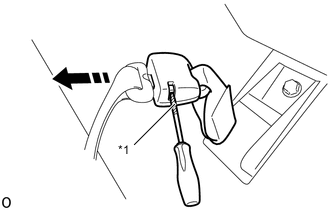
*1 Protective Tape 
Remove in this Direction w/ Center Headrest:
Using a screwdriver, push the buckle button to release the lock and disconnect the rear seat center outer belt.
Tech Tips
Tape the screwdriver tip before use.
-
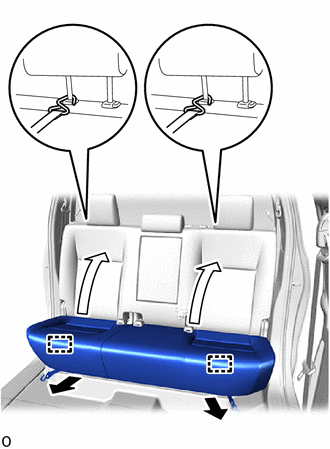
Pull the 2 No. 1 fold seat stopper band assemblies to release the 2 seat cushion locks.
-
Fold up the 2 rear seat cushion assemblies.
-
Attach the 2 No. 1 fold seat stopper band assemblies to the stay of the rear seat headrest assembly and temporarily fix the 2 rear seat cushion assemblies in place.
-
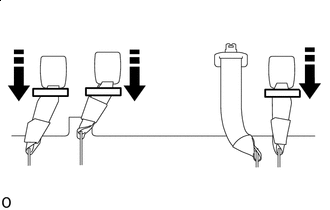
Remove in this Direction w/o Center Headrest:
Disconnect the 3 inner belt buckles from the seatback.
-
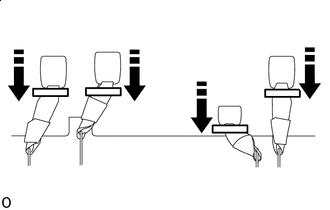
Remove in this Direction w/ Center Headrest:
Disconnect the 4 inner belt buckles from the seatback.
-
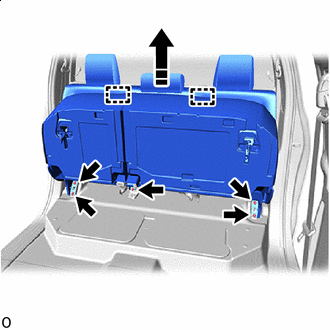
Remove in this Direction Remove the 5 bolts.
-
Pull in the direction shown in the illustration to detach the hook and remove the rear seat assembly.
Note
-
Removing the rear seat assembly from the vehicle must be performed by multiple people.
-
Do not damage the rear seat assembly, body exterior or vehicle interior.
-
-
-
REMOVE REAR SEATBACK HOLDER RH
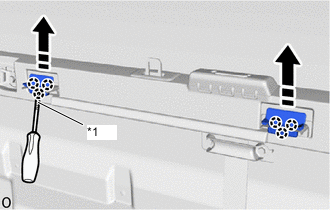
*1 Protective Tape Remove in this Direction Note
-
Perform the following only when replacing the rear seatback holder RH.
-
Do not reuse the rear seatback holder RH after removing it.
-
Using a screwdriver, detach the claw and remove the 2 rear seatback holder RH.
Tech Tips
Tape the screwdriver tip before use.
-