CAUTION / NOTICE / HINT
-
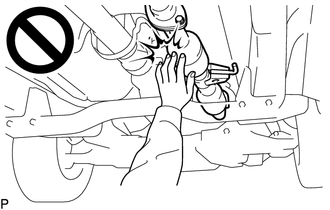
To prevent burns, do not touch the engine, exhaust pipe or other high temperature components while the engine is hot.
-
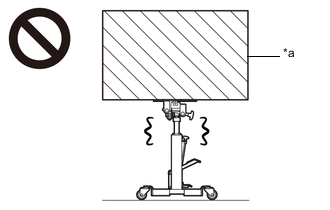
*a Object Exceeding Weight Limit of Transmission Jack Be sure to perform this procedure with several people as the front differential carrier assembly is very heavy.
-
Be sure to follow the procedure described in the repair manual, or the transmission jack may suddenly drop or a part may fall.
PROCEDURE
- Click here
PLACE FRONT WHEELS FACING STRAIGHT AHEAD
- Click here
SECURE STEERING WHEEL ASSEMBLY
- Click here
REMOVE NO. 1 ENGINE UNDER COVER
- Click here
REMOVE NO. 2 ENGINE UNDER COVER
- Click here
DRAIN DIFFERENTIAL OIL
- Click here
REMOVE FRONT PROPELLER SHAFT ASSEMBLY
- Click here
REMOVE FRONT DRIVE SHAFT ASSEMBLY LH
- Click here
REMOVE FRONT DRIVE SHAFT ASSEMBLY RH
Tip:Use the same procedure described for the LH side.
- Click here
REMOVE CLUTCH RELEASE CYLINDER ASSEMBLY (for Manual Transmission)
-
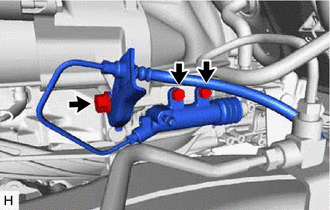
Remove the bolt and disconnect the bracket.
-
Remove the 2 bolts and clutch release cylinder assembly.
-
- Click here
REMOVE EXHAUST MANIFOLD SUB-ASSEMBLY LH (for 1GR-FE)
- Click here
REMOVE STARTER ASSEMBLY (for 1GR-FE)
- Click here
DISCONNECT STEERING SLIDING YOKE
- Click here
REMOVE POWER STEERING LINK ASSEMBLY
-
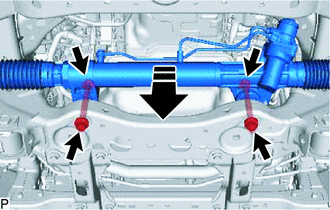

Remove in Direction Remove the 2 bolts, 2 washers and 2 nuts, and then slide the power steering link assembly slightly towards the front.
Note:Never turn the nut. Be sure to turn the bolt.
-
- Click here
REMOVE FRONT DIFFERENTIAL CARRIER ASSEMBLY
-
w/ A.D.D.
-
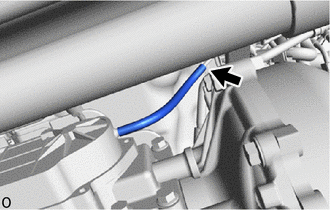
Disconnect the front differential breather hose from the differential breather tube bracket.
-
-
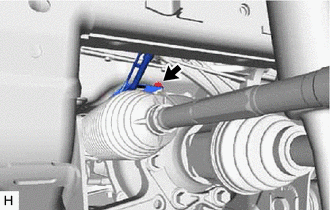
Remove the bolt and disconnect the differential breather tube bracket.
-
Disconnect the front differential breather hose from the front differential union.
-

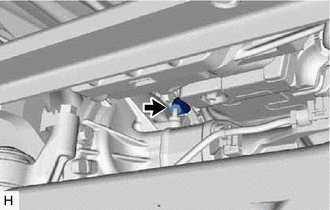
Disconnect the oil temperature sensor connector.
-
Remove the bolt and disconnect the bracket.
-
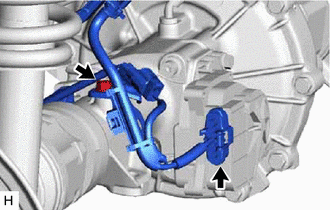
w/ A.D.D.
-
Disconnect the differential motor actuator connector.
-
-
Remove the bolt and disconnect the bracket.
-
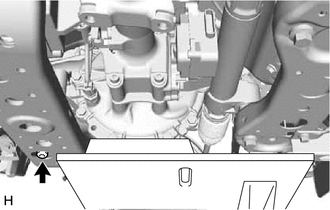
Support the front differential carrier assembly with a jack.
-
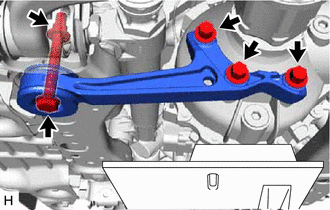
Remove the 4 bolts, nut and front No. 1 differential support from the front differential carrier assembly.
-
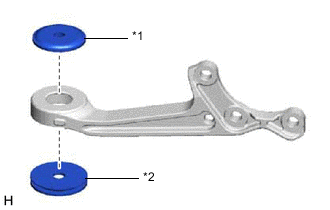
*1 Upper Differential Mount Stopper *2 Lower Differential Mount Stopper Remove the upper differential mount stopper and lower differential mount stopper from the front No. 1 differential support.
-
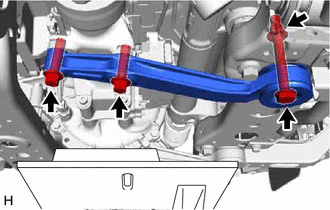
Remove the 3 bolts, nut and front No. 2 differential support from the front differential carrier assembly.
-
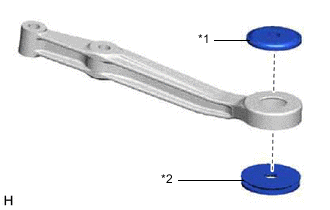
*1 Upper Differential Mount Stopper *2 Lower Differential Mount Stopper Remove the upper differential mount stopper and lower differential mount stopper from the front No. 2 differential support.
-
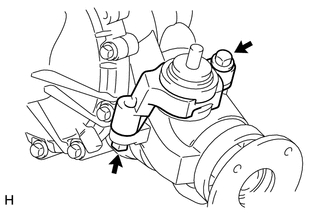
Remove the differential mount nut and disconnect the front No. 3 differential support.
-
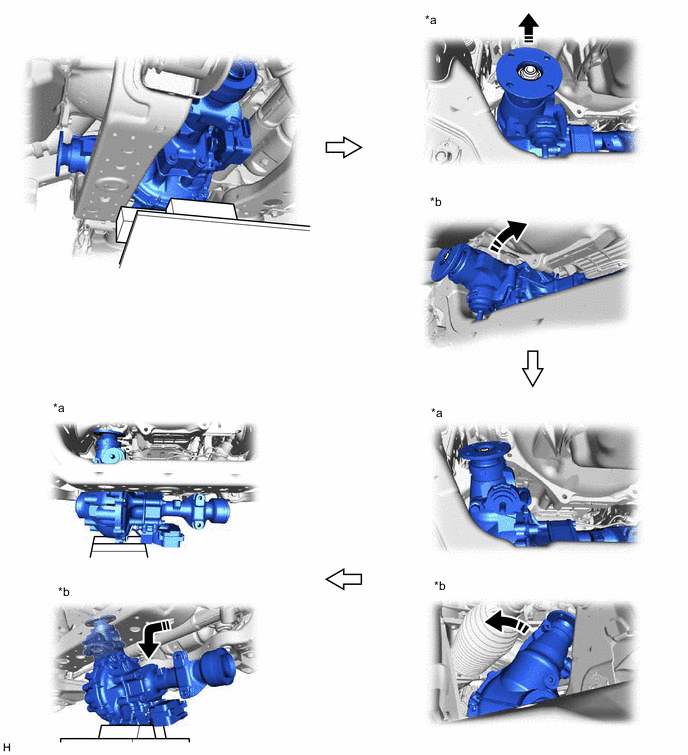
*a Rear of Vehicle *b Side of Vehicle Remove in this Direction - - Lower the jack and remove the front differential carrier assembly.
CAUTION:The front differential carrier assembly is a heavy component. Make sure that it is supported securely.
Note:
-
Securely support the front differential carrier assembly while performing this step to avoid excessively tilting or dropping the front differential carrier assembly.
-
The remaining oil may leak out when removing the front differential carrier assembly.
-
Do not damage the installation surface when removing the front differential carrier assembly.
-
Remove the bolts with the front differential carrier assembly secured.
-
-
Remove the 2 bolts and front No. 3 differential support from the front differential carrier assembly.
-