WATER PUMP ON-VEHICLE INSPECTION
PROCEDURE
-
INSPECT FOR COOLANT LEAK
Tech Tips
-
The sliding surface inside the engine water pump assembly is lubricated by engine coolant. As some engine coolant is discharged during normal operation, coolant residue (solids) may be found on the drain plug or the bottom of the engine water pump assembly. Also, engine coolant may leak if foreign matter enters the engine water pump assembly, however the sealing performance will recover when the foreign matter is pushed out or breaks into fine pieces. In this case, check the area around the engine water pump assembly.
-
Before performing this inspection, check that there is no coolant leaking from any parts other than the engine water pump assembly. If there are leaks, inspect those areas.
-
Perform this inspection when the engine is cold.
-
Visually check the engine water pump assembly.
-
Check that engine coolant is not dripping from the engine water pump assembly.
Tech Tips
-
If engine coolant is dripping, replace the engine water pump assembly.
-
If engine coolant is not dripping, perform the following check.
-
-
-
Inspect the area around the engine water pump assembly.
Tech Tips
Check for deposits around the drain plug of the engine water pump assembly.
-
Remove the fan pulley.
-
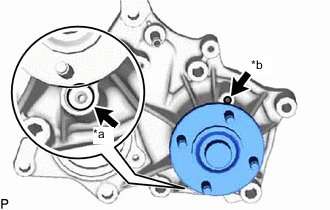
*a Drain Plug *b Air Hole Press a piece of paper towel against the drain plug or deposits on the lip of the drain plug and check that the paper towel is not wet.
Tech Tips
-
If the thin paper towel is wet, replace the engine water pump assembly.
-
If the thin paper towel is dry, clean the area around the engine water pump assembly.
-
-
-
-
INSPECT ENGINE WATER PUMP ASSEMBLY
-
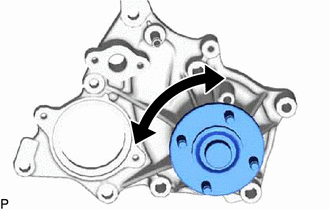
Turn the water pump pulley and check that the water pump bearing moves smoothly and quietly.
If necessary, replace the engine water pump assembly.
-
Install the fan pulley.
-
-
INSPECT FLUID COUPLING ASSEMBLY
-
Remove the fan with fluid coupling assembly.
-
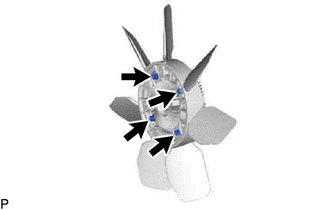
Remove the 4 nuts and fan from the fluid coupling assembly.
-
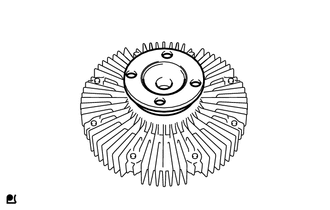
Check that the fluid coupling assembly is not damaged and that no silicon oil leaks.
If necessary, replace the fluid coupling assembly.
-
Install the fan to the fluid coupling assembly with the 4 nuts.
- Torque:
- 6.0 N*m { 61 kgf*cm, 53 in.*lbf }
-
Install the fan with fluid coupling assembly.
-