EXHAUST PIPE(for Urea SCR System) INSTALLATION
PROCEDURE
-
INSTALL FRONT EXHAUST PIPE ASSEMBLY
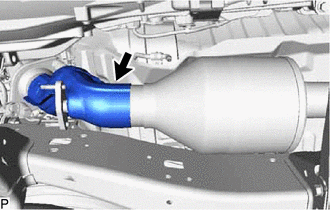
Note
Do not hold the front exhaust pipe assembly at the location shown in the illustration. Otherwise, it may become deformed or damaged, adversely affecting its thermal insulation capabilities.
-
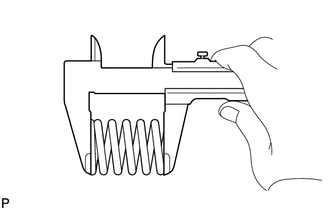
Using a vernier caliper, measure the free length of the compression spring.
Minimum length 40 mm (1.57 in.) If the free length is less than the minimum, replace the compression spring.
-
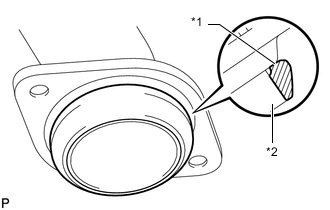
*1 Gasket *2 Exhaust Manifold Converter Sub-assembly Install a new gasket to the exhaust manifold converter sub-assembly.
Note
-
Be sure to install the gasket so that it faces the correct direction.
-
Do not reuse the gasket.
-
Do not damage the gasket.
-
When connecting the front exhaust pipe assembly, do not push in the gasket with the front exhaust pipe assembly.
-
-
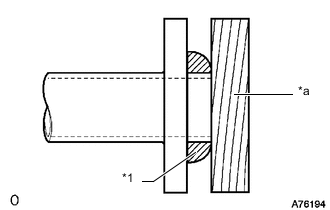
*1 Gasket *a Wooden Block Using a plastic-faced hammer and wooden block, tap on a new gasket until its surface is flush with the exhaust manifold converter sub-assembly.
-
Install the front exhaust pipe assembly and 2 compression springs with the 2 bolts.
-
Using a 14 mm union nut wrench, tighten the 2 bolts.
- Torque:
- Specified tightening torque
- 43 N*m { 438 kgf*cm, 32 ft.*lbf }
Tech Tips
-
Calculate the torque wrench reading when changing the fulcrum length of the torque wrench.
-
When using a union nut wrench (fulcrum length of 30 mm (1.18 in.)) + torque wrench (fulcrum length of 180 mm (7.09 in.)): 37.8 N*m (385 kgf*cm, 28 ft.*lbf)
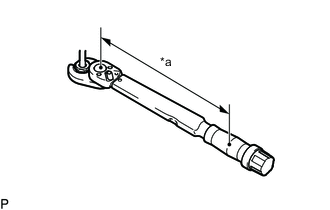
*a Torque Wrench Fulcrum Length -
Install the No. 1 exhaust pipe support to the front exhaust pipe assembly.
-
-
INSTALL UREA INJECTOR SET
-
INSTALL NO. 3 FRAME CROSSMEMBER SUB-ASSEMBLY (for Manual Transmission)
-
for 4WD:
-
for 2WD:
-
-
INSTALL NO. 3 FRAME CROSSMEMBER SUB-ASSEMBLY (for Automatic Transmission)
-
INSTALL NITROGEN OXIDES SENSOR ASSEMBLY
-
INSTALL NO. 4 EXHAUST GAS TEMPERATURE SENSOR
-
INSTALL TAILPIPE ASSEMBLY
-
for TSAM Made:
Install the tailpipe assembly to the 3 exhaust pipe supports.
-
for TMT Made:
Install the tailpipe assembly to the 4 exhaust pipe supports.
-
Install a new gasket and connect the tailpipe assembly to the front exhaust pipe assembly with the 2 bolts and 2 new nuts. Alternately tighten the bolts in several passes.
- Torque:
- 43 N*m { 438 kgf*cm, 32 ft.*lbf }
Note
Do not reuse the gasket.
-
-
INSPECT FOR EXHAUST GAS LEAK
If gas is leaking, tighten the problem areas to stop the leak. Replace damaged parts as necessary.