CAMSHAFT REMOVAL

CAUTION / NOTICE / HINT
The necessary procedures (adjustment, calibration, initialization or registration) that must be performed after parts are removed, installed or replaced during the camshaft removal/installation are shown below.
| Replacement Part or Procedure | Necessary Procedures | Effects/Inoperative when not Performed | Link |
|---|---|---|---|
| Replacement of timing belt | Mode reset operation |
|
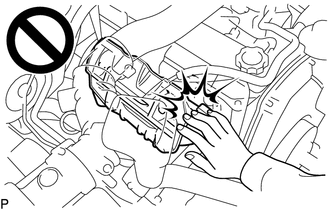
CAUTION:
To prevent burns, do not touch the engine, exhaust manifold or other high temperature components while the engine is hot.
PROCEDURE
-
REMOVE TIMING BELT
-
DRAIN ENGINE OIL
-
DISCONNECT WIRE HARNESS
-
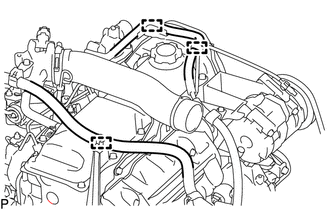
Detach the 3 wire harness clamps.
-
-
REMOVE INTAKE PIPE
-
REMOVE CYLINDER HEAD COVER SUB-ASSEMBLY
-
REMOVE CAMSHAFT TIMING PULLEY
-
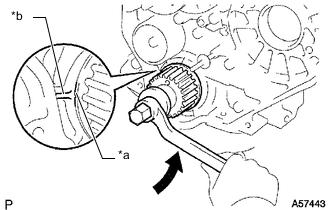
*a Timing Mark *b Protrusion 
Turn Using the crankshaft pulley bolt, turn the crankshaft 90° counterclockwise and align the timing mark of the crankshaft timing pulley with the protrusion of the timing belt case sub-assembly.
Tech Tips
Set the No. 1 cylinder to 90° BTDC/compression to avoid interference with the piston top and valve head.
-
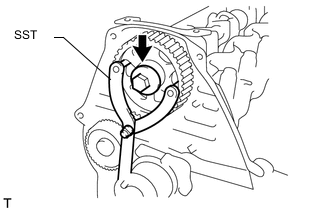
Using SST, loosen the camshaft timing pulley bolt.
- SST
- 09960-10010 ( 09962-01000, 09963-01000 )
-
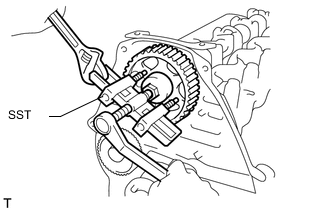
Using SST, disconnect the camshaft timing pulley from the camshaft.
- SST
- 09950-50013 ( 09951-05010, 09952-05010, 09953-05010, 09954-05021 )
-
Remove the camshaft timing pulley bolt and camshaft timing pulley.
-
Remove the timing pulley woodruff key.
-
-
REMOVE NO. 2 TIMING BELT COVER
-
Remove the 4 bolts and No. 2 timing belt cover.
-
-
REMOVE CAMSHAFT OIL SEAL RETAINER
-
Remove the 4 bolts, camshaft oil seal retainer and gasket.
-
-
REMOVE CAMSHAFT OIL SEAL
-
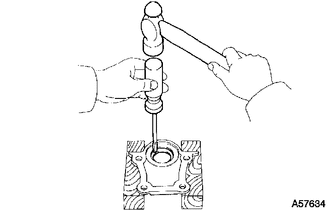
Using a screwdriver and hammer, tap out the camshaft oil seal.
Note
Be careful not to damage the camshaft oil seal retainer.
-
-
REMOVE CAMSHAFT
-

*a Upward *b Timing Pulley Woodruff Key Groove Turn the camshaft with a wrench so that the timing pulley woodruff key groove faces upward.
-
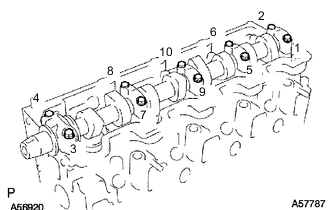
Uniformly loosen and remove the 10 camshaft bearing cap bolts in several passes in the sequence shown in the illustration.
-
Remove the 5 camshaft bearing caps and camshaft.
Tech Tips
Arrange the camshaft bearing caps in the correct order.
-