CRANKSHAFT POSITION SENSOR REMOVAL
PROCEDURE
-
REMOVE NO. 1 ENGINE UNDER COVER ASSEMBLY (w/ Air Conditioning System)
-
REMOVE FAN AND GENERATOR V BELT (w/ Air Conditioning System)
-
REMOVE FRONT UPPER FENDER APRON SEAL LH (w/ Air Conditioning System)
-
DISCONNECT COOLER COMPRESSOR ASSEMBLY (w/ Air Conditioning System)
-

Remove the bolt and disconnect the suction hose sub-assembly from the timing chain cover sub-assembly.
-

Disconnect the cooler compressor connector.
-
Remove the 2 bolts and 2 nuts.
-
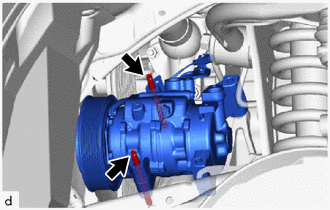
Using an E8 "TORX" socket wrench, remove the 2 stud bolts and disconnect the cooler compressor assembly.
-
Support the cooler compressor assembly securely.
Tech Tips
It is not necessary to completely remove the cooler compressor assembly. With the hoses connected to the cooler compressor assembly, hang the cooler compressor assembly on the vehicle body with a rope.
-
-
REMOVE NO. 1 COMPRESSOR MOUNTING BRACKET (w/ Air Conditioning System)
-
REMOVE CRANKSHAFT POSITION SENSOR
-
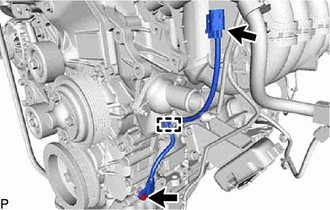
Disconnect the crankshaft position sensor connector.
-
Disconnect the crankshaft position sensor connector from the connector bracket.
-
Detach the harness clamp.
-
Remove the bolt and crankshaft position sensor.
-