REAR DOOR BELT MOULDING INSTALLATION
CAUTION / NOTICE / HINT
Tech Tips
-
Use the same procedure for the RH and LH sides.
-
The procedure listed below is for the LH side.
PROCEDURE
-
INSTALL REAR DOOR BELT MOULDING ASSEMBLY LH
-
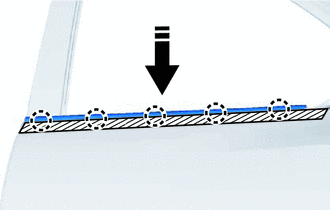

Install in this Direction Attach the claw to install a new rear door belt moulding assembly LH as shown in the illustration.
-
Remove the protective tape.
-
-
INSTALL REAR DOOR REAR BELT MOULDING LH
-
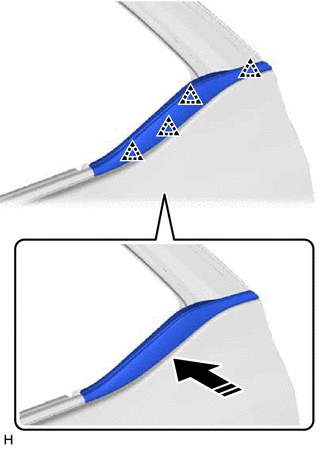
Install in this Direction Attach the clip to install the rear door rear belt moulding LH.
-
-
INSTALL REAR DOOR QUARTER WINDOW GLASS LH
-
INSTALL REAR DOOR GLASS SUB-ASSEMBLY LH
-
INSTALL REAR DOOR WINDOW DIVISION BAR SUB-ASSEMBLY LH
-
INSTALL REAR DOOR GLASS RUN LH
-
INSTALL REAR DOOR SERVICE HOLE COVER LH
-
INSTALL REAR DOOR TRIM BOARD SUB-ASSEMBLY LH
-
INSTALL REAR DOOR INSIDE HANDLE BEZEL PLUG LH
-
INSTALL COURTESY LIGHT ASSEMBLY (w/ Courtesy Light)
-
INSTALL REAR POWER WINDOW REGULATOR SWITCH ASSEMBLY WITH REAR DOOR ARMREST BASE PANEL
-
INSTALL REAR ARMREST ASSEMBLY LH
-
INSTALL REAR DOOR FRAME GARNISH LH
-
CONNECT CABLE TO NEGATIVE BATTERY TERMINAL
Note
When disconnecting the cable, some systems need to be initialized after the cable is reconnected.