BACK DOOR OUTSIDE GARNISH REMOVAL
PROCEDURE
-
REMOVE CENTER BACK DOOR GARNISH
-
REMOVE BACK DOOR SIDE GARNISH LH
-
REMOVE BACK DOOR SIDE GARNISH RH
Tech Tips
Use the same procedure described for the LH side.
-
REMOVE DOOR PULL HANDLE
-
REMOVE BACK DOOR TRIM BOARD ASSEMBLY
-
REMOVE POWER BACK DOOR SENSOR ASSEMBLY LH (w/ Power Back Door)
-
REMOVE POWER BACK DOOR SENSOR ASSEMBLY RH (w/ Power Back Door)
Tech Tips
Use the same procedure described for the LH side.
-
REMOVE BACK DOOR DAMPER ASSEMBLY
-
REMOVE REAR LIGHT ASSEMBLY LH
-
REMOVE REAR LIGHT ASSEMBLY RH
Tech Tips
Use the same procedure described for the LH side.
-
REMOVE BACK DOOR OUTSIDE GARNISH SUB-ASSEMBLY
-
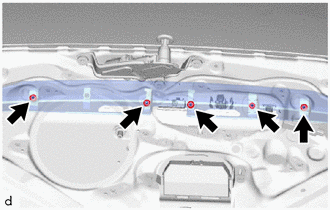
Remove the 5 nuts.
-
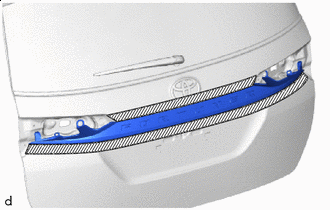

Protective Tape Put protective tape around the back door outside garnish sub-assembly.
-

Detach the clip and remove the back door outside garnish sub-assembly.
-