HEADLIGHT ASSEMBLY(for Halogen Headlight) DISASSEMBLY
CAUTION / NOTICE / HINT
Tech Tips
-
Use the same procedure for the RH and LH sides.
-
The procedure listed below is for the LH side.
PROCEDURE
-
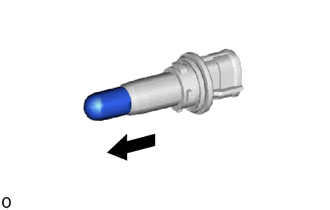
REMOVE NO. 1 HEADLIGHT BULB
-
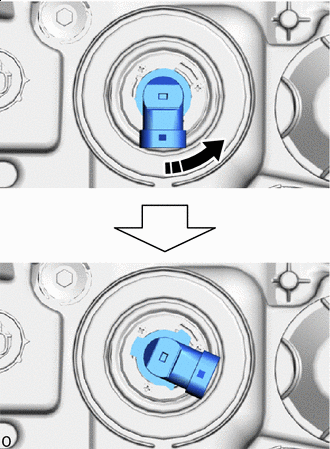

Counterclockwise Turn the No. 1 headlight bulb counterclockwise until the bulb stops.
-
Remove the No. 1 headlight bulb.
Note
Do not touch the glass part of the No. 1 headlight bulb.
-
-
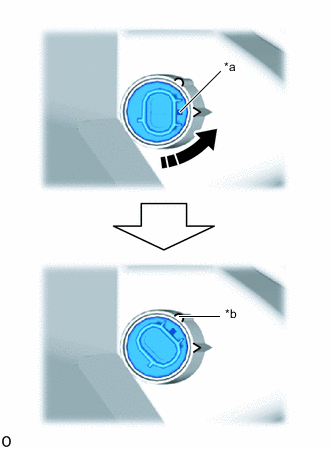
REMOVE HEADLIGHT SOCKET COVER
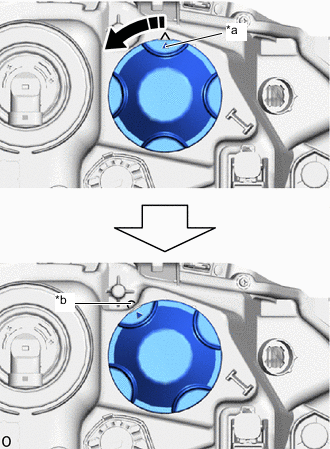
*a Matchmark *b Unlock Position Mark Counterclockwise
-
Turn the headlight socket cover counterclockwise until the matchmark is aligned with the unlock position mark to remove the headlight socket cover.
-
-
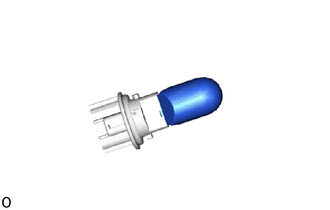
REMOVE NO. 2 HEADLIGHT BULB (w/ Additional High Beam)
-
Counterclockwise Turn the No. 2 headlight bulb counterclockwise until the bulb stops.
-
Remove the No. 2 headlight bulb.
Note
Do not touch the glass part of the No. 2 headlight bulb.
-
-
REMOVE DAYTIME RUNNING LIGHT BULB (w/ Daytime Runnning Light)
-
Counterclockwise Turn the bulb socket counterclockwise until the bulb socket stops and disconnect the bulb socket.
-

Remove the daytime running light bulb.
-
-
REMOVE DAYTIME RUNNING LIGHT SOCKET (w/ Daytime Runnning Light)
-

Disconnect the connector to remove the daytime running light socket.
-
-
REMOVE CLEARANCE LIGHT SOCKET (w/ Additional High Beam)
-
*a Matchmark *b Unlock Position Mark Counterclockwise Turn the clearance light socket counterclockwise until the matchmark is aligned with the unlock position mark to remove the clearance light socket.
-
-
REMOVE CLEARANCE LIGHT BULB (w/ Additional High Beam)
-
Remove the clearance light bulb.
-
-
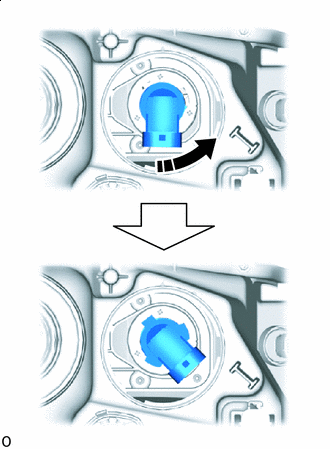
REMOVE FRONT TURN SIGNAL LIGHT SOCKET

*a Matchmark *b Unlock Position Mark Counterclockwise
-
Turn the front turn signal light socket counterclockwise until the matchmark is aligned with the unlock position mark to remove the front turn signal light socket.
-
-
REMOVE FRONT TURN SIGNAL LIGHT BULB
-
Remove the front turn signal light bulb.
-
-
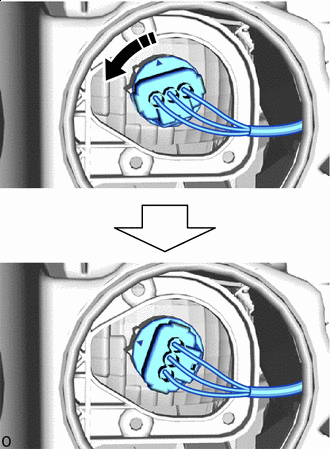
REMOVE HEADLIGHT LEVELING MOTOR LH
-
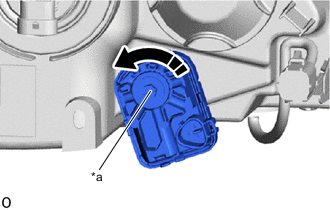
*a Aiming Screw Loosen in this Direction Loosen the aiming screw 20 rotations.
-
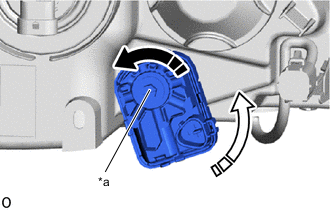
*a Aiming Screw Loosen in this Direction 
Counterclockwise Turn the headlight leveling motor LH counterclockwise and remove it.
Note
-
Do not pull excessively as the headlight unit and headlight leveling motor LH are connected at this time.
-
Turn while holding with one hand as the headlight leveling motor LH may jump out.
-
If the headlight leveling motor LH is removed, make sure to replace the headlight leveling motor base packing with a new one.
Tech Tips
For the headlight assembly RH, turn the headlight leveling motor RH clockwise to remove it.
-
-
Loosen the aiming screw of the headlight leveling motor LH until the headlight unit is disconnected.
Tech Tips
Count and record the number of rotations before the headlight unit and headlight leveling motor LH are disconnected.
-
-
REMOVE HEADLIGHT LEVELING MOTOR BASE PACKING
-
Remove the headlight leveling motor base packing.
Note
If the headlight leveling motor base packing is removed, replace it with a new one.
-
-
REMOVE HEADLIGHT RIM LH
-
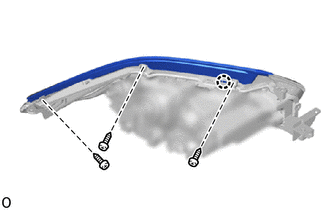
Remove the 3 screws.
-
Detach the claw and remove the headlight rim LH.
-