FRONT CONSOLE BOX INSTALLATION
CAUTION / NOTICE / HINT
PROCEDURE
-
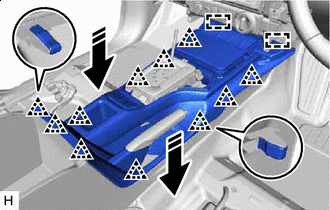
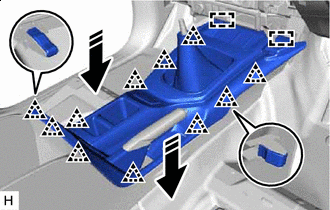
INSTALL CONSOLE BOX ASSEMBLY
-
for Automatic Transmission:
-
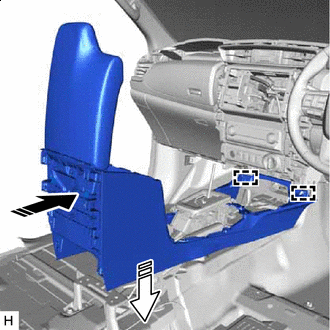

Install in this Direction (1) 
Install in this Direction (2) Attach the guide to install the console box assembly as shown in the illustration.
-
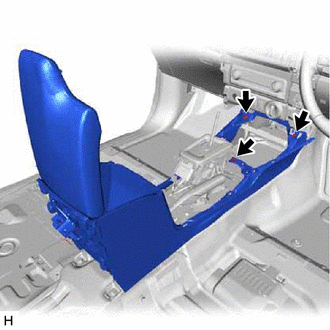
Install the 3 screws.
-

Connect the connector and attach the clamp.
-

Install the 2 bolts.
-
-
for Manual Transmission:
-
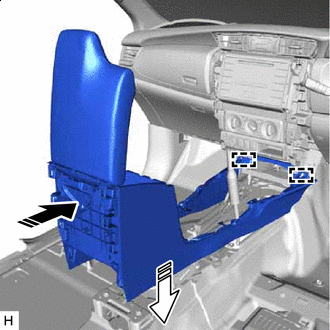
Install in this Direction (1) Install in this Direction (2) Attach the guide to install the console box assembly as shown in the illustration.
-
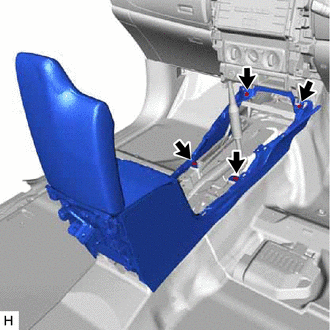
Install the 4 screws.
-
Connect the connector and attach the clamp.
-
Install the 2 bolts.
-
-
-
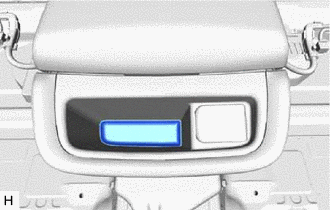
INSTALL CONSOLE BOX CARPET
-
Install the console box carpet.
-
-
INSTALL REAR CONSOLE END PANEL SUB-ASSEMBLY
-
Connect the connector.
-
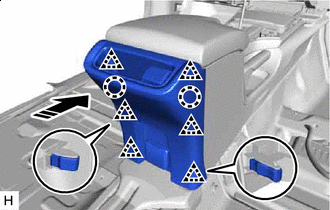
Install in this Direction Attach the claw and clip to install the rear console end panel sub-assembly as shown in the illustration.
-

Install the screw.
-
-
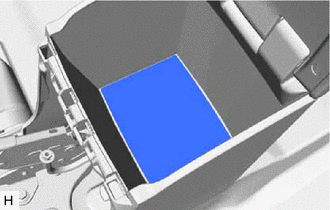
INSTALL BOX BOTTOM MAT
-
Install the box bottom mat.
-
-
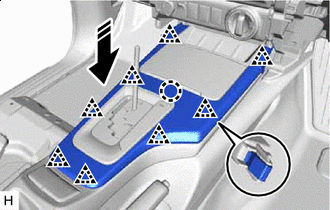
INSTALL UPPER CONSOLE PANEL SUB-ASSEMBLY
-
for Automatic Transmission:
-
Connect the connector.
-
Install in this Direction Attach the guide and clip to install the upper console panel sub-assembly as shown in the illustration.
-
-
for Manual Transmission:
-
Connect the connector.
-
Install in this Direction Attach the guide and clip to install the upper console panel sub-assembly as shown in the illustration.
-
-
-
INSTALL SHIFTING HOLE COVER SUB-ASSEMBLY (for Automatic Transmission)
-
Install in this Direction Attach the claw and clip to install the shifting hole cover sub-assembly as shown in the illustration.
-
-
INSTALL SHIFT LEVER KNOB SUB-ASSEMBLY
-
for Automatic Transmission:
-
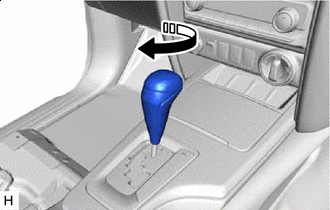
Install in this Direction Install the shift lever knob sub-assembly and twist it as shown in the illustration.
-
-
for Manual Transmission:
-
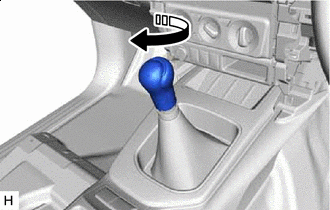
Install in this Direction Install the shift lever knob sub-assembly and twist it as shown in the illustration.
-
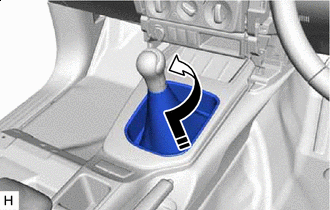
Install in this Direction Connect the shifting hole cover and twist it as shown in the illustration.
-
-
-
INSTALL NO. 1 INSTRUMENT PANEL GARNISH SUB-ASSEMBLY
-
INSTALL NO. 2 INSTRUMENT PANEL GARNISH SUB-ASSEMBLY
-
INSTALL INSTRUMENT PANEL REGISTER BEZEL GARNISH