REAR NO. 2 SEAT ASSEMBLY INSTALLATION
CAUTION / NOTICE / HINT
CAUTION:
-
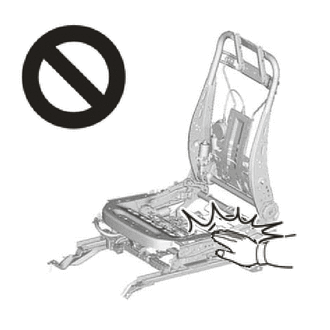
Wear protective gloves. Sharp areas on the parts may injure your hands.
-
There is risk of injury.
-
Replace any other damaged parts as necessary.
Tech Tips
-
Use the same procedure for the RH and LH sides.
-
The procedure listed below is for the RH side.
PROCEDURE
-
INSTALL REAR NO. 2 SEAT ASSEMBLY RH
-
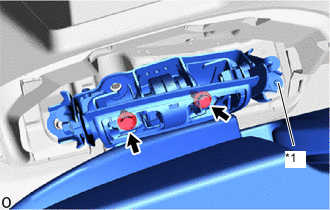
*1 Location Pin Insert the location pin of the outer side into the hole in the body to lock the rear No. 2 seat leg assembly RH to the floor striker.
Note
-
Protect the front seat legs.
-
Do not damage the rear No. 2 seat assembly RH, body exterior or interior parts.
Tech Tips
Install the part with the seatback folded forward.
-
-
Install the 2 pop-up prevention bolts.
-
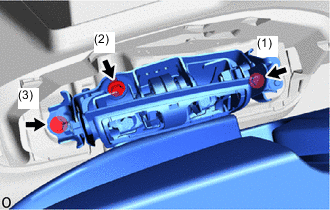
Tighten the 3 bolts in the order shown in the illustration to install the rear No. 2 seat assembly RH.
- Torque:
- 37 N*m { 377 kgf*cm, 27 ft.*lbf }
-
Remove the 2 pop-up prevention bolts.
-
-
INSTALL SEAT ADJUSTER COVER CAP RH
-

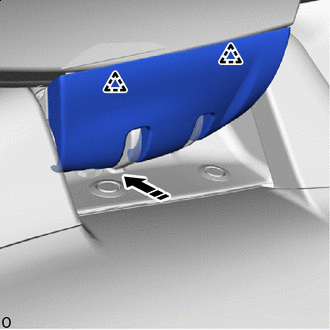
Install in this Direction Push as shown in the illustration to attach the claw and guide and install the seat adjuster cover cap RH.
-
-
INSTALL REAR SEAT CUSHION UNDER COVER RH
-
Install in this Direction Set the rear No. 2 seat assembly RH to the upright position.
-
Push as shown in the illustration to attach the clip and install the rear seat cushion under cover RH.
-
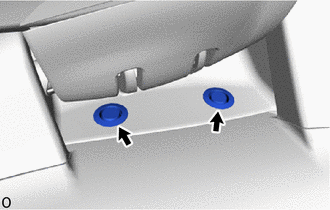
Install the 2 hole plugs.
-
Lock the rear No. 2 seat leg assembly RH to the floor striker and set the rear No. 2 seat to the upright position.
-
-
INSTALL NO.2 SEAT HEADREST ASSEMBLY
-


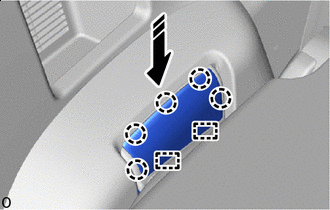
Apply silicon 
Lubricant in this range. Apply silicon lubricant at the positions shown in the illustration and install the No. 2 seat headrest assembly.
-