DOOR COURTESY LIGHT BULB(for Front Door) REPLACEMENT
CAUTION / NOTICE / HINT
Tech Tips
-
Use the same procedure for the RH and LH sides.
-
The procedure listed below is for the LH side.
PROCEDURE
-
REMOVE COURTESY LIGHT ASSEMBLY
-
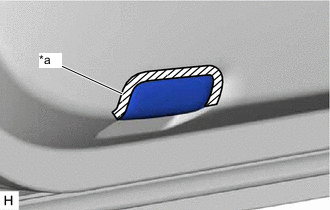
*a Protective Tape Put protective tape around the courtesy light assembly.
-
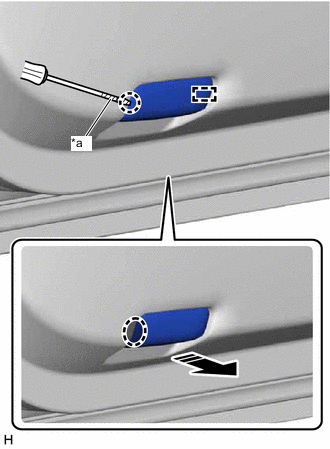
*a Protective Tape 
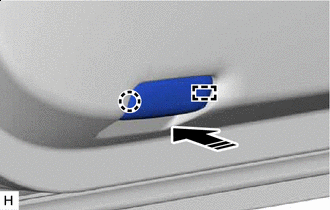
Insert Thin-bladed Screwdriver Here 
Remove in this Direction Insert a thin-bladed screwdriver at the position shown in the illustration and detach the claw and guide.
Tech Tips
Tape the thin-bladed screwdriver tip before use.
-
Disconnect the connector and remove the courtesy light assembly.
-
-
REMOVE COURTESY LIGHT BULB
-
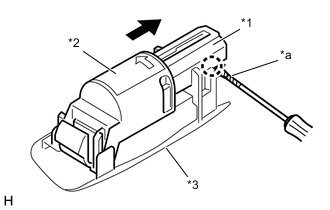
*1 Housing *2 Cover *3 Lens *a Protective Tape Using a screwdriver, detach the claw.
Tech Tips
Tape the screwdriver tip before use.
-
Remove the housing and cover as shown in the illustration.
-
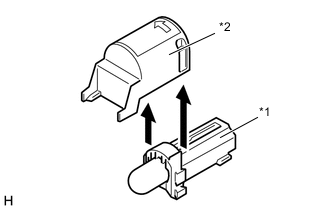
*1 Housing *2 Cover Pull the cover from the housing as shown in the illustration.
-
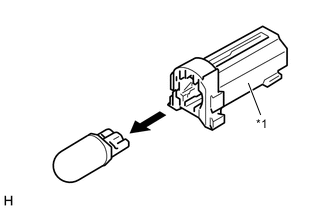
*1 Housing Remove the courtesy light bulb from the housing.
-
-
INSTALL COURTESY LIGHT BULB
-
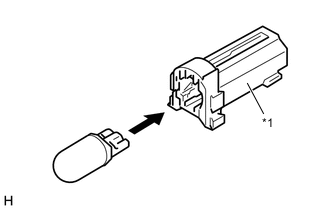
*1 Housing Install the courtesy light bulb to the housing.
-
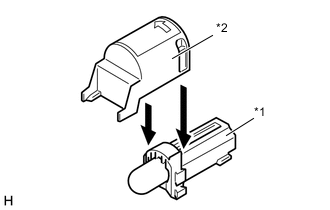
*1 Housing *2 Cover Install the cover to the housing as shown in the illustration.
-
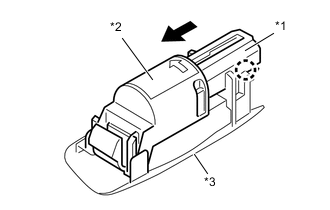
*1 Housing *2 Cover *3 Lens Install the housing and cover to the lens as shown in the illustration and attach the claw.
-
-
INSTALL COURTESY LIGHT ASSEMBLY
-
Install in this Direction Connect the connector.
-
Attach the guide and claw to install the courtesy light assembly as shown in the illustration.
-