STEREO COMPONENT AMPLIFIER INSTALLATION
PROCEDURE
-
INSTALL STEREO COMPONENT AMPLIFIER ASSEMBLY
-
INSTALL NO. 2 AMPLIFIER BRACKET
-
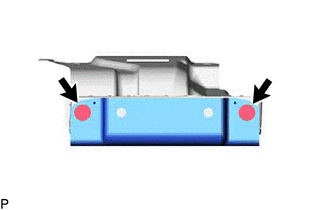
Install the No. 2 amplifier bracket with the 2 screws.
- Torque:
- 3.0 N*m { 31 kgf*cm, 27 in.*lbf }
-
-
INSTALL NO. 1 AMPLIFIER BRACKET
-
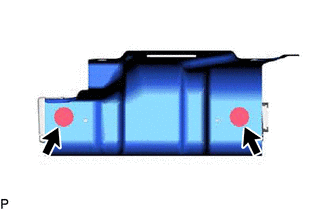
Install the No. 1 amplifier bracket with the 2 screws.
- Torque:
- 3.0 N*m { 31 kgf*cm, 27 in.*lbf }
-
-
INSTALL STEREO COMPONENT AMPLIFIER ASSEMBLY WITH BRACKET
-
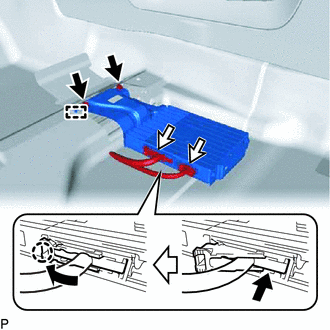
Attach the guide and install the stereo component amplifier assembly with bracket with the 2 bolts.
- Torque:
- 10.5 N*m { 107 kgf*cm, 8 ft.*lbf }
-
Connect the connectors.
-
Attach the claw to lock the connector lock.
-
Return the floor carpet to its original position.
-
-
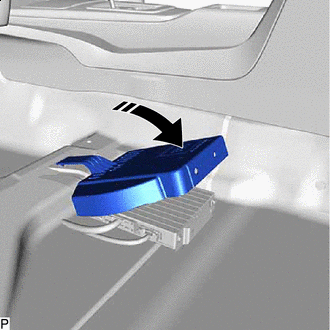
INSTALL AUDIO AMPLIFIER COVER
-
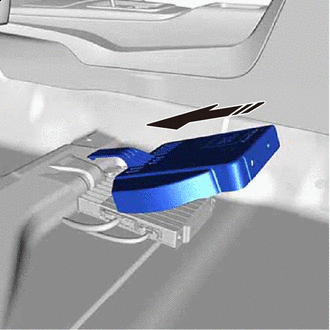

Install in this Direction Install the audio amplifier cover as shown in the illustration.
-
Install in this Direction Move the audio amplifier cover as shown in the illustration.
-

Install the 2 clips.
-
-
INSTALL FRONT SEAT ASSEMBLY LH