BACK DOOR DISASSEMBLY
PROCEDURE
-
REMOVE REAR WIPER ARM HEAD CAP
-
REMOVE REAR WIPER ARM AND BLADE ASSEMBLY
-
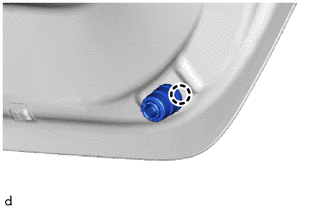
REMOVE REAR WIPER MOTOR GROMMET
-
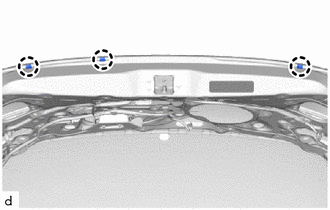
REMOVE CENTER BACK DOOR GARNISH
-
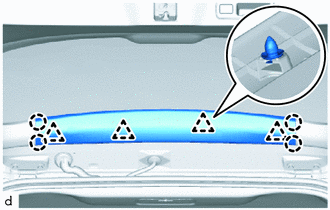
Detach the clip and claw and remove the center back door garnish.
-
-
REMOVE BACK DOOR SIDE GARNISH LH
-
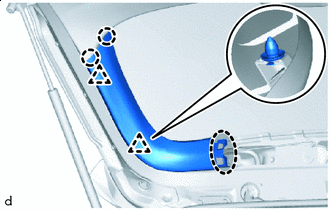

Place Hands Here Detach the claw and clip and remove the back door side garnish LH.
-
-
REMOVE BACK DOOR SIDE GARNISH RH
Tech Tips
Use the same procedure as for the LH side.
-
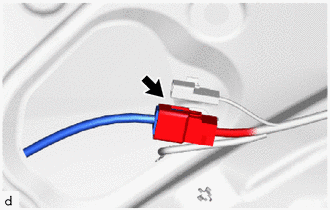
REMOVE DOOR PULL HANDLE
-
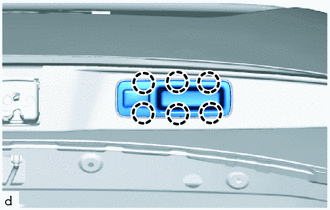
Detach the claw and remove the door pull handle.
-
w/ Power Back Door:
Disconnect the connector.
-
-
REMOVE BACK DOOR CONTROL SWITCH (w/ Power Back Door)
-
REMOVE SPARE SWITCH HOLE COVER (w/o Power Back Door)
-
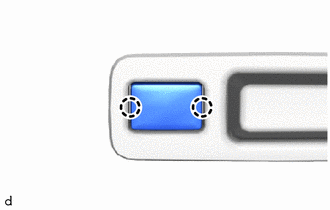
Detach the claw and remove the spare switch hole cover.
-
-
REMOVE BACK DOOR TRIM BOARD ASSEMBLY
-
Detach the clip and remove the back door trim board assembly.
-
-
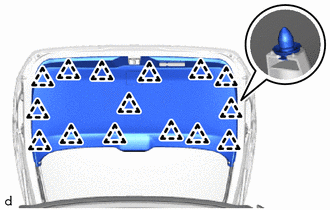
REMOVE BACK DOOR SERVICE HOLE COVER (w/ Cover)
-
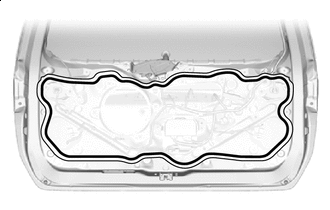

Butyl Tape Remove the back door service hole cover.
Note
Remove any remaining butyl tape from the back door panel.
-
-
REMOVE POWER BACK DOOR SENSOR ASSEMBLY LH (w/ Power Back Door)
-
REMOVE POWER BACK DOOR SENSOR ASSEMBLY RH (w/ Power Back Door)
Tech Tips
Use the same procedure as for the LH side.
-
REMOVE BACK DOOR GLASS CHANNEL LH
-
REMOVE BACK DOOR GLASS CHANNEL RH
Tech Tips
Use the same procedure as for the LH side.
-
REMOVE REAR SPOILER ASSEMBLY
-
REMOVE REAR WASHER NOZZLE
-
REMOVE BACK DOOR DAMPER ASSEMBLY
-
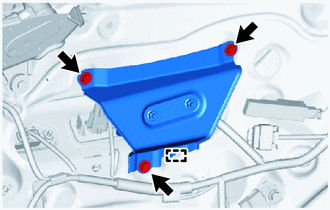
Remove the 3 bolts.
-
Detach the guide and remove the back door damper assembly.
-
-
REMOVE NO. 2 INDOOR ELECTRICAL KEY ANTENNA ASSEMBLY (w/ Smart Entry and Start System)
-
REMOVE REAR LIGHT ASSEMBLY LH
-
REMOVE REAR LIGHT ASSEMBLY RH
Tech Tips
Use the same procedure as for the LH side.
-
REMOVE BACK DOOR OUTSIDE GARNISH SUB-ASSEMBLY
-
REMOVE BACK DOOR OPENER SWITCH ASSEMBLY
-
REMOVE LICENSE PLATE LIGHT ASSEMBLY LH
-
REMOVE LICENSE PLATE LIGHT ASSEMBLY RH
-
REMOVE REAR TELEVISION CAMERA ASSEMBLY (w/ Parking Assist Monitor System)
-
REMOVE MULTIPLEX NETWORK DOOR ECU (w/ Power Back Door)
-
REMOVE MULTIPLEX NETWORK DOOR ECU (w/ Easy Closer)
-
REMOVE POWER BACK DOOR WARNING BUZZER (w/ Power Back Door)
-
REMOVE BACK DOOR LOCK ASSEMBLY (w/ Easy Closer)
-
REMOVE BACK DOOR LOCK ASSEMBLY (w/o Easy Closer)
-
REMOVE REAR WIPER MOTOR ASSEMBLY
-
REMOVE LOWER BACK DOOR STOPPER
-

Remove the bolt.
-
Detach the guide and remove the lower back door stopper.
Tech Tips
Use the same procedure as for the RH side.
-
-
REMOVE BACK DOOR STOPPER CUSHION
-
Detach the claw and remove the back door stopper cushion.
Tech Tips
Use the same procedure as for the RH side.
-
-
REMOVE DOOR DUST PROOF SEAL
-
Detach the claw and remove the 3 door dust proof seals.
-
-
REMOVE BACK DOOR STAY ASSEMBLY LH (w/o Power Back Door)
-
REMOVE BACK DOOR STAY ASSEMBLY RH (w/o Power Back Door)
Tech Tips
Use the same procedure as for the LH side.
-
REMOVE POWER BACK DOOR UNIT SET ASSEMBLY LH (w/ Power Back Door)
Note
Do not apply any horizontal load to the power back door unit set assembly in order to prevent the piston rod from deforming.
-
Disconnect the connector.
-
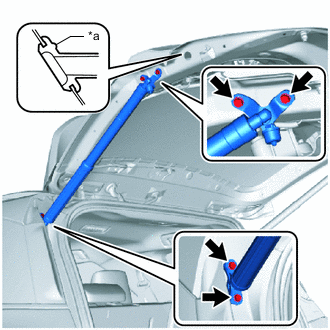
*a Grommet Detach the grommet.
-
Remove the 4 bolts and power back door unit set assembly LH.
Note
Remove the power back door unit set assembly LH while supporting the back door by hand.
-
-
REMOVE POWER BACK DOOR UNIT SET ASSEMBLY RH (w/ Power Back Door)
Tech Tips
Use the same procedure as for the LH side.