TRANSMISSION WIRE REMOVAL
PROCEDURE
-
DRAIN AUTOMATIC TRANSMISSION FLUID
-
Remove the drain plug and gasket from the automatic transmission assembly, and drain the ATF.
-
Install a new gasket and the drain plug to automatic transmission assembly.
- Torque:
- 20 N*m { 204 kgf*cm, 15 ft.*lbf }
-
-
SUPPORT AUTOMATIC TRANSMISSION ASSEMBLY
-
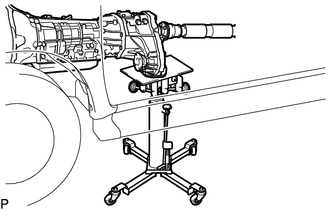
Support the automatic transmission assembly with a transmission jack.
-
-
REMOVE NO. 3 FRAME CROSSMEMBER SUB-ASSEMBLY
-
REMOVE REAR ENGINE MOUNTING INSULATOR
-
REMOVE AUTOMATIC TRANSMISSION OIL PAN SUB-ASSEMBLY
-
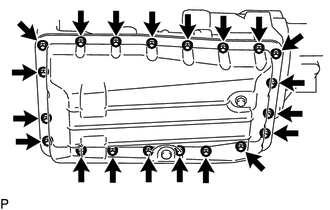
Remove the 20 bolts, automatic transmission oil pan sub-assembly and gasket from the automatic transmission assembly.
Note
Some fluid will remain in the automatic transmission oil pan sub-assembly. Remove all the oil pan bolts, and carefully remove the automatic transmission oil pan sub-assembly.
-
Examine the particles in the automatic transmission oil pan sub-assembly.
-
Remove the 4 magnets and use them to collect steel particles. Carefully inspect the foreign matter and particles in the pan and on the magnets to anticipate the type of wear you will find in the automatic transmission assembly.
Steel (magnetic): Bearing, gear and clutch plate wear
Brass (non-magnetic): Bush wear
-
-
-
REMOVE VALVE BODY OIL STRAINER ASSEMBLY
-
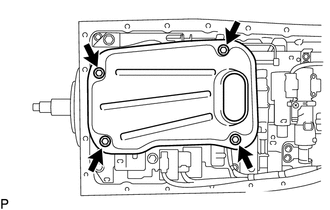
Remove the 4 bolts and valve body oil strainer assembly.
Note
Be careful as some fluid may leak out of the valve body oil strainer assembly.
-
Remove the O-ring from the valve body oil strainer assembly.
-
-
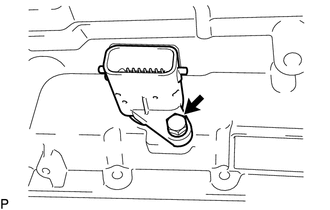
DISCONNECT ENGINE WIRE
-
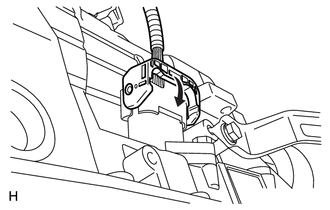
Disconnect the engine wire from the transmission wire.
Tech Tips
Detach the claw, press down the lever, and disconnect the engine wire connector.
-
-
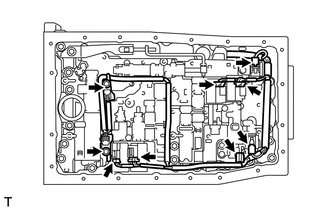
REMOVE TRANSMISSION WIRE
-
Remove the 2 bolts and 2 temperature sensor clamps.
-
Disconnect the 2 ATF temperature sensors.
-
Remove the 2 O-rings from the 2 ATF temperature sensors.
-
Disconnect the 7 connectors from the solenoid valves.
-
Remove the bolt and pull out the transmission wire from the automatic transmission case sub-assembly.
-
Remove the O-ring from the transmission wire connector.
-