REAR COIL SPRING INSTALLATION
CAUTION / NOTICE / HINT
Tech Tips
-
Use the same procedure for the RH and LH sides.
-
The procedure listed below is for the LH side.
PROCEDURE
-
INSTALL REAR COIL SPRING LH
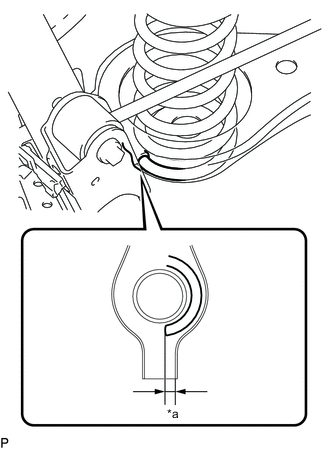
*a 10 to 20 mm (0.394 to 0.787 in.)
-
Temporarily install the rear coil spring LH to the lower control arm assembly LH as shown in the illustration.
Standard length 10 to 20 mm (0.394 to 0.787 in.) -
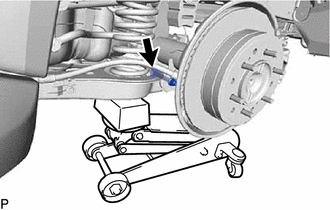
Temporarily install the rear coil spring LH and rear upper coil spring insulator LH with the bolt and nut.
-
-
CONNECT NO. 3 PARKING BRAKE CABLE ASSEMBLY
-
Connect the No. 3 parking brake cable assembly with the bolt.
- Torque:
- 25.5 N*m { 260 kgf*cm, 19 ft.*lbf }
-
-
INSTALL REAR NO. 1 SPRING BUMPER LH
-
Install the rear No. 1 spring bumper LH to the frame with the 2 bolts.
- Torque:
- 32 N*m { 326 kgf*cm, 24 ft.*lbf }
-
-
INSTALL REAR WHEEL
-
STABILIZE SUSPENSION
-
TIGHTEN LOWER CONTROL ARM ASSEMBLY LH
-
Tighten the 2 bolts.
- Torque:
- 145 N*m { 1479 kgf*cm, 107 ft.*lbf }
Tech Tips
While fixing the nut in place, tighten the bolts.
-
-
PERFORM INITIALIZATION (w/ Automatic Headlight Beam Level Control System)
-
INSPECT AUTOMATIC LIGHT CONTROL SYSTEM (w/ Automatic Headlight Beam Level Control System)
-
INSPECT HEADLIGHT AIMING (w/ Automatic Headlight Beam Level Control System)