REAR SHOCK ABSORBER REMOVAL
CAUTION / NOTICE / HINT
The necessary procedures (adjustment, calibration, initialization, or registration) that must be performed after parts are removed, installed, or replaced during the rear shock absorber removal/installation are shown below.
| Necessary Procedure After Parts Removed/Installed/Replaced | ||||||||
|---|---|---|---|---|---|---|---|---|
|
Tech Tips
-
Use the same procedure for the RH and LH sides.
-
The procedure listed below is for the LH side.
PROCEDURE
-
REMOVE REAR WHEEL
-
REMOVE REAR SHOCK ABSORBER ASSEMBLY LH
-
Support the axle housing.
-
Jack up and support the vehicle's frame on stands.
-
Lower the axle housing until the coil spring tension is free, and maintain this position.
-
-

Remove the 2 bolts.
-
Remove the bolt.
-
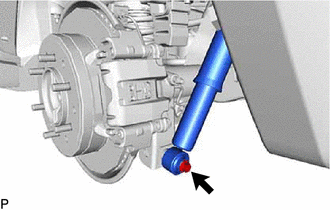
Disconnect the rear shock absorber assembly LH from the axle housing and frame.
-
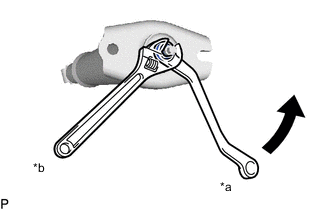
*a Turn *b Hold Remove the lock nut, 3 rear shock absorber cushion retainers, rear No. 1 shock absorber cushion, rear upper shock absorber bracket LH and rear No. 2 shock absorber cushion.
-