ECM REMOVAL
CAUTION / NOTICE / HINT
The necessary procedures (adjustment, calibration, initialization, or registration) that must be performed after parts are removed, installed, or replaced during the ECM removal/installation are shown below.
| Replacement Part or Procedure | Necessary Procedures | Effects/Inoperative when not Performed | Link |
|---|---|---|---|
| Replacement of ECM | Vehicle Identification Number (VIN) registration | DTC P0630 is output | |
| Code registration (Immobiliser system) | Engine start function | See the Service Bulletin for the registration method. |
PROCEDURE
-
REMOVE NO. 2 INSTRUMENT PANEL UNDER COVER SUB-ASSEMBLY (w/ Cover)
-
REMOVE GLOVE COMPARTMENT DOOR ASSEMBLY
-
REMOVE ECM
-
for 4WD:
Disconnect the 2 connectors from the 4 wheel drive control ECU.
-
for Automatic Transmission:
Disconnect the 5 connectors from the ECM.
-
for Manual Transmission:
Disconnect the 4 connectors from the ECM.
-
for LHD:
Detach the 2 clamps.
-
for RHD:
Detach the 3 clamps.
-
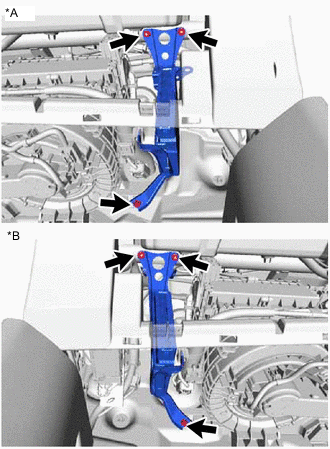
*A for LHD *B for RHD Remove the bolt, 2 nuts and ECM.
-
-
REMOVE 4 WHEEL DRIVE CONTROL ECU (for 4WD)
-
REMOVE NO. 1 ECM BRACKET
-
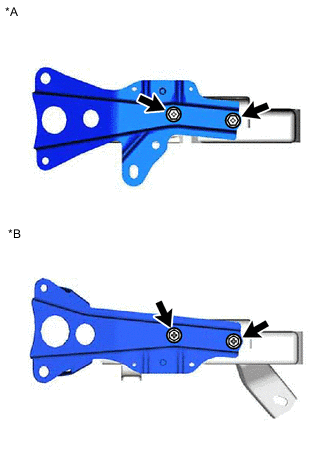
*A for LHD *B for RHD Remove the 2 screws and No. 1 ECM bracket.
-
-
REMOVE NO. 2 ECM BRACKET
-
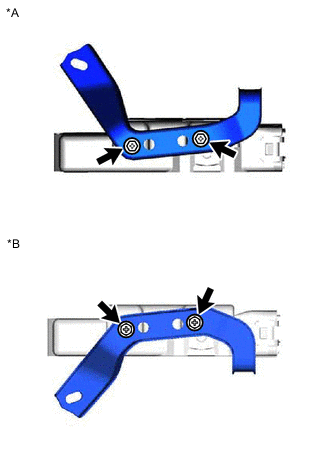
*A for LHD *B for RHD Remove the 2 screws and No. 2 ECM bracket.
-