TIMING BELT INSPECTION
PROCEDURE
-
INSPECT TIMING BELT
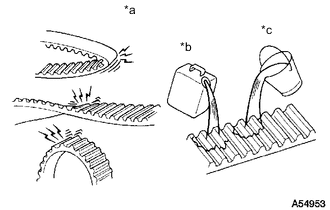
*a INCORRECT *b Oil *c Water Note
-
Do not bend or twist the timing belt, and do not turn the timing belt inside out.
-
Do not allow the timing belt to come into contact with oil, water or steam.
-
Visually inspect the timing belt.
If defects are present, perform the steps below.
-
If there is premature parting:
-
Check for proper installation.
-
Check the No. 1 timing belt cover gasket for damage and proper installation.
-
-
If the timing belt teeth are cracked or damaged, check if either camshaft sub-assembly is locked.
-
If there is noticeable wear or cracks on the timing belt face, check if there are nicks on the side of the No. 1 timing belt idler pulley sub-assembly.
-
If there is wear or damage on only one side of the timing belt, check the timing belt guide and the alignment of each pulley.
-
If there is noticeable wear on the timing belt teeth, check the No. 1 timing belt cover for damage, check that the gasket is installed correctly and check for foreign matter on the pulley teeth.
If necessary, replace the timing belt.
-
-
INSPECT NO. 1 TIMING BELT IDLER SUB-ASSEMBLY
-
Check that the No. 1 timing belt idler sub-assembly pulley turns smoothly by hand.
-
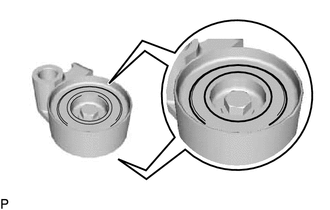
Visually check that the seal portion of the No. 1 timing belt idler sub-assembly pulley has no grease on it.
Note
-
If there is oil, water or other foreign matter on the timing belt or a pulley, repair the leak.
-
Do not allow the timing belt and each pulley to come into contact with oil, water or steam.
-
Before installing the No. 1 timing belt idler pulley sub-assembly, be sure to clean each pulley with a cloth or equivalent.
-
When inspecting the No. 1 timing belt idler sub-assembly, do not remove it unless absolutely necessary.
-
-
-
INSPECT TIMING BELT TENSIONER ASSEMBLY
-
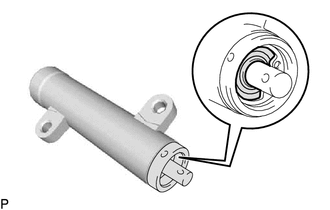
Visually check the seal portion of the timing belt tensioner assembly for oil leakage.
If leakage is found, replace the timing belt tensioner assembly.
Tech Tips
A trace of oil on the timing belt tensioner push rod side's seal is acceptable.
-
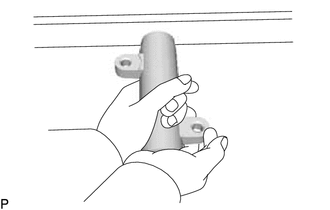
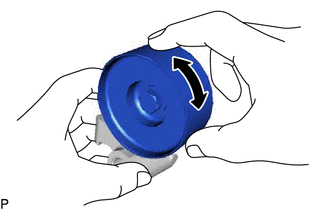
Hold the timing belt tensioner assembly with both hands as shown in the illustration. Firmly push the push rod and check that it does not move.
If the push rod moves, replace the timing belt tensioner assembly.
Note
Never point the timing belt tensioner assembly push rod downward.
-
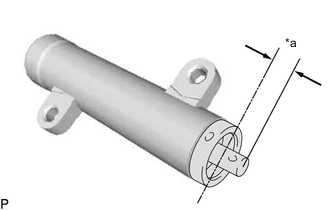
*a Protrusion Distance Measure the protrusion distance of the timing belt tensioner assembly push rod from the housing end.
Standard protrusion distance 8.1 to 8.9 mm (0.319 to 0.350 in.) If the protrusion distance is not as specified, replace the timing belt tensioner assembly.
-