HEATED OXYGEN SENSOR INSTALLATION

PROCEDURE
-
INSTALL HEATED OXYGEN SENSOR (for Bank 1 Sensor 2)
-
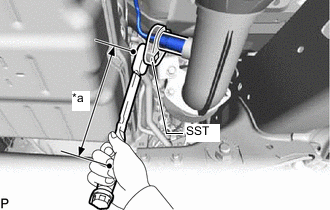
*a Torque Wrench Fulcrum Length Using SST, install the heated oxygen sensor to the front exhaust pipe.
- SST
- 09224-00011
- Torque:
- Specified tightening torque
- 44 N*m { 449 kgf*cm, 32 ft.*lbf }
Note
Do not damage the heated oxygen sensor.
Tech Tips
-
Calculate the torque wrench reading when changing the fulcrum length of the torque wrench.
-
When using SST (fulcrum length of 30 mm (1.18 in.)) + torque wrench (fulcrum length of 180 mm (7.09 in.)): 38 N*m (387 kgf*cm, 28 ft.*lbf)
-
Attach the 2 clamps.
-
Connect the connector.
-
-
INSTALL HEATED OXYGEN SENSOR (for Bank 2 Sensor 2)
-
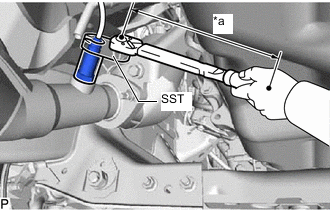
*a Torque Wrench Fulcrum Length Using SST, install the heated oxygen sensor to the front exhaust pipe.
- SST
- 09224-00011
- Torque:
- Specified tightening torque
- 44 N*m { 449 kgf*cm, 32 ft.*lbf }
Note
Do not damage the heated oxygen sensor.
Tech Tips
-
Calculate the torque wrench reading when changing the fulcrum length of the torque wrench.
-
When using SST (fulcrum length of 30 mm (1.18 in.)) + torque wrench (fulcrum length of 180 mm (7.09 in.)): 38 N*m (387 kgf*cm, 28 ft.*lbf)
-
Attach the 2 clamps.
-
Connect the connector.
-
-
INSTALL FRONT PROPELLER SHAFT ASSEMBLY (for 4WD)
-
INSPECT FOR EXHAUST GAS LEAK