ТОПЛИВНЫЙ БАК (для моделей с короткой колесной базой) СНЯТИЕ

CAUTION / NOTICE / HINT
The necessary procedures (adjustment, calibration, initialization, or registration) that must be performed after parts are removed, installed, or replaced during the fuel tank assembly removal/installation are shown below.
| Replacement Part or Procedure | Necessary Procedures | Effects/Inoperative when not Performed | Link |
|---|---|---|---|
| Replacement of fuel pump | Inspection after repair | Poor idle, engine start, etc. |
CAUTION:
The fuel tank assembly is very heavy. Be sure to follow the procedure described in the repair manual, or the fuel tank assembly may fall off the engine lifter.

PROCEDURE
-
DISCHARGE FUEL SYSTEM PRESSURE
-
PRECAUTION
Note
After turning the ignition switch off, waiting time may be required before disconnecting the cable from the battery terminal. Therefore, make sure to read the disconnecting the cable from the battery terminal notice before proceeding with work.
-
DISCONNECT CABLE FROM NEGATIVE BATTERY TERMINAL
Note
When disconnecting the cable, some systems need to be initialized after the cable is reconnected.
-
REMOVE FUEL TANK CAP ASSEMBLY
-
REMOVE NO. 1 FUEL TANK PROTECTOR
-
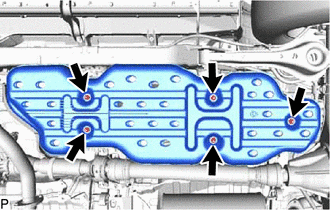
Remove the 5 nuts and No. 1 fuel tank protector from the fuel tank assembly.
-
-
REMOVE NO. 3 FUEL TUBE CLAMP
-
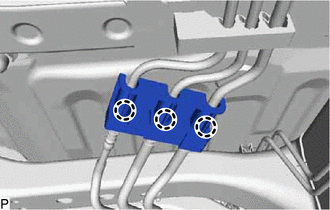
Detach the 3 claws and remove the No. 3 fuel tube clamp from the fuel tube.
-
-
DISCONNECT FUEL TUBE
-
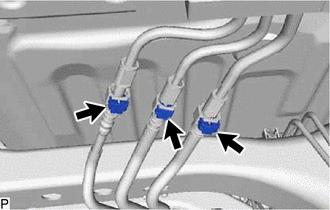
Disconnect the fuel main tube sub-assembly, fuel tank return tube and vent line tube.
-
-
DISCONNECT FUEL TANK BREATHER HOSE
-
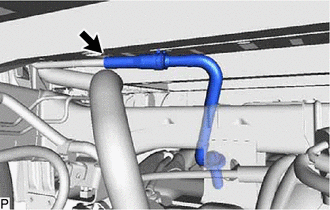
Slide the clamp and disconnect the fuel tank breather hose from the fuel tank filler pipe sub-assembly.
-
-
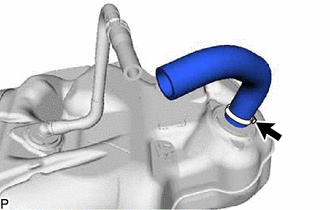
DISCONNECT FUEL TANK TO FILLER PIPE HOSE
-
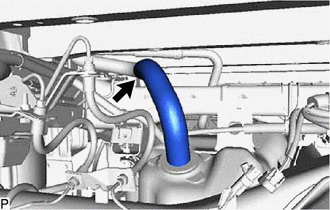
Loosen the clamp and disconnect the fuel tank to filler pipe hose from the fuel tank filler pipe sub-assembly.
-
-
REMOVE FUEL TANK ASSEMBLY
-
Using an engine lifter and attachments, support the fuel tank assembly.
-
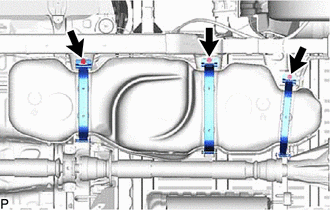
Remove the 3 bolts and disconnect the 3 fuel tank bands.
-
Remove the 3 clips, 3 fuel tank band pins and 3 fuel tank bands.
Tech Tips
Move the fuel tank just enough to remove the fuel tank band pins.
-
Slightly lower the engine lifter.
Note
Be careful not to cut the wire harness.
-
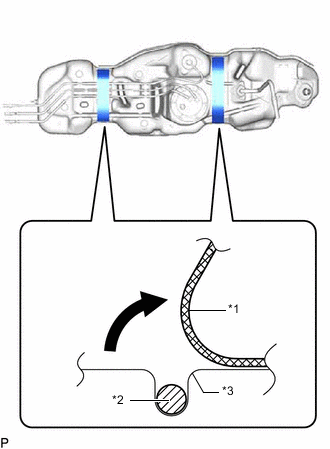
*1 Fuel Tank Cushion *2 Wire Harness *3 Fuel Tank Assembly Fold back approximately half of each fuel tank cushion so that the wire harness can be removed in the step below.
-

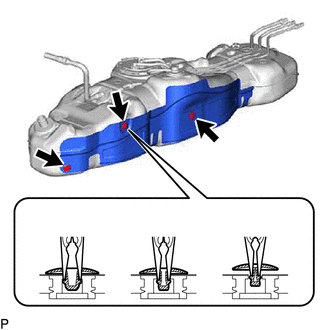
*a Claw Detach the wire harness from the 6 clamps shown in the illustration.
-
Disconnect the fuel sender gauge connector from the fuel suction with pump and gauge tube assembly.
-
-
REMOVE NO. 1 FUEL TANK HEAT INSULATOR
-
Using needle-nose pliers, remove the 3 No. 2 fuel tank brackets shown in the illustration, and then remove the No. 1 fuel tank heat insulator.
-
-
REMOVE FUEL TANK CUSHION
-
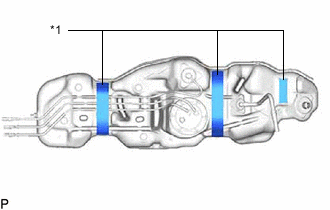
*1 Fuel Tank Cushion Remove the 3 fuel tank cushions from the fuel tank assembly.
-
-
REMOVE FUEL SUCTION WITH PUMP AND GAUGE TUBE ASSEMBLY
-
REMOVE FUEL TANK TO FILLER PIPE HOSE
-
Loosen the clamp and remove the fuel tank to filler pipe hose from the fuel tank assembly.
-