ТОПЛИВНАЯ СИСТЕМА ПРОВЕРКА БЕЗ СНЯТИЯ С АВТОМОБИЛЯ
PROCEDURE
-
INSPECT FOR FUEL LEAK
-
Check that there are no fuel leaks anywhere in the fuel system after performing maintenance.
Tech Tips
When checking for fuel leaks, make sure that there is pressure in the fuel line.
-
-
CHECK FUEL SYSTEM WARNING LIGHT AND DRAIN WATER
-
w/ Multi-information Display:
Check the fuel system warning is displayed on the multi-information display, replace the fuel filter element assembly Click here or drain the water in the fuel filter assembly.
-
w/o Multi-information Display:
Check the fuel system warning light in the combination meter assembly and either replace the fuel filter element assembly Click here or drain the water in the fuel filter assembly based on the instructions shown in the illustration.
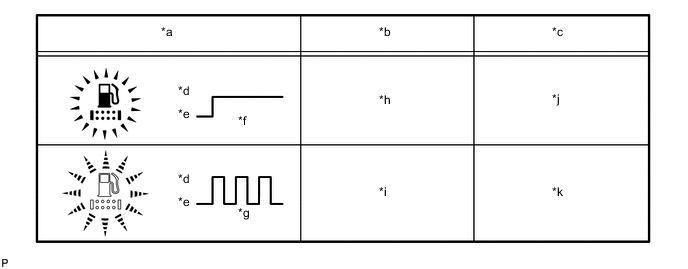
*a Fuel System Warning Light *b Fuel Filter Condition *c Necessary Procedure *d On *e Off *f Illuminate *g Blinking *h Clogged *i Water Level Warning *j Replace the Fuel Filter Element Assembly *k Drain the Water - - -
Drain water.
-
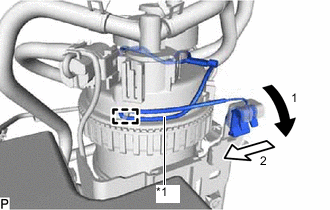
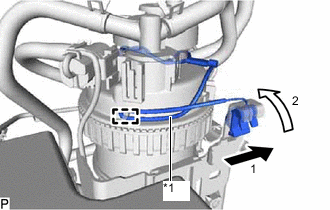
*1 Lead Wire Disconnect the clamp and slide the lead wire as shown in the illustration to remove it.
-
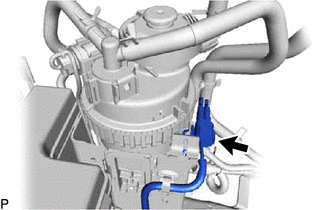
Disconnect the level warning switch connector.
-
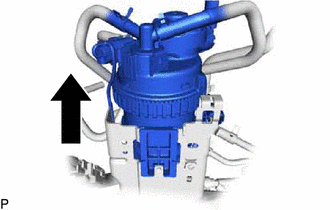
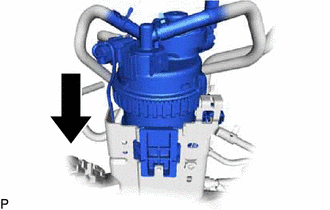
Slide the fuel filter assembly and lift it up.
-
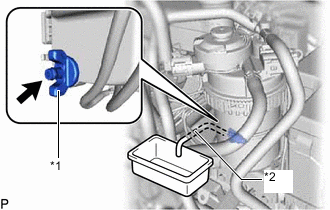
*1 Drain Cock *2 Hose Connect a hose to the drain cock. Place the other end of the hose into a container under the drain cock.
-
Loosen the drain cock to drain water.
-
Operate the hand pump until fuel begins to run out.
-
Tighten the drain cock by hand.
Note
Do not use any tools in this procedure.
-
Slide the fuel filter assembly to install it.
-
Connect the level warning switch connector.
-
*1 Lead Wire Attach the clamp and slide the lead wire as shown in the illustration to install it.
-
-