BACK DOOR OUTSIDE GARNISH(for ALPHARD) REMOVAL
PROCEDURE
-
REMOVE CENTER BACK DOOR GARNISH
-
REMOVE BACK DOOR SERVICE HOLE COVER LH (w/ Power Back Door)
-
REMOVE BACK DOOR SIDE GARNISH LH (w/o Power Back Door)
-
REMOVE BACK DOOR SIDE GARNISH LH (w/ Power Back Door)
-
REMOVE BACK DOOR SIDE GARNISH RH
-
REMOVE BACK DOOR INSIDE HANDLE
-
REMOVE SWITCH BEZEL (w/ Power Back Door)
-
REMOVE BACK DOOR TRIM BOARD ASSEMBLY
-
REMOVE BACK DOOR OUTSIDE GARNISH SUB-ASSEMBLY
-


Protective Tape Put protective tape around the back door outside garnish sub-assembly.
-

Remove the 4 bolts.
-
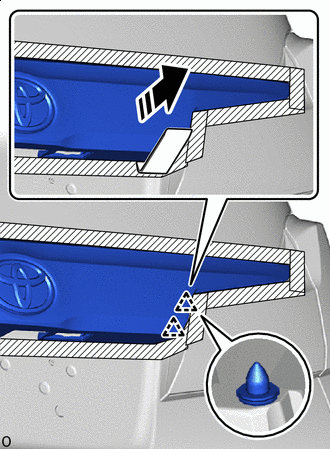

Remove in this Direction Insert moulding remover D at the position shown in the illustration and detach the clip.
Tech Tips
Use the same procedure for the opposite side.
-
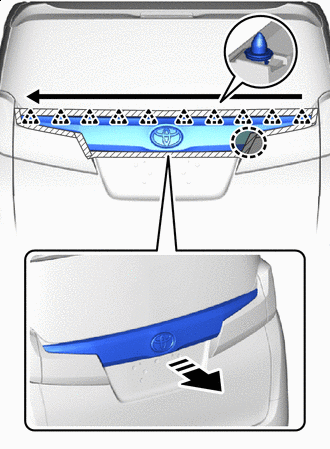

Order of Removal 
Place Hands Here Remove in this Direction Place your hand at the position shown in the illustration and pull to detach the clip and remove the back door outside garnish sub-assembly.
-