REAR DOOR WINDOW FRAME MOULDING REMOVAL
CAUTION / NOTICE / HINT
Tech Tips
-
Use the same procedure for the RH and LH sides.
-
The procedure listed below is for the LH side.
PROCEDURE
-
REMOVE REAR DOOR FRONT WINDOW FRAME MOULDING LH
Tech Tips
When removing the rear door front window frame moulding LH, heat the slide door panel and rear door front window frame moulding LH using a heat light.
Standard Item Temperature Slide Door Panel 40 to 60°C (104 to 140°F) Rear Door Front Window Frame Moulding LH 20 to 30°C (68 to 86°F) CAUTION:
-
Do not touch the heat light and heated parts.
-
Touching the heat light may result in burns.
-
Touching heated parts for a long time may result in burns.
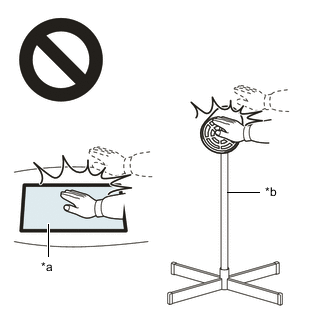
*a Heated Part *b Heat Light
-


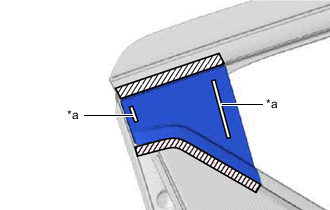
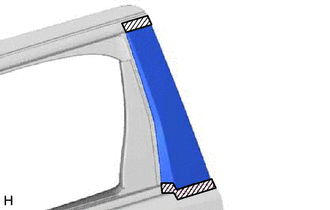
Protective Tape Put protective tape around the rear door front window frame moulding LH.
-
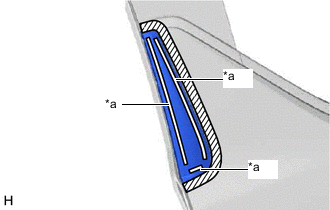
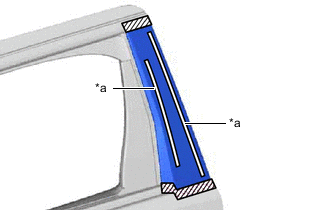
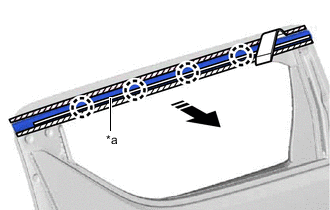
*a Double-sided Tape Using a scraper, start from the top and remove the double-sided tape from the back of the rear door front window frame moulding LH.
-

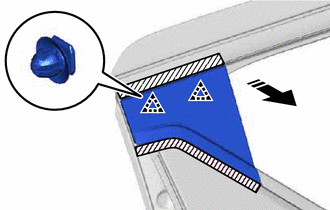
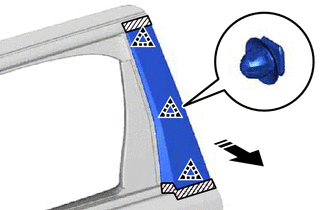
Remove in this Direction Detach the clip and remove the rear door front window frame moulding LH as shown in the illustration.
-
-
REMOVE REAR DOOR UPPER WINDOW FRAME MOULDING LH
Tech Tips
When removing the rear door upper window frame moulding LH, heat the slide door panel and rear door upper window frame moulding LH using a heat light.
Standard Item Temperature Slide Door Panel 40 to 60°C (104 to 140°F) Rear Door Upper Window Frame Moulding LH 20 to 30°C (68 to 86°F) CAUTION:
-
Do not touch the heat light and heated parts.
-
Touching the heat light may result in burns.
-
Touching heated parts for a long time may result in burns.
*a Heated Part *b Heat Light
-
Protective Tape Put protective tape around the rear door upper window frame moulding LH.
-
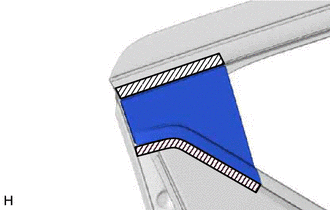
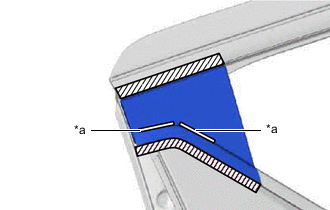
*a Double-sided Tape Using a scraper, remove the double-sided tape from the back of the rear door upper window frame moulding LH.
-
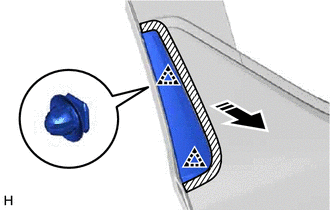
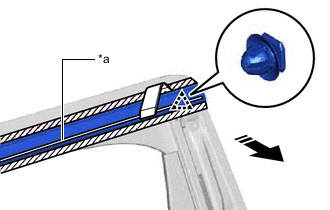
Remove in this Direction Detach the clip as shown in the illustration.
-
*a Double-sided Tape Using a scraper, remove the double-sided tape from the back of the rear door upper window frame moulding LH.
-
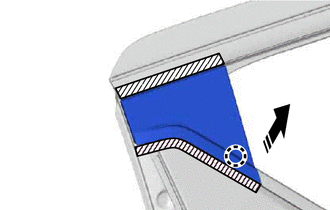
Remove in this Direction Detach the claw and remove the rear door upper window frame moulding LH as shown in the illustration.
-
-
REMOVE REAR DOOR REAR WINDOW FRAME MOULDING LH
Tech Tips
When removing the rear door rear window frame moulding LH, heat the slide door panel and rear door rear window frame moulding LH using a heat light.
Standard Item Temperature Slide Door Panel 40 to 60°C (104 to 140°F) Rear Door Rear Window Frame Moulding LH 20 to 30°C (68 to 86°F) CAUTION:
-
Do not touch the heat light and heated parts.
-
Touching the heat light may result in burns.
-
Touching heated parts for a long time may result in burns.
*a Heated Part *b Heat Light
-
Protective Tape Put protective tape around the rear door rear window frame moulding LH.
-
*a Double-sided Tape Using a scraper, start from the top and remove the double-sided tape from the back of the rear door rear window frame moulding LH.
-
Remove in this Direction Detach the clip and remove the rear door rear window frame moulding LH as shown in the illustration.
-
-
REMOVE REAR DOOR OUTSIDE MOULDING LH
Tech Tips
When removing the rear door outside moulding LH, heat the slide door panel and rear door outside moulding LH using a heat light.
Standard Item Temperature Slide Door Panel 40 to 60°C (104 to 140°F) Rear Door Outside Moulding LH 20 to 30°C (68 to 86°F) CAUTION:
-
Do not touch the heat light and heated parts.
-
Touching the heat light may result in burns.
-
Touching heated parts for a long time may result in burns.
*a Heated Part *b Heat Light
-

Protective Tape Put protective tape around the rear door outside moulding LH.
-
*a Double-sided Tape Remove in this Direction Insert moulding remover D at the position shown in the illustration and detach the clip.
-
*a Double-sided Tape Remove in this Direction Using moulding remover D, detach the claw as shown in the illustration.
-

*a Double-sided Tape Remove in this Direction Detach the clip and remove the rear door outside moulding LH as shown in the illustration.
-