SIDE MUDGUARD REMOVAL
CAUTION / NOTICE / HINT
Tech Tips
-
Use the same procedure for the RH and LH sides.
-
The procedure listed below is for the LH side.
PROCEDURE
-
REMOVE FENDER PANEL MUDGUARD LH
-

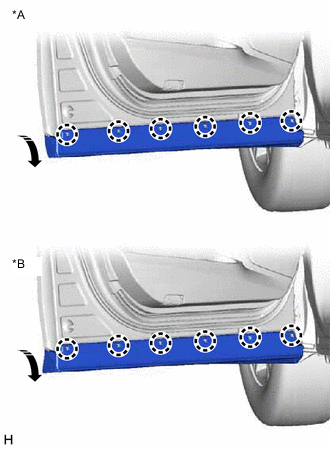
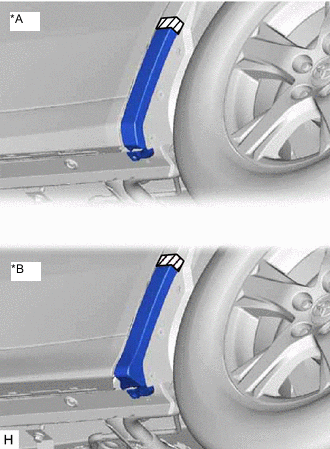
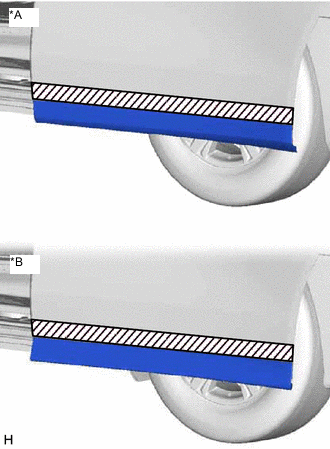
*A for Standard *B except Standard 
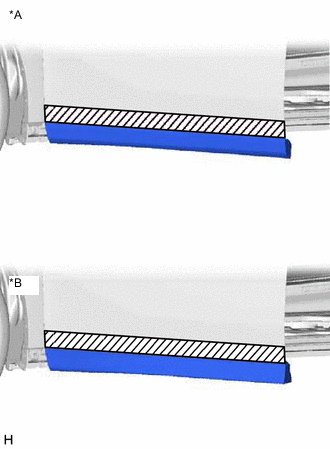
Protective Tape Put protective tape around the fender panel mudguard LH.
-
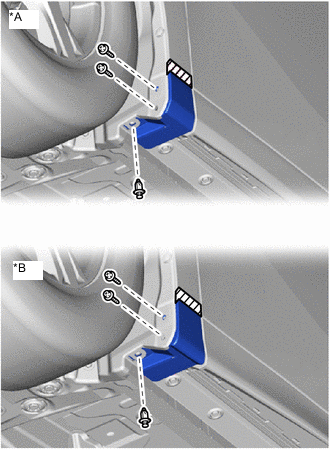
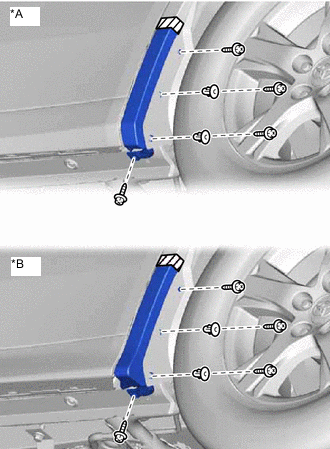
*A for Standard *B except Standard Remove the 2 screws and clip.
-
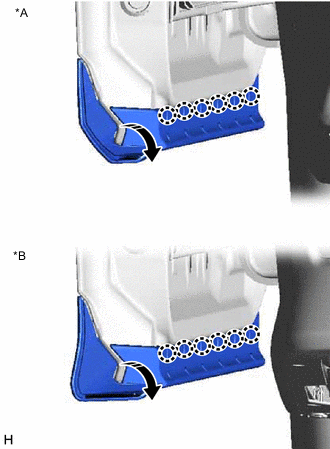
*A for Standard *B except Standard 
Place Hands Here 
Remove in this Direction Pull in the direction indicated by the arrow shown in the illustration to detach the clip.
-

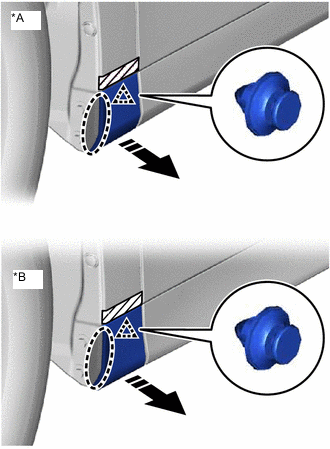
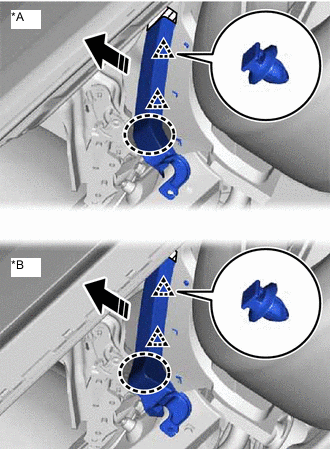
*A for Standard *B except Standard Remove in this Direction Pull in the direction indicated by the arrow shown in the illustration to remove the fender panel mudguard LH.
-
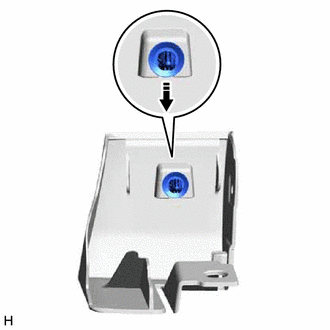
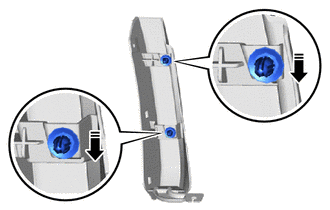
Remove in this Direction Detach the clip as shown in the illustration.
-
-
REMOVE FRONT DOOR MUDGUARD LH
-
*A for Standard *B except Standard Protective Tape Put protective tape around the front door mudguard LH.
-
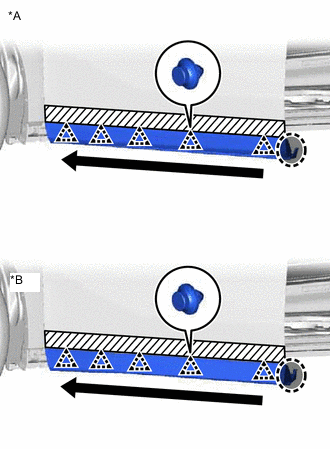
*A for Standard *B except Standard Remove in this Direction Using a screwdriver with its tip wrapped with protective tape, detach the claw as shown in the illustration.
-
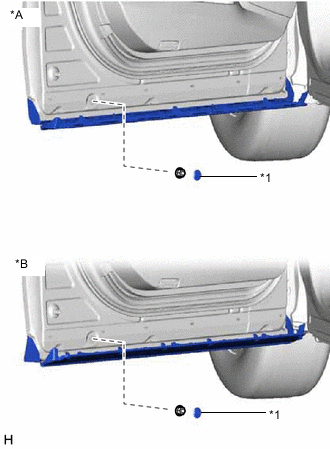
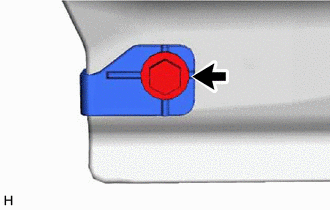
*A for Standard *B except Standard *1 Hole Plug Remove the hole plug and nut.
-
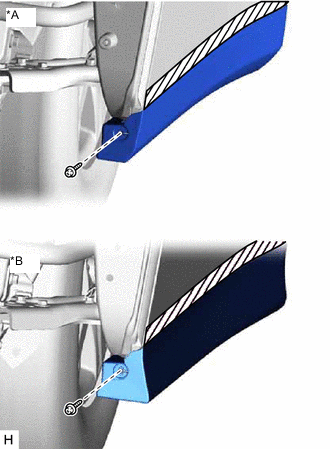
*A for Standard *B except Standard 
Order of Removal Place Hands Here Detach the clip as shown in the illustration and remove the front door mudguard LH.
-
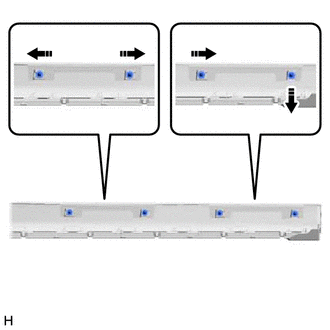
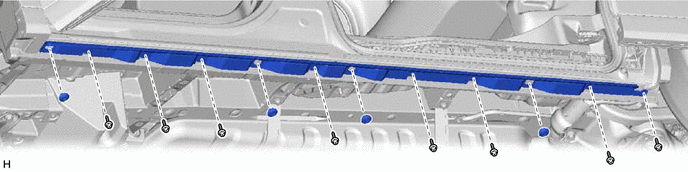
Detach the 6 clips and bolt as shown in the illustration.
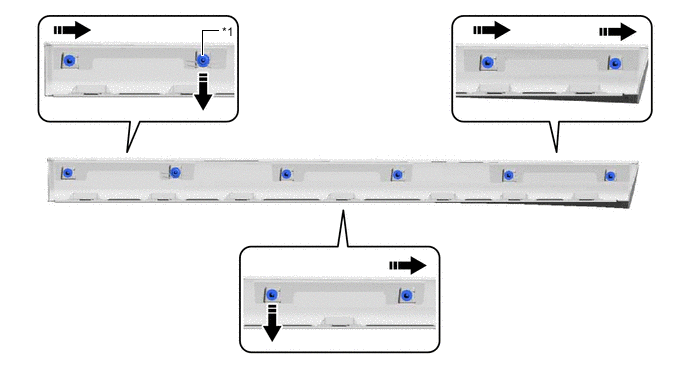
*1 Bolt - - Remove in this Direction - -
-
-
REMOVE QUARTER PANEL MUDGUARD LH
-
*A for Standard *B except Standard Protective Tape Put protective tape around the quarter panel mudguard LH.
-
*A for Standard *B except Standard Remove the 4 screws.
-
Using a thin-bladed screwdriver, remove the 2 grommets.
-
*A for Standard *B except Standard Place Hands Here Remove in this Direction Detach the clip and remove the quarter panel mudguard LH as shown in the illustration.
-
Remove in this Direction Detach the 2 clips as shown in the illustration.
-
-
REMOVE SLIDE DOOR MUDGUARD LH
-
*A for Standard *B except Standard Protective Tape Put protective tape around the slide door mudguard LH.
-
*A for Standard *B except Standard Remove the screw.
-
*A for Standard *B except Standard Remove in this Direction Using a screwdriver with its tip wrapped with protective tape, detach the claw as shown in the illustration.
-

*A for Standard *B except Standard Order of Removal Place Hands Here Detach the clip as shown in the illustration and remove the slide door mudguard LH.
-
Remove in this Direction Detach the 4 clips as shown in the illustration.
-
-
REMOVE NO. 1 SIDE MUDGUARD BRACKET LH
-
Remove the screw and No. 1 side mudguard bracket LH.
-
-
REMOVE FRONT SIDE PANEL NO. 1 PROTECTOR LH (for Cold Area Specification Vehicles)
-
Using a clip remover, remove the 4 No. 2 side mudguard retainers.
-
Remove the 8 screws.
-
Using moulding remover D, remove the front side panel No. 1 protector LH together with the front side panel No. 2 protector LH.
-
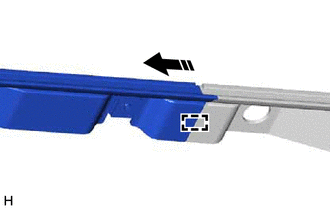
Remove in this Direction Slide the front side panel No. 1 protector LH, detach the guide, and then remove the front side panel No. 1 protector LH from the front side panel No. 2 protector LH as shown in the illustration.
-