RADIATOR GRILLE(for VELLFIRE) DISASSEMBLY
PROCEDURE
-
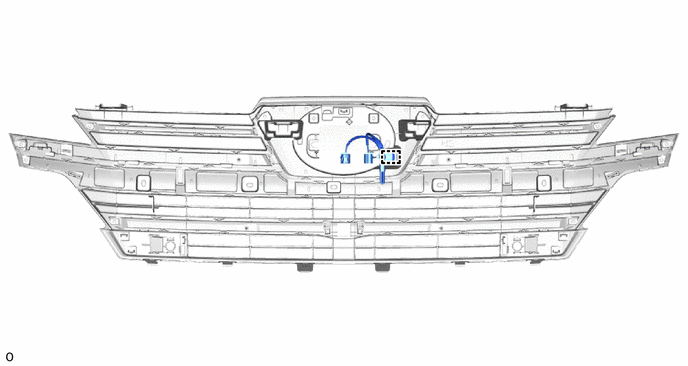
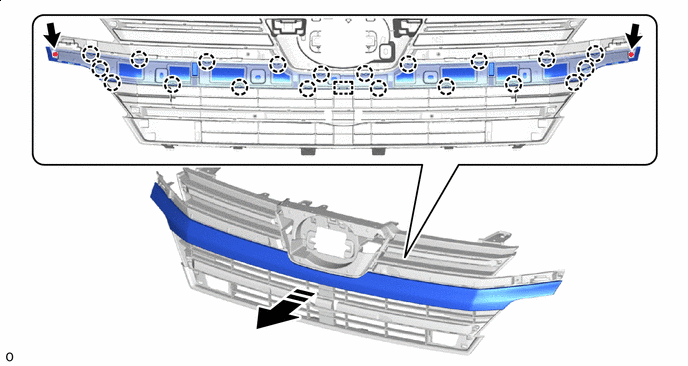
REMOVE NO. 3 ENGINE ROOM WIRE
-
Detach the clamp and remove the No. 3 engine room wire.
-
-
REMOVE RADIATOR GRILLE BRACKET LH
-
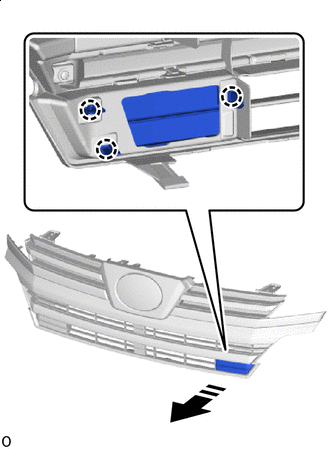

Remove in this Direction Detach the claw and remove the radiator grille bracket LH as shown in the illustration.
-
-
REMOVE RADIATOR GRILLE BRACKET RH
Tech Tips
Use the same procedure described for the LH side
-
REMOVE UPPER RADIATOR SEAL
-
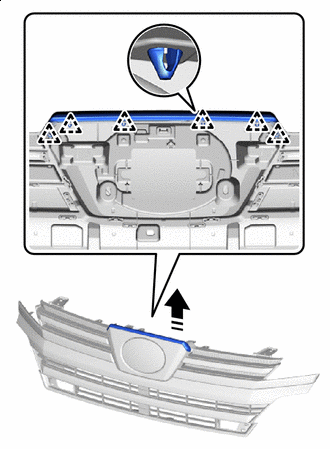
Remove in this Direction Detach the clip and remove the upper radiator seal as shown in the illustration.
-
-
REMOVE NO. 1 RADIATOR GRILLE MOULDING
-
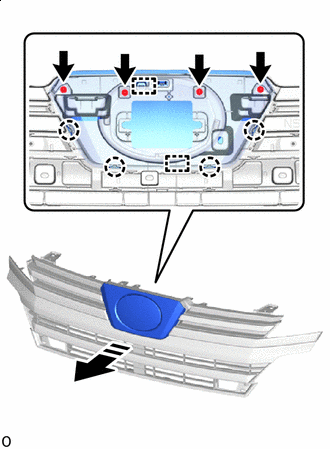
Remove in this Direction Remove the 4 screws.
-
Detach the claw and guide, and remove the No. 1 radiator grille moulding as shown in the illustration.
-
-
REMOVE RADIATOR GRILLE EMBLEM
-
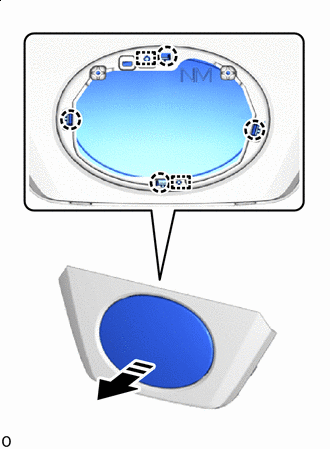
Remove in this Direction Detach the claw and guide, and remove the radiator grille emblem as shown in the illustration.
-
-
REMOVE NO. 3 RADIATOR GRILLE MOULDING
-
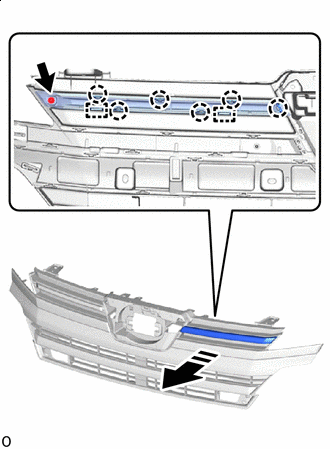
Remove in this Direction Remove the screw.
-
Detach the claw and guide, and remove the No. 3 radiator grille moulding as shown in the illustration.
-
-
REMOVE NO. 2 RADIATOR GRILLE MOULDING
Tech Tips
Use the same procedure described for the No. 3 radiator grille moulding.
-
REMOVE NO. 5 RADIATOR GRILLE MOULDING
-
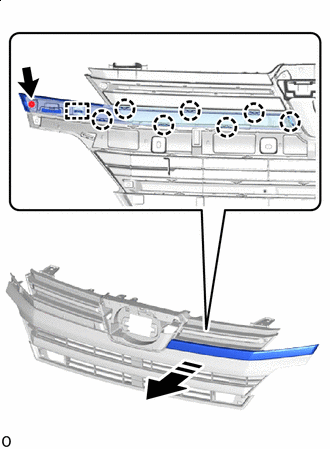
Remove in this Direction Remove the screw.
-
Detach the claw and guide, and remove the No. 5 radiator grille moulding as shown in the illustration.
-
-
REMOVE NO. 4 RADIATOR GRILLE MOULDING
Tech Tips
Use the same procedure described for the No. 5 radiator grille moulding.
-
REMOVE NO. 6 RADIATOR GRILLE MOULDING
-
Remove the 2 screws.
-
Detach the claw and guide, and remove the No. 6 radiator grille moulding as shown in the illustration.
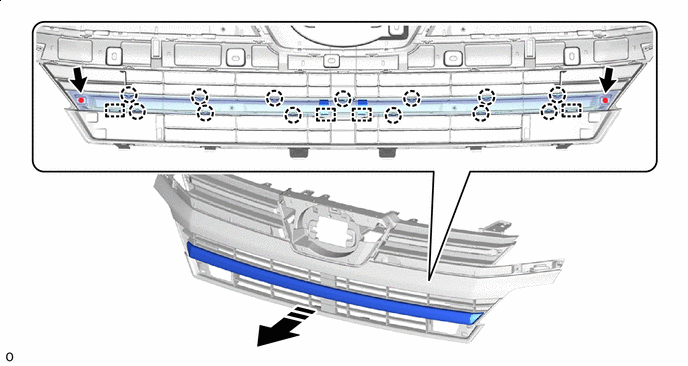
Remove in this Direction - -
-
-
REMOVE NO. 7 RADIATOR GRILLE MOULDING
-
Remove the 2 screws.
-
Detach the claw and guide, and remove the No. 7 radiator grille moulding as shown in the illustration.
Remove in this Direction - -
-