RADIATOR GRILLE(for ALPHARD) REMOVAL
CAUTION / NOTICE / HINT
The necessary procedures (adjustment, calibration, initialization or registration) that must be performed after parts are removed, installed or replaced during the radiator grille installation/removal are shown below.
| Replacement Part or Procedure | Necessary Procedures | Effects/Inoperative Functions when not Performed | Link |
|---|---|---|---|
|
Television camera view adjustment | Panoramic view monitor system |
PROCEDURE
-
REMOVE RADIATOR COVER SUB-ASSEMBLY
-
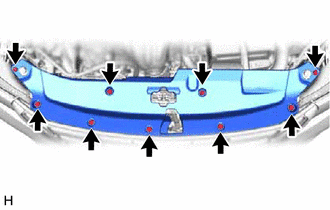
Remove the 9 clips and radiator cover sub-assembly.
-
-
REMOVE RADIATOR GRILLE
-
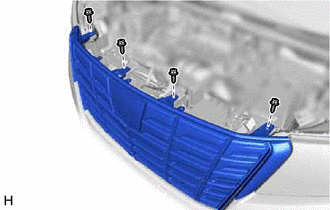
Remove the 4 screws.
-
Put protective tape araund the radiator grille.

Protective Tape - - -
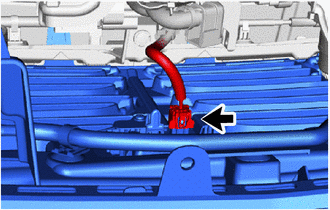
w/ Panoramic View Monitor System:
Disconnect the connector.
-
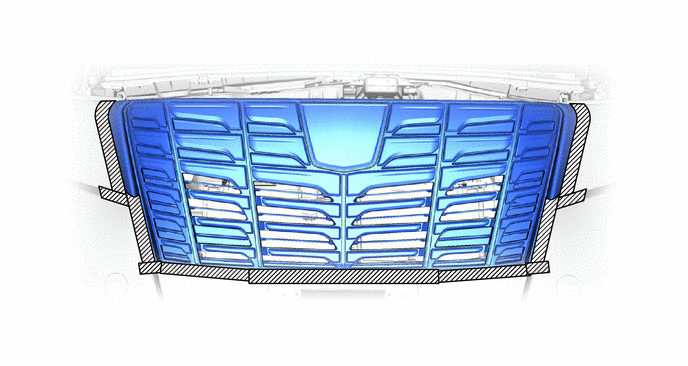
Detach the claw and guide.
Tech Tips
-
Lift up the part in the direction indicated by the arrow shown in the illustration to detach the claw.
-
Place your hand on the top of the radiator grille and pull it in the direction indicated by the arrow to detach the guide as shown in the illustration.
-
Pull each side in the direction indicated by the arrow shown in the illustration.
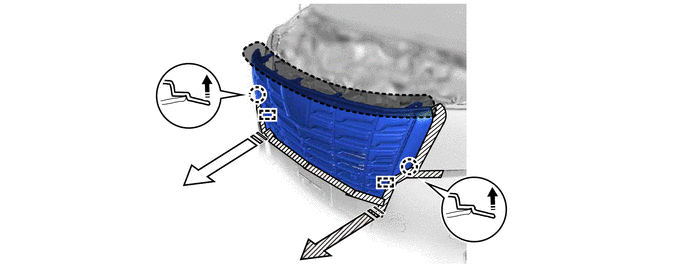

Place Hands Here - - 
Claw Lifting Direction 
Pulling Direction (1) 
Pulling Direction (2) - - -
-
Detach the claw and remove the radiator grille.
Tech Tips
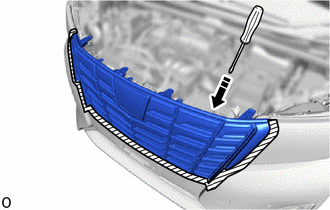
Insert Here Protective Tape Insert a screwdriver with its tip wrapped with protective tape behind the radiator grille and detach it as shown in the illustration.
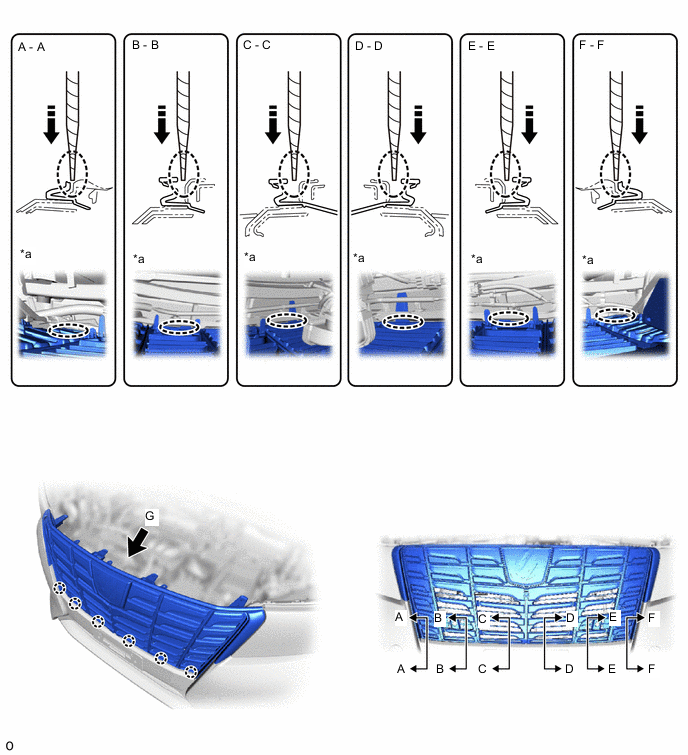
*a View G - - Screwdriver Insertion Area Screwdriver Insertion Direction Protective Tape - -
-