FRONT BUMPER(for ALPHARD) INSTALLATION
CAUTION / NOTICE / HINT
PROCEDURE
-
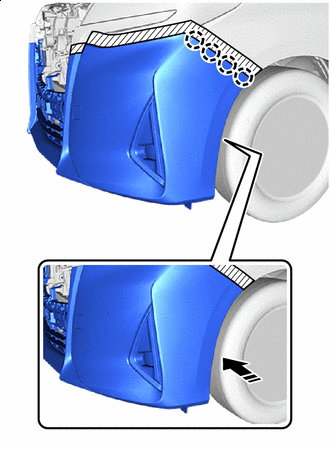
INSTALL FRONT WHEEL OPENING EXTENSION PAD LH
-
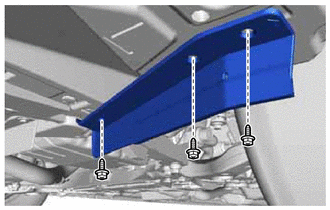
Install the front wheel opening extension pad LH with the 3 screws.
-
-
INSTALL FRONT WHEEL OPENING EXTENSION PAD RH
Tech Tips
Use the same procedure described for the LH side.
-
INSTALL FRONT BUMPER SIDE SUPPORT LH
-
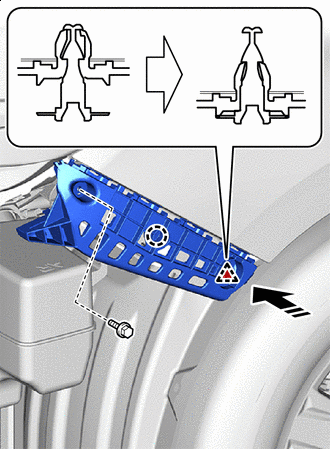

Install in this Direction Attach the claw, clip to install the front bumper side support LH as shown in the illustration.
-
Install the bolt.
-
-
INSTALL FRONT BUMPER SIDE SUPPORT RH
Tech Tips
Use the same procedure described for the LH side.
-
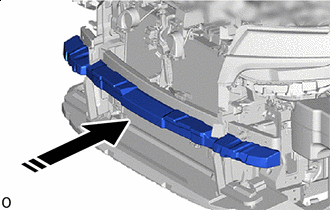
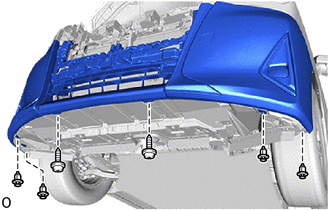
INSTALL FRONT BUMPER REINFORCEMENT SUB-ASSEMBLY
-
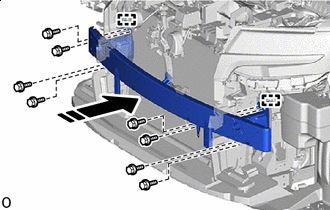
Install in this Direction Attach the guide to install the front bumper reinforcement sub-assembly.
-
Install the 8 bolts.
- Torque:
- 66 N*m { 673 kgf*cm, 49 ft.*lbf }
-
-
INSTALL HOOD LOCK SUPPORT BRACE SUB-ASSEMBLY
-
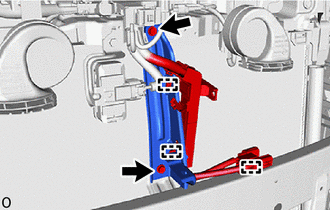
Install the hood lock support brace sub-assembly with the 2 bolts.
- Torque:
- 8.5 N*m { 87 kgf*cm, 75 in.*lbf }
-
Attach the clamp.
-
-
INSTALL THERMISTOR ASSEMBLY
-
INSTALL FRONT BUMPER ENERGY ABSORBER
-
Install in this Direction Install the front bumper energy absorber as shown in the illustration.
-
-
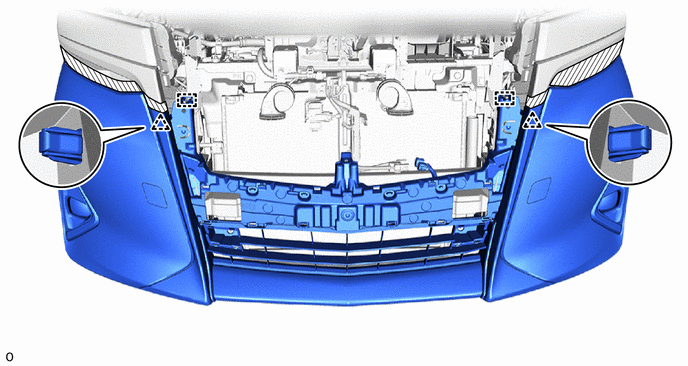
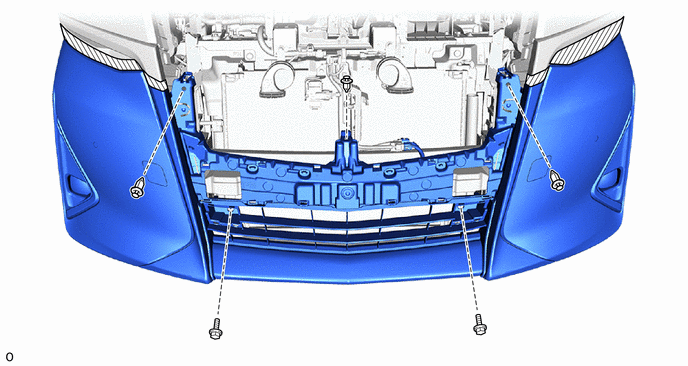
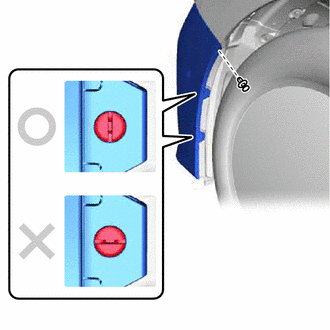
INSTALL FRONT BUMPER COVER
-
Attach the clip, guide to install the front bumper cover.
-
Install in this Direction Attach the claw as shown in the illustration.
Tech Tips
Use the same procedure for the other side.
-
Connect the 2 connectors.

-
Install the 3 clips and 2 bolts.
-
Remove the protective tape.
-
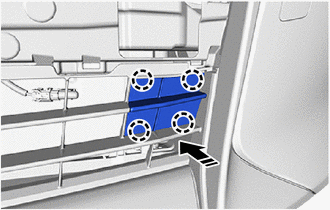
Install the 4 clips and 2 screws.
-
Install the 2 pin hold clips.
Tech Tips
Use the same procedure for the pin hold clip on the other side.
-
Install the clip.
Tech Tips
Use the same procedure for the clip on the other side.
-
-
INSTALL LOWER RADIATOR GRILLE BRACKET LH
-
Attach the claw and install the lower radiator grille bracket LH.
-
-
INSTALL LOWER RADIATOR GRILLE BRACKET RH
Tech Tips
Use the same procedure described for the LH side.
-
INSTALL RADIATOR GRILLE
-
INSTALL RADIATOR COVER SUB-ASSEMBLY
-
ADJUST FOG LIGHT AIMING
-
ADJUST FRONT TELEVISION CAMERA ASSEMBLY (w/ Panoramic View Monitor System)