BACK-UP LIGHT BULB REPLACEMENT
CAUTION / NOTICE / HINT
Tech Tips
-
Use the same procedure for the RH and LH sides.
-
The procedure listed below is for the LH side.
PROCEDURE
-
REMOVE BACK-UP LIGHT BULB
-

Protective Tape Apply protective tape as shown in the illustration.
-
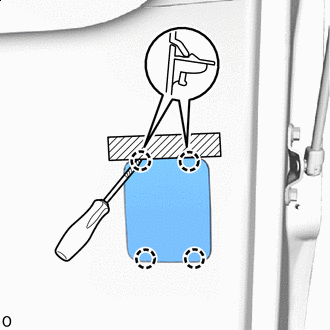
Using a screwdriver, detach the claw and remove the rear light service hole cover.
Tech Tips
Tape the screwdriver tip before use.
-
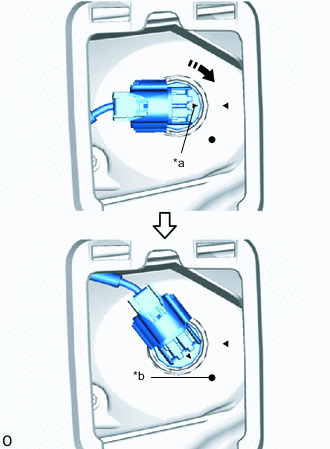
*a Matchmark *b Unlock Position Mark 
Clockwise Turn the bulb socket clockwise until the matchmark is aligned with the unlock position mark to disconnect the bulb socket.
Tech Tips
For the RH side, disconnect the bulb socket by rotating counterclockwise.
-

Remove in this Direction Remove the back-up light bulb from the bulb socket.
-
-
INSTALL BACK-UP LIGHT BULB
-
Install the back-up light bulb to the bulb socket.
-
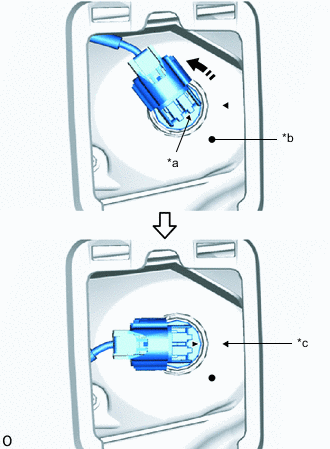
*a Matchmark *b Unlock Position Mark *c Lock Position Mark Counterclockwise Align the matchmark of the bulb socket to the unlock position mark, and then rotate the bulb socket counterclockwise until the lock position mark to connect the bulb socket.
Tech Tips
For the RH side, connect the bulb socket by rotating clockwise.
-
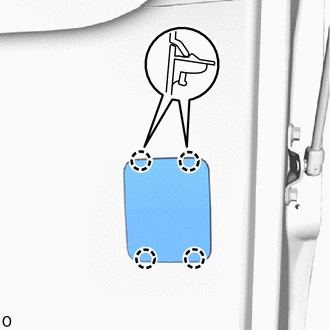
Attach the claw to install the rear light service hole cover.
-