WASHER MOTOR INSTALLATION
PROCEDURE
-
INSTALL WINDSHIELD WASHER JAR SUB-ASSEMBLY
-
for LHD
-
Attach the guide to temporarily set the windshield washer jar sub-assembly on the vehicle.
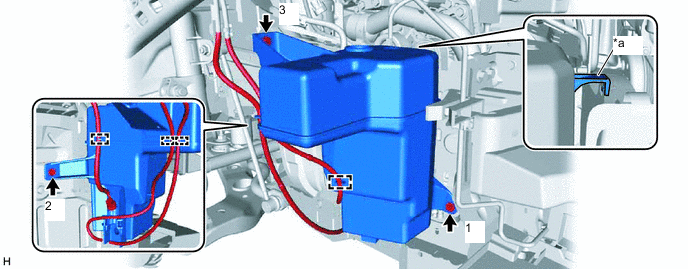
*a Guide - - -
Temporarily install the windshield washer jar sub-assembly with the 3 bolts.
-
Tighten the 3 bolts in the order indicated in the illustration.
- Torque:
- 5.5 N*m { 56 kgf*cm, 49 in.*lbf }
-
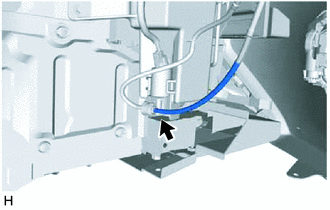
Attach the clamp.
-
-
for RHD
-
Attach the guide to temporarily set the windshield washer jar sub-assembly on the vehicle.
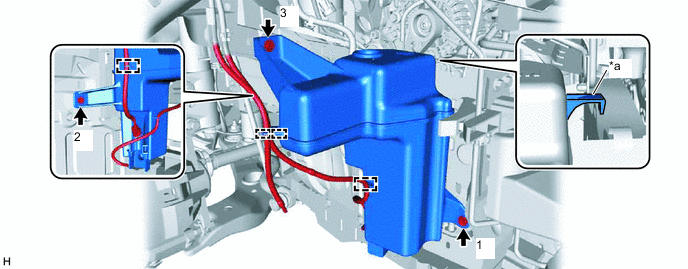
*a Guide - - -
Temporarily install the windshield washer jar sub-assembly with the 3 bolts.
-
Tighten the 3 bolts in the order indicated in the illustration.
- Torque:
- 5.5 N*m { 56 kgf*cm, 49 in.*lbf }
-
Attach the clamp.
-
-
-
INSTALL FRONT BUMPER COVER
-
for ALPHARD:
-
for VELLFIRE:
-
-
INSTALL WASHER INLET SUB-ASSEMBLY
-
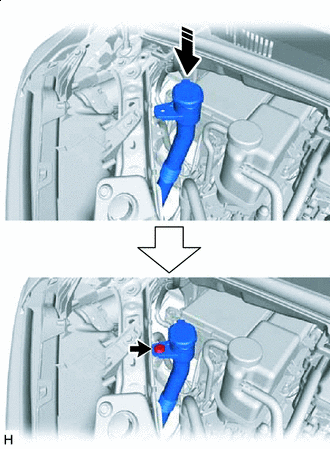

Install in this Direction Install the washer inlet sub-assembly to the windshield washer jar sub-assembly.
-
Install the washer inlet sub-assembly to vehicle with the clip.
-
-
INSTALL WINDSHIELD WASHER MOTOR AND PUMP ASSEMBLY
-
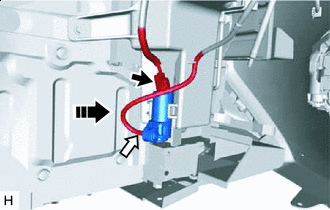

Connector 
Washer Hose Install in this Direction Install the windshield washer motor and pump assembly.
-
Connect the connector and washer hose.
-
Connect the rear washer hoses.
-
-
FILL UP WINDSHIELD WASHER JAR WITH WASHER FLUID
-
Refill with the windshield washer fluid.
-
-
INSTALL FRONT FENDER SPLASH SHIELD SUB-ASSEMBLY RH
-
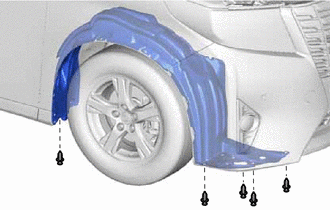
Install the front fender splash shield sub-assembly RH to the vehicle with the 5 clips B.
-
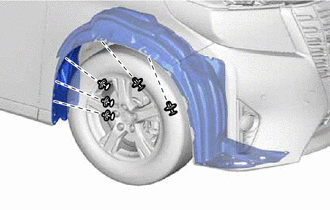
Install the 5 clips A.
-
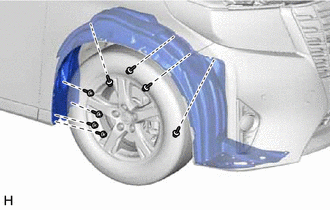
Install the 8 screws.
-
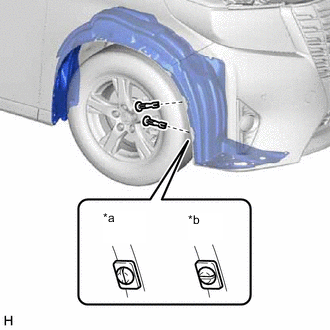
*a Correct *b Incorrect Install the 2 pin hold clips as shown in the illustration.
-
-
ADJUST FOG LIGHT AIMING
-
for LED Type:
-
for Bulb Type:
-