BACK DOOR REASSEMBLY
PROCEDURE
-
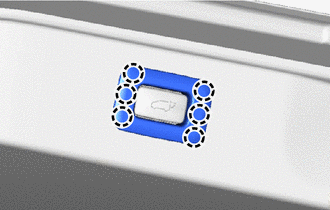
INSTALL BACK DOOR GARNISH COVER (w/o Panoramic View Monitor System)
-
Install the back door garnish cover with the 2 bolts.
-
-
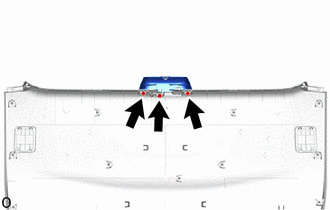
INSTALL REAR TELEVISION CAMERA ASSEMBLY (w/ Panoramic View Monitor System)
-
INSTALL REAR LIGHT ASSEMBLY LH (for ALPHARD)
-
INSTALL REAR LIGHT ASSEMBLY RH (for ALPHARD)
Tech Tips
Use the same procedure described for the LH side.
-
INSTALL REAR LIGHT ASSEMBLY LH (for VELLFIRE)
-
INSTALL REAR LIGHT ASSEMBLY RH (for VELLFIRE)
Tech Tips
Use the same procedure described for the LH side.
-
INSTALL LICENSE PLATE LIGHT ASSEMBLY
-
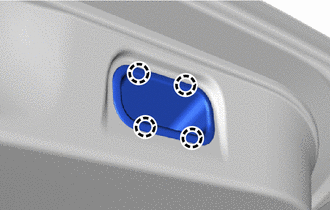
INSTALL BACK DOOR WEIGHT (for 2AR-FE)
-
Attach the guide to install the back door weight with the 3 bolts.
-
-
INSTALL BACK DOOR OPENER SWITCH ASSEMBLY
-
INSTALL BACK DOOR OUTSIDE GARNISH SUB-ASSEMBLY
-
for ALPHARD:
-
for VELLFIRE:
-
-
INSTALL REAR WIPER MOTOR ASSEMBLY
-
INSTALL REAR WIPER MOTOR GROMMET
-
INSTALL NO. 1 REAR SPOILER COVER
-
INSTALL REAR WIPER ARM AND BLADE ASSEMBLY
-
INSTALL REAR SPOILER SEAL
-
INSTALL REAR SPOILER
-
INSTALL REAR NO. 3 SPEAKER ASSEMBLY (w/ Back Door Speaker)
-
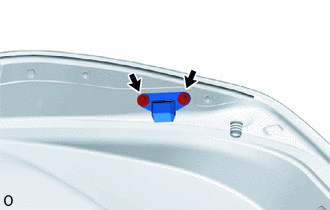
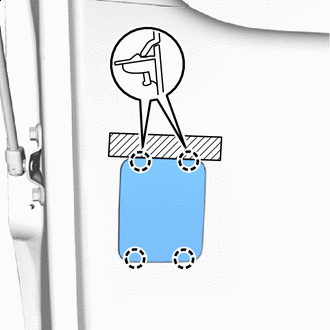
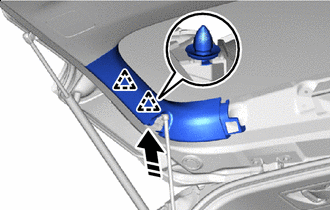
INSTALL BACK DOOR PANEL CUSHION
Tech Tips
Use the same procedure for both back door panel cushions.
-
Attach the claw to install a new back door panel cushion.
-
-
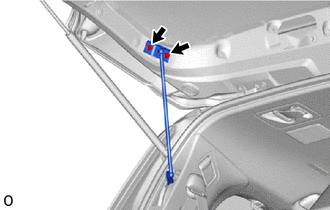
INSTALL POWER BACK DOOR SENSOR ASSEMBLY LH (w/ Power Back Door)
-
INSTALL POWER BACK DOOR SENSOR ASSEMBLY RH (w/ Power Back Door)
Tech Tips
Use the same procedure described for the LH side.
-
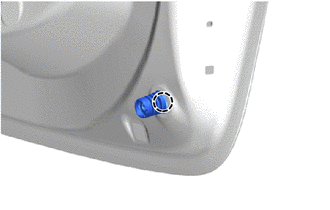
INSTALL BACK DOOR SIDE MALE STOPPER LH
-
Install the back door side male stopper LH with the 2 bolts.
- Torque:
- 7.5 N*m { 76 kgf*cm, 66 in.*lbf }
-
-
INSTALL BACK DOOR SIDE MALE STOPPER RH
Tech Tips
Use the same procedure described for the LH side.
-
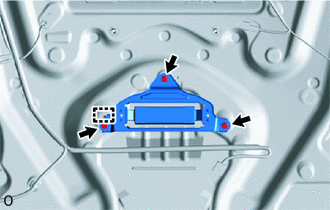
CONNECT POWER BACK DOOR ROD (w/ Power Back Door)
-
Connect the power back door rod with the 2 bolts.
- Torque:
- 30 N*m { 306 kgf*cm, 22 ft.*lbf }
-
-
INSTALL BACK DOOR LOCK ASSEMBLY
-
INSTALL INNER MIRROR CAMERA ASSEMBLY (w/ Digital Inner Mirror)
Click here
-
INSTALL BACK DOOR TRIM COVER (w/ Digital Inner Mirror)
-
Install the back door trim cover with the 3 screws.
-
-
INSTALL BACK DOOR TRIM BOARD ASSEMBLY
-
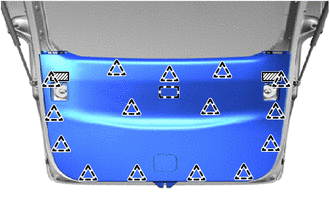
Detach the guide, clip to install the back door trim board assembly.
-

Protective Tape Attach the claw to install the back door service hole cover.
Tech Tips
Use the same procedure described for other side.
-
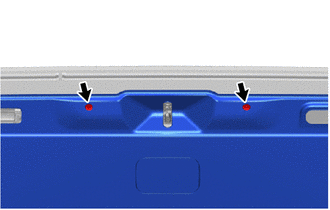
Install the 2 clips.
-
Remove each protective tape.
-
-
INSTALL SWITCH BEZEL (w/ Power Back Door)
-
Attach the claw to install the switch bezel.
-
-
INSTALL BACK DOOR INSIDE HANDLE
-
Attach the claw to install the back door inside handle.
-
-
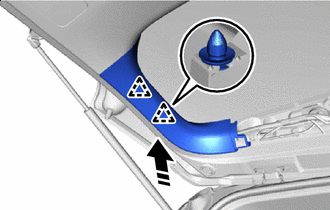
INSTALL BACK DOOR SIDE GARNISH LH (w/ Power Back Door)
-
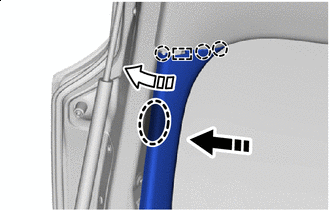

Place Hands Here 
Install in this Direction (1) 
Install in this Direction (2) Attach the guide and claw as shown in the illustration.
-
Install in this Direction Attach the clip to install the back door side garnish LH.
-
-
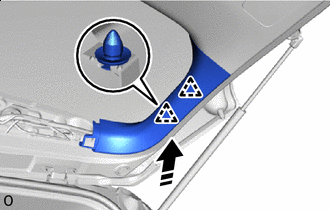
INSTALL BACK DOOR SIDE GARNISH LH (w/o Power Back Door)
-
Place Hands Here Install in this Direction (1) Install in this Direction (2) Attach the guide and claw as shown in the illustration.
-
Install in this Direction Attach the clip to install the back door side garnish LH.
-
-
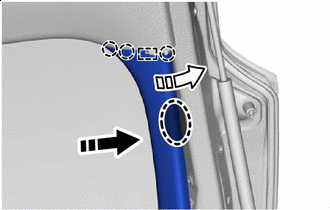
INSTALL BACK DOOR SERVICE HOLE COVER LH (w/ Power Back Door)
-
Install in this Direction Attach the claw to install the back door service hole cover LH.
-
-
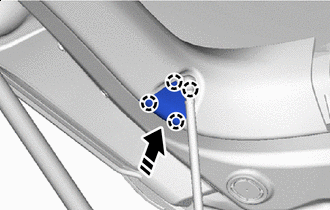
INSTALL BACK DOOR SIDE GARNISH RH
-
Place Hands Here Install in this Direction (1) Install in this Direction (2) Attach the guide and claw as shown in the illustration.
-
Install in this Direction Attach the clip to install the back door side garnish RH.
-
-
INSTALL CENTER BACK DOOR GARNISH
-
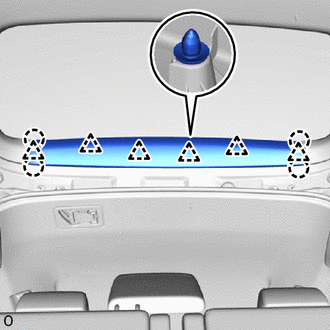
Attach the claw and clip to install the center back door garnish.
-