FRONT SIDE FIX WINDOW GLASS REMOVAL
CAUTION / NOTICE / HINT
Tech Tips
-
Use the same procedure for the RH and LH sides.
-
The procedure listed below is for the LH side.
PROCEDURE
-
REMOVE ASSIST GRIP PLUG
-
REMOVE PILLAR ASSIST GRIP ASSEMBLY
-
REMOVE FRONT PILLAR GARNISH LH
-
REMOVE LOWER FRONT PILLAR GARNISH LH
-
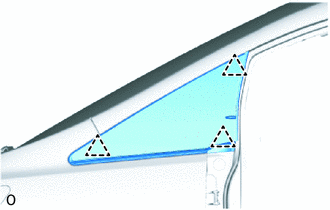
REMOVE FRONT SIDE FIX WINDOW ASSEMBLY LH
Note
The front side fix window assembly LH may fall while performing this procedure. Therefore, use suction cups to hold the front side fix window assembly LH from the outside of the vehicle.
-
Using a knife, cut off the moulding as shown in the illustration.
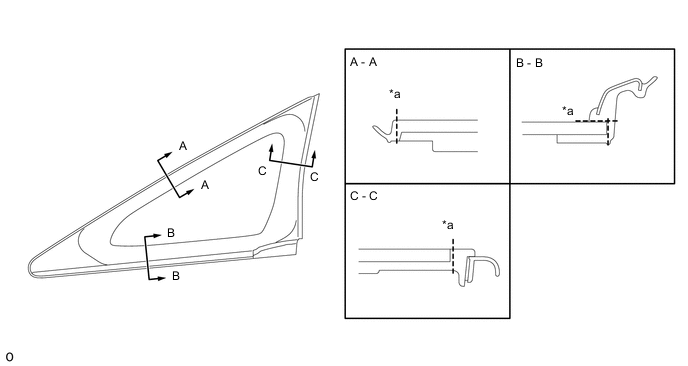
*a Cut - - Note
Be careful not to damage the vehicle body with the knife.
-
Remove the remaining moulding.
Tech Tips
Make a partial cut in the moulding. Then pull and remove it by hand.
-
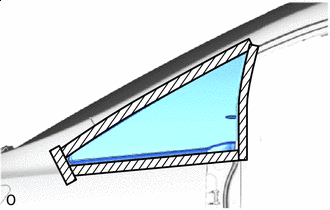

Protective Tape Put protective tape on the body surface around the front side fix window assembly LH.
-
Install a suction cup to the front side fix window assembly LH.
-
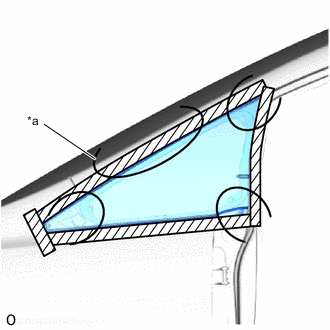
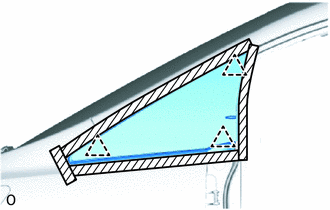
*a Piano Wire Insert a piano wire (approx. 0.6 mm) at the locations shown in the illustration, and tie objects that can serve as handles (for example, wooden blocks) to the wire ends.
-
Pull on the ends of the piano wire alternately and leave the front side fix windows clips when cutting through the adhesive.
Note
-
Do not forcefully brush the piano wire against the windshield glass.
-
Be careful as the piano wire will break if it crosses itself.
-
-
Using a suction cup, detach the 3 clips and remove the front side fix window assembly LH.
Note
Make sure that the front side fix window assembly LH does not fall.
-