FRONT CONSOLE BOX(for Integrated Type) REMOVAL
CAUTION / NOTICE / HINT
Tech Tips
-
Use the same procedure for RHD and LHD vehicles.
-
The procedure listed below is for LHD vehicles.
PROCEDURE
-
REMOVE NO. 2 BOX BOTTOM MAT
-
w/o Seat Heater System:
Remove the No. 2 box bottom mat.
-
w/ Seat Heater System:
Remove the No. 2 box bottom mat.
-
-
REMOVE INSTRUMENT PANEL FINISH PANEL END LH
-
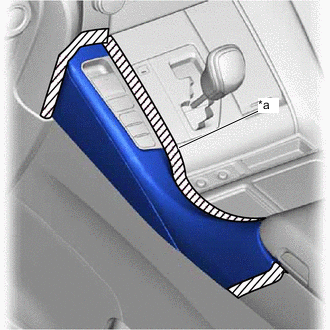
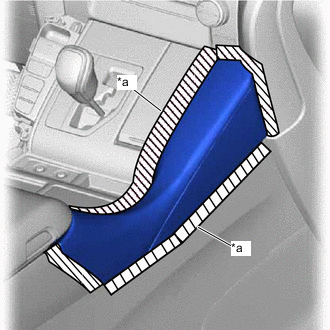
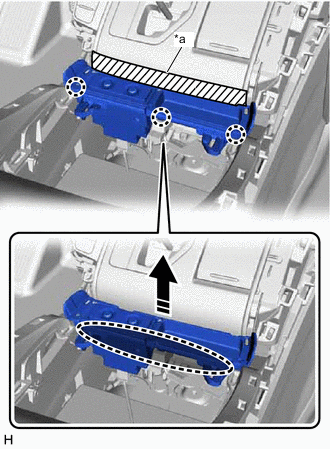
*a Protective Tape Put protective tape around the instrument panel finish panel end LH.
-
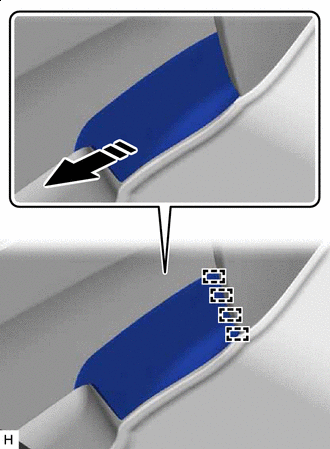
Open the console box toward the vehicle exterior, place your hand at the position shown in the illustration (where the height of the instrument panel finish panel end LH changes) and pull in the direction indicated by the arrow to remove the instrument panel finish panel end LH.

Place Hand Here 
Remove in this Direction
-
-
REMOVE INSTRUMENT PANEL FINISH PANEL END RH
-
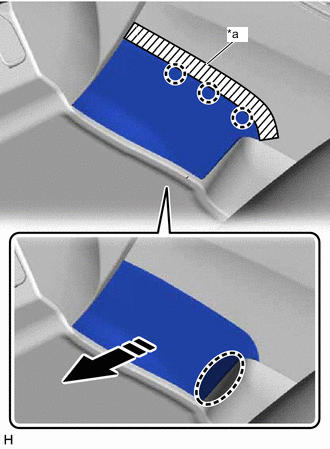
*a Protective Tape Put protective tape around the instrument panel finish panel end RH.
-
Insert moulding remover D at the position shown in the illustration and pull in the direction indicated by the arrow to detach the claw and clip

Insert Moulding Remover D Here Remove in this Direction -
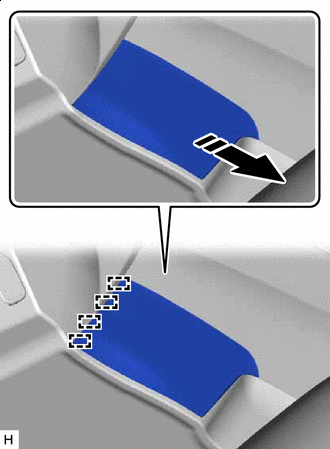
Place your hand in the gap created during the above procedure and pull in the direction indicated by the arrow shown in the illustration to detach the claw.
Remove in this Direction - - -
Place your hand at the position shown in the illustration, bend the instrument panel finish panel end RH in the direction indicated by the arrow (toward the vehicle exterior) to detach the claw and remove the instrument panel finish panel end RH.
Place Hand Here Remove in this Direction
-
-
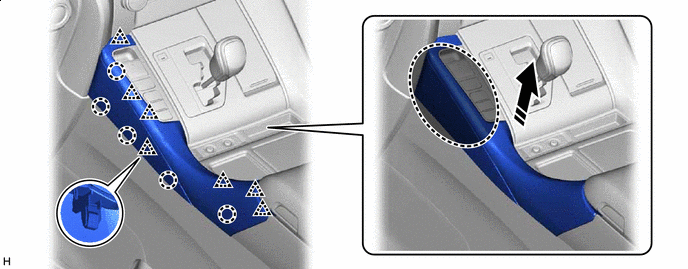
REMOVE UPPER CONSOLE PANEL SUB-ASSEMBLY
-
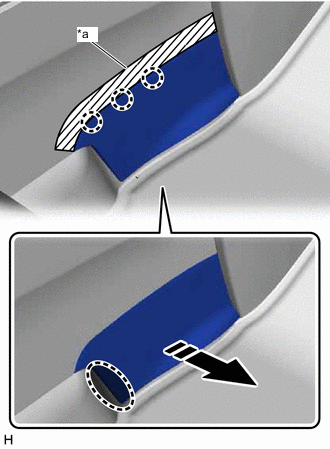
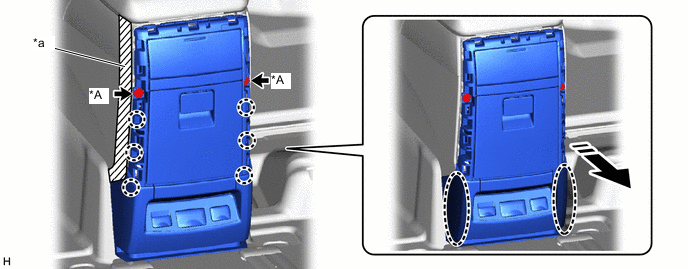
*a Protective Tape Insert Moulding Remover D Here Remove in this Direction Put protective tape around the upper console panel sub-assembly.
-
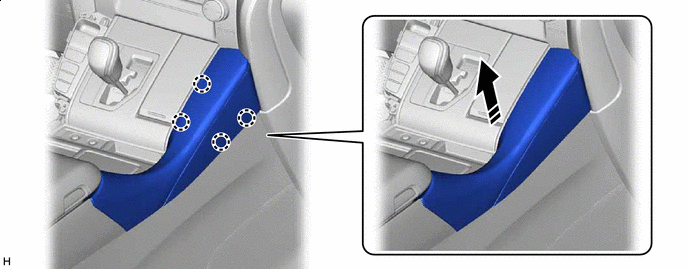
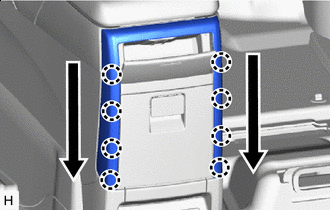
Insert moulding remover D at the position shown in the illustration and pull in the direction indicated by the arrow to detach the claw.
-
Remove in this Direction Place your hand in the gap created during the above procedure and pull in the direction indicated by the arrows shown in the illustration to detach the claw.
-
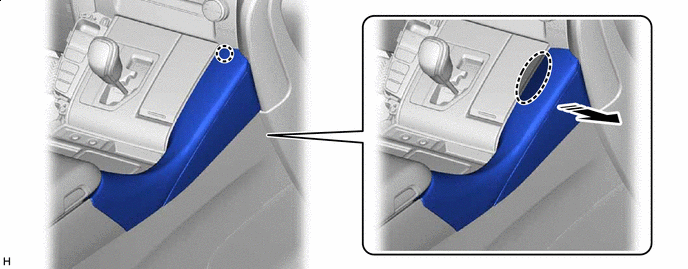
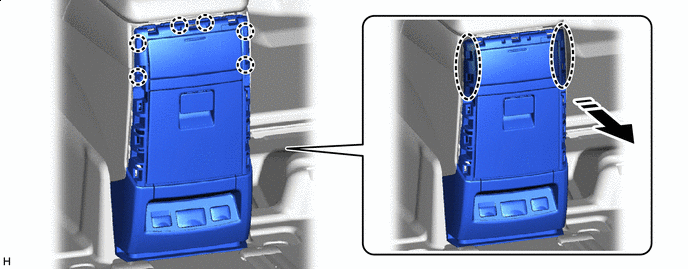
Remove in this Direction Slide in the direction indicated by the arrow shown in the illustration to detach the guide.
-
Remove in this Direction Pull up in the direction indicated by the arrow shown in the illustration to remove the upper console panel sub-assembly.
-
-
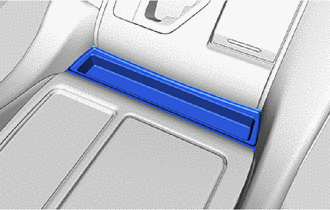
REMOVE FRONT NO. 2 CONSOLE BOX INSERT
-
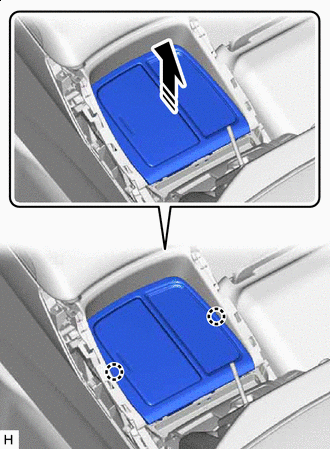
*a Protective Tape Place Hand Here Remove in this Direction w/o Seat Heater System:
-
Put protective tape around the front No. 2 console box insert.
-
Place your hand at the position shown in the illustration and pull in the direction indicated by the arrow to detach the claw and remove the front No. 2 console box insert.
-
-
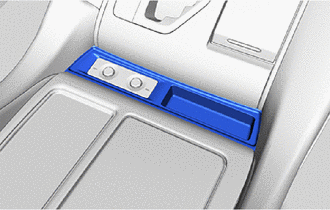
*a Protective Tape Place Hand Here Remove in this Direction w/ Seat Heater System:
-
Put protective tape around the front No. 2 console box insert.
-
Place your hand at the position shown in the illustration and pull in the direction indicated by the arrow to detach the claw.
-
Disconnect the connector and remove the front No. 2 console box insert.
-
-
-
REMOVE CENTER FLOOR CARPET COVER LH
-
*a Protective Tape Place Hand Here Remove in this Direction Put protective tape around the center floor carpet cover LH.
-
Place your hand at the position shown in the illustration and pull in the direction indicated by the arrow to detach the claw.
-
Remove in this Direction Pull in the direction indicated by the arrow shown in the illustration to detach the guide and remove the center floor carpet cover LH.
-
-
REMOVE CENTER FLOOR CARPET COVER RH
-
*a Protective Tape Place Hand Here Remove in this Direction Put protective tape around the center floor carpet cover RH.
-
Place your hand at the position shown in the illustration and pull in the direction indicated by the arrow to detach the claw.
-
Remove in this Direction Pull in the direction indicated by the arrow shown in the illustration to detach the guide and remove the center floor carpet cover RH.
-
-
REMOVE REAR NO. 2 CONSOLE END PANEL GARNISH
-

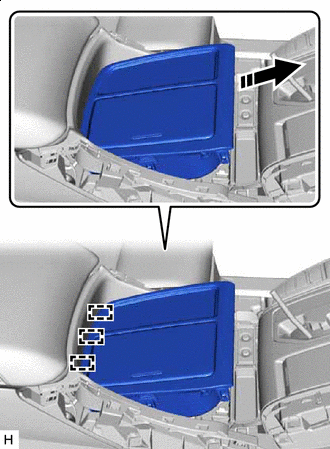
*a Protective Tape Insert Moulding Remover B Here Remove in this Direction Put protective tape around the rear No. 2 console end panel garnish.
-
Open the lid of the rear console end panel sub-assembly.
-
Insert moulding remover B at the position shown in the illustration and pull in the direction indicated by the arrow to detach the claw.
-

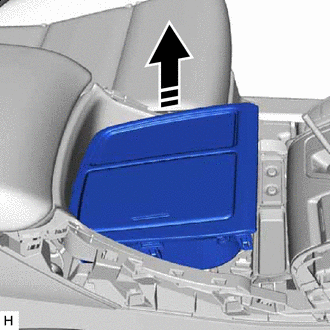
Order of Removal Place your hand in the gap created during the above procedures, detach the claw as shown in the illustration and remove the rear No. 2 console end panel garnish.
-
-
REMOVE REAR CONSOLE END PANEL SUB-ASSEMBLY
-
Put protective tape around the rear console end panel sub-assembly.
-
w/ Clip:
-
Remove the 2 clips.
-
-
Place your hand at the position shown in the illustration and pull in the direction indicated by the arrow to detach the claw.
*A w/ Clip - - *a Protective Tape - - Place Hand Here Remove in this Direction -
Place your hand at the position shown in the illustration and pull in the direction indicated by the arrow to detach the claw.
-
Disconnect the connector and remove the rear console end panel sub-assembly.
Place Hand Here Remove in this Direction
-
-
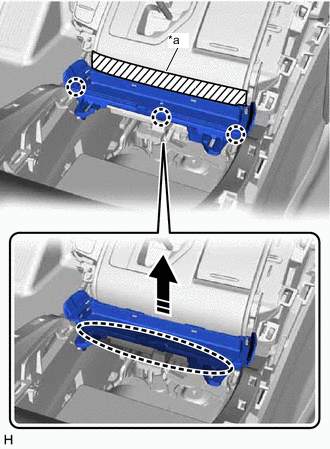
REMOVE CONSOLE BOX CARPET
-
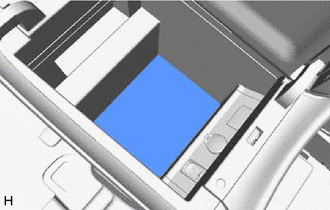
Remove the console box carpet.
-
-
REMOVE CONSOLE BOX ASSEMBLY
-
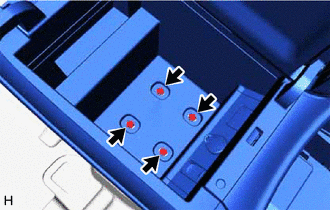
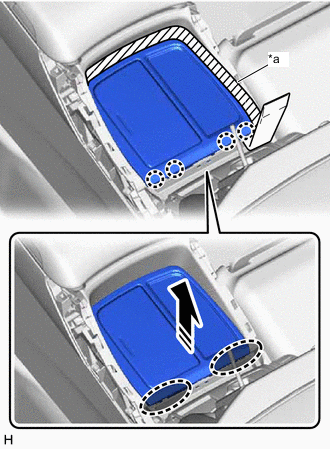
Open the lid of the console box assembly and remove the 4 bolts.
-
Disconnect the connector.
-
Slide in the direction indicated by the arrow shown in the illustration to detach the claw and guide.
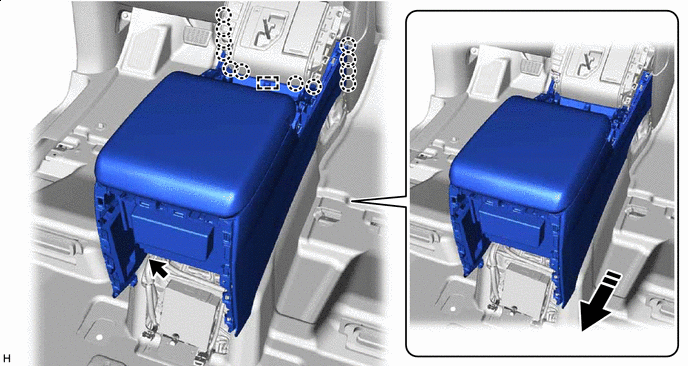
Remove in this Direction - - -
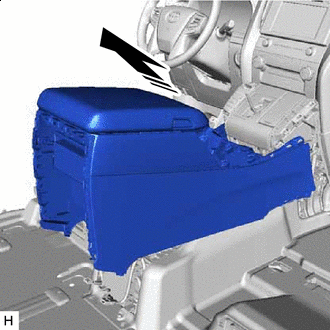
Remove in this Direction Pull in the direction indicated by the arrow shown in the illustration to remove the console box assembly.
-