FRONT CONSOLE BOX(for Separate Type) REASSEMBLY
PROCEDURE
-
INSTALL CONSOLE BOX POCKET GARNISH (for Type A)
-
Attach the claw to install the console box pocket garnish.
-
-
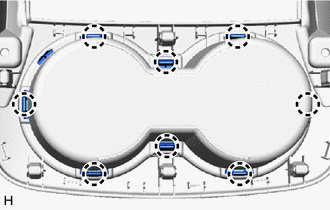
INSTALL UPPER NO. 1 CONSOLE PANEL GARNISH
-
Attach the claw to install the upper No. 1 console panel garnish.
-
Install the 6 screws.
-
-
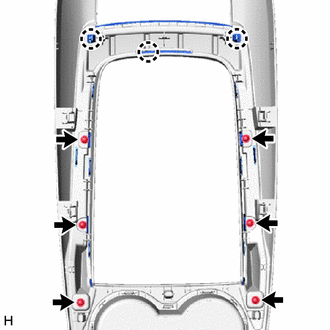
INSTALL CONSOLE BOX POCKET SUB-ASSEMBLY (for Type A)
-
Install the console box pocket sub-assembly with the 4 screws.
-
-
INSTALL CENTER CONSOLE MAT (for Type A)
-
Install the center console mat.
-
-
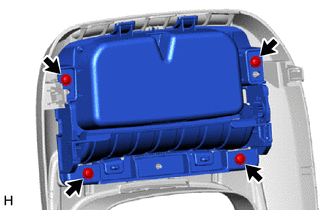
INSTALL CONSOLE BOX POCKET (for Type A)
-
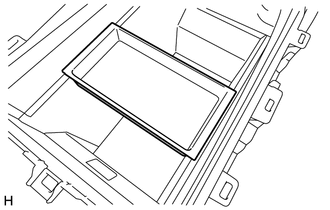
Install the console box pocket.
-
-
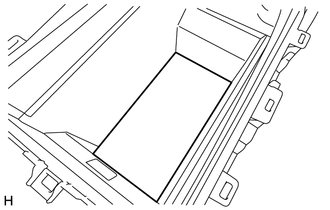
INSTALL CONSOLE COMPARTMENT DOOR SUB-ASSEMBLY
-
Fit the console compartment door sub-assembly to the upper rail and slide in the direction indicated by the arrow to temporarily install the console compartment door sub-assembly.
-
Push the parts labeled A in the illustration to fit the console compartment door sub-assembly to the lower rail and install the console compartment door sub-assembly.
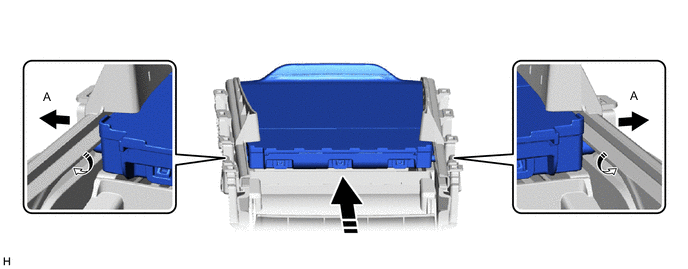

Install in this Direction - -
-
-
INSTALL ELECTRICAL KEY WIRE HARNESS
-
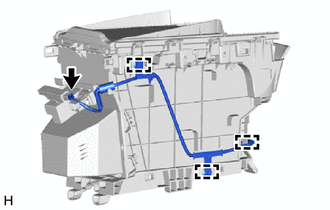
Attach the clamp to install the electrical key wire harness.
-
Connect the connector.
-
-
INSTALL NO. 1 STEREO COMPONENT WIRE
-
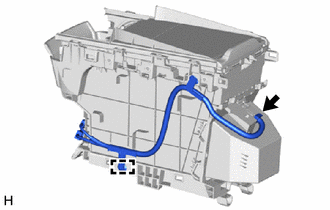
Attach the clamp to install the No. 1 stereo component wire.
-
Connect the connector.
-
-
INSTALL NO. 2 BOX PANEL
-
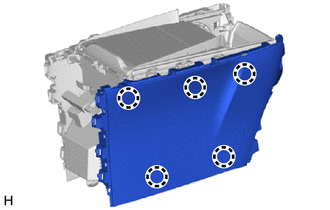
Attach the claw to install the No. 2 box panel.
-
-
INSTALL NO. 1 BOX PANEL
-
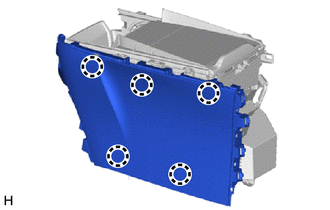
Attach the claw to install the No. 1 box panel.
-
-
INSTALL NO. 3 BOX PANEL
-
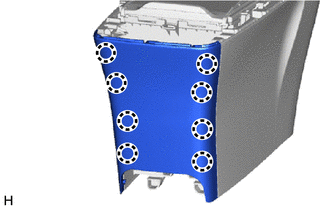
Attach the claw to install the No. 3 box panel.
-
-
INSTALL UPPER CONSOLE PANEL SUB-ASSEMBLY
-
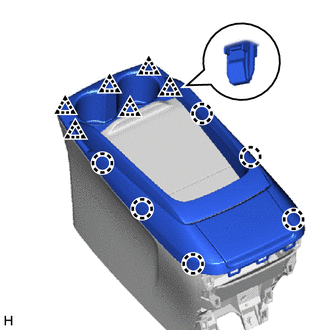
Attach the claw and clip to install the upper console panel sub assembly.
-