CIGARETTE LIGHTER REMOVAL
PROCEDURE
-
REMOVE NO. 2 BOX BOTTOM MAT
-
REMOVE INSTRUMENT PANEL FINISH PANEL END LH
-
REMOVE INSTRUMENT PANEL FINISH PANEL END RH
-
REMOVE UPPER INSTRUMENT PANEL FINISH PANEL
-
REMOVE CENTER INSTRUMENT CLUSTER FINISH PANEL SUB-ASSEMBLY (w/o Audio)
-
REMOVE NO. 3 INSTRUMENT PANEL REGISTER ASSEMBLY (w/ Audio)
-
REMOVE RADIO RECEIVER ASSEMBLY WITH BRACKET (w/ Audio, w/o Navigation System)
-
REMOVE NAVIGATION RECEIVER ASSEMBLY WITH BRACKET (w/ Audio, w/ Navigation System)
-
REMOVE AIR CONDITIONING CONTROL ASSEMBLY
-
REMOVE SHIFT LEVER KNOB SUB-ASSEMBLY
-
REMOVE COMBINATION SWITCH ASSEMBLY
-
REMOVE LOWER CENTER INSTRUMENT CLUSTER FINISH PANEL SUB-ASSEMBLY
-
REMOVE CIGARETTE LIGHTER ASSEMBLY
-
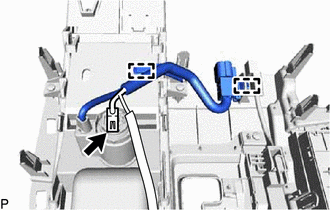
Remove the cigarette lighter knob and element assembly.
-
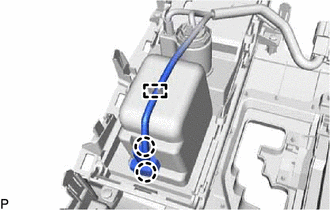
Disengage the 2 claws and guide.
-
Disengage the 2 clamps and disconnect the connector.
-
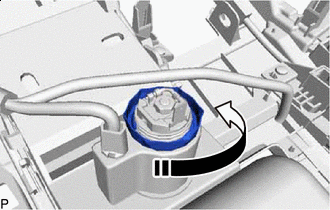

Remove in this Direction Turn the cigarette lighter nut as shown in the illustration to remove the cigarette lighter socket and retainer assembly from the center lower instrument cluster finish panel sub-assembly.
-