REAR NO. 1 SEAT ASSEMBLY(for Manual Captain Seat) REMOVAL
CAUTION / NOTICE / HINT
Tech Tips
The procedure listed below is for the RH side. Use the same procedure for the RH and LH sides, unless otherwise specified.
PROCEDURE
-
REMOVE REAR SEAT HEADREST ASSEMBLY
-
Remove the rear seat headrest assembly.
-
-
REMOVE NO. 2 REAR SEAT LEG SIDE COVER
Tech Tips
Use the same procedure for the other locations.
-
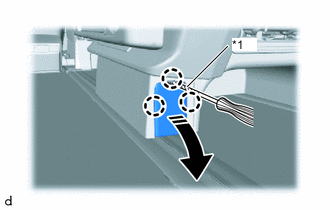
*1 Protective Tape 
Remove in this Direction Using a screwdriver with its tip wrapped with protective tape, detach the claw.
-
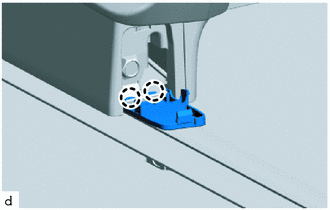
Detach the claw and remove the No. 2 rear seat leg side cover.
-
-
REMOVE NO. 3 REAR SEAT LEG SIDE COVER
Tech Tips
Use the same procedure for the other locations
-
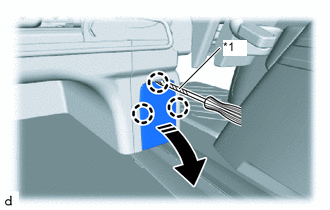
*1 Protective Tape Remove in this Direction Using a screwdriver with its tip wrapped with protective tape, detach the claw.
-
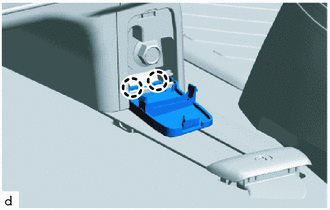
Detach the claw and remove the No. 3 rear seat leg side cover.
-
-
REMOVE REAR NO. 1 SEAT ASSEMBLY RH
-
Move the rear No. 1 seat assembly RH to the rearmost seat slide position.
-
Raise the ottoman.
-
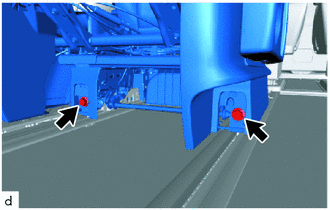
Remove the 2 bolts.
-
Move the rear No. 1 seat assembly RH to the frontmost seat slide position.
-
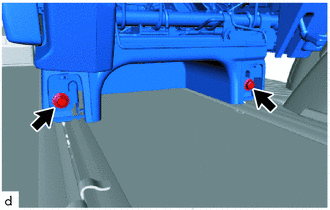
Remove the 2 bolts.
-
Move the slide position of the rear No. 1 seat assembly RH 3 steps to the rear from the frontmost position, and then set the seatback to the perpendicular position.
-
Remove the rear No. 1 seat assembly RH from the vehicle.
Note
-
Removing the rear No. 1 seat assembly RH from the vehicle must be performed by multiple people.
-
Do not damage the rear No. 1 seat assembly RH, body exterior or vehicle interior.
-
-