REAR NO. 1 SEAT ASSEMBLY(for Power Captain Seat with Memory) REMOVAL
CAUTION / NOTICE / HINT
The necessary procedures (adjustment, calibration, initialization, or registration) that must be performed after parts are removed, installed, or replaced during the rear No. 1 seat assembly removal/installation are shown below.
| Replacement Part or Procedure | Necessary Procedures | Effects/Inoperative when not Performed | Link |
|---|---|---|---|
| Position control ECU assembly | Register the seat position | Rear power seat function |
Tech Tips
-
Use the same procedure for RHD and LHD vehicles.
-
The procedures listed below are for LHD vehicles.
-
Use the same procedure for the RH and LH sides.
-
The procedure listed below is for the LH side.
PROCEDURE
-
REMOVE REAR SEAT HEADREST ASSEMBLY
-
Remove the rear seat headrest assembly.
-
-
REMOVE REAR SEAT LOWER CUSHION SHIELD LH
-
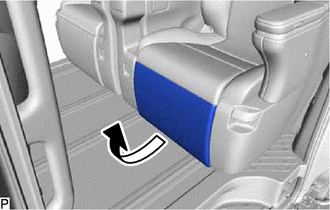
Operate the rear power seat switch LH to move the ottoman of the rear No. 1 seat assembly to the uppermost position.
-
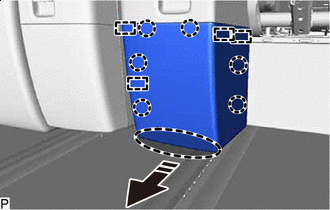

Place Hands Here 
Remove in this Direction Pull as shown in the illustration to detach the claw and guide and remove the rear seat lower cushion shield LH.
-
-
REMOVE NO. 2 SEAT LEG COVER LH
-
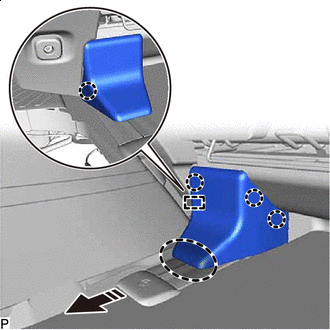
Place Hands Here Remove in this Direction Pull as shown in the illustration to detach the claw and guide and remove the No. 2 seat leg cover LH.
-
-
REMOVE REAR NO. 1 SEAT ASSEMBLY
-
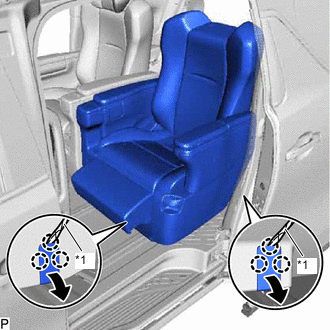
*1 Protective Tape Using a screwdriver, detach the claw and open the 2 cover sections of the rear No. 1 seat assembly as shown in the illustration.
Tech Tips
Tape the screwdriver tip before use.
-
Operate the rear power seat switch LH to move the seatback of the rear No. 1 seat assembly to the frontmost position.
-
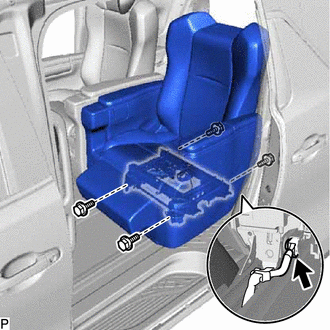
Remove the 4 bolts.
-
When not disassembling the rear No. 1 seat assembly:
Operate the rear power seat switch LH to return the ottoman to its original position.
-
Disconnect the connector.
-
Remove the rear No. 1 seat assembly.
Note
-
Removing the rear No. 1 seat assembly from the vehicle must be performed by multiple people.
-
Do not damage the rear No. 1 seat assembly, body exterior or vehicle interior.
-
-