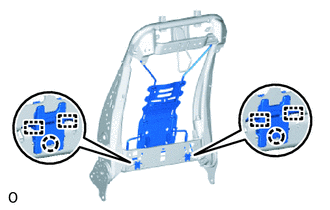
FRONT SEAT ASSEMBLY(for Front Passenger Side Power Seat) REASSEMBLY
CAUTION / NOTICE / HINT
CAUTION:
-
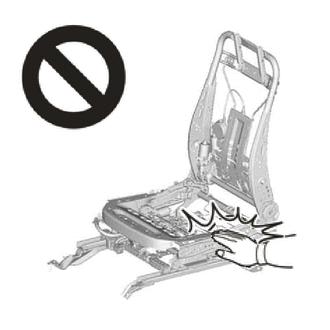
Wear protective gloves. Sharp areas on the parts may injure your hands.
-
There is risk of injury.
-
If the front seat side airbag was deployed, replace the front seat airbag assembly, separate type front seatback frame sub-assembly, separate type front seatback cover and separate type front seatback pad with the necessary parts in accordance with the extent of the collision damage.
-
Replace any other damaged parts as necessary.
Tech Tips
-
Use the same procedure for RHD and LHD vehicles.
-
The procedure listed below is for LHD vehicles.
PROCEDURE
-
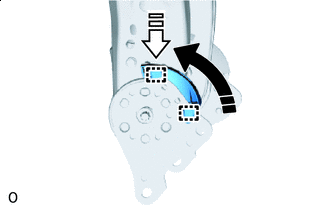
INSTALL FRONT SEATBACK SPRING SUB-ASSEMBLY RH
-

Install in this Direction Insert the 2 front seatback hooks in the installation direction shown in the illustration to install the front seatback spring sub-assembly RH.
-
-
INSTALL FRONT SEATBACK HOOK
-
Install in this Direction Push the 2 front seatback hooks in the installation direction shown in the illustration.
-
Attach the clamps to install the 2 front seatback hooks.
-
-
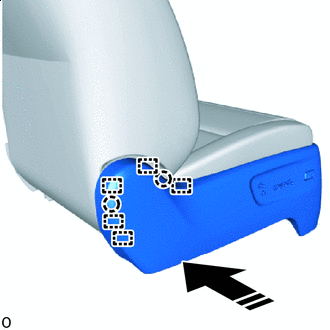
INSTALL FRONT SEATBACK EDGE PROTECTOR
-
Attach the claw and guide to install the 2 front seatback edge protectors.
-
-
INSTALL RECLINING ADJUSTER INSIDE COVER RH
-
Install in this Direction (1) 
Install in this Direction (2) While pushing in installation direction (1) shown in the illustration, insert the guide.
-
Push down the guide in installation direction (2) shown in the illustration to install the reclining adjuster inside cover RH.
-
-
INSTALL RECLINING ADJUSTER INSIDE COVER LH
Tech Tips
Use the same procedure as for the RH side.
-
INSTALL FRONT SEAT CUSHION SPRING SUB-ASSEMBLY RH
-
Install in this Direction (1) Install in this Direction (2) While rotating the part in installation direction (1) shown in the illustration, install the hook.
-
Pull in installation direction (2) shown in the illustration to install the front seat cushion spring sub-assembly RH to the hook.
-
-
INSTALL SEAT HEATER CONTROL SUB-ASSEMBLY RH (w/ Seat Heater System)
-

Attach the connector clamp to install the seat heater control sub-assembly RH.
-
-
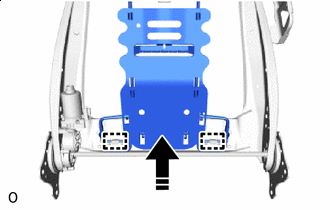
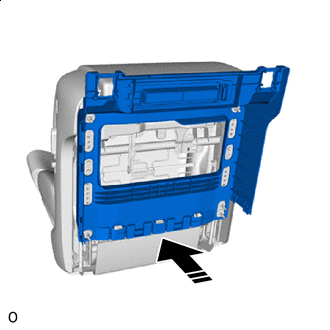
INSTALL FRONT SEATBACK FRAME SUB-ASSEMBLY RH
-
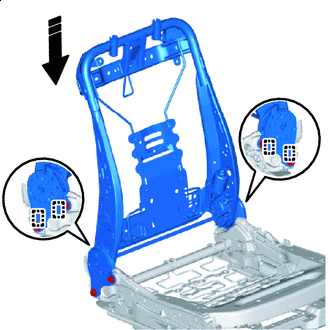
Install in this Direction Push the front seatback frame sub-assembly RH as shown in the illustration to attach the guide.
-
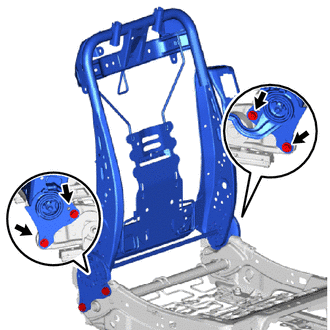
Install the front seatback frame sub-assembly RH with the 4 bolts.
- Torque:
- 42 N*m { 428 kgf*cm, 31 ft.*lbf }
Tech Tips
Tighten the bolts while pushing the front seatback frame sub-assembly RH
-
-
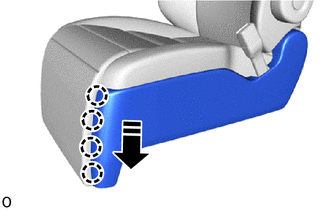
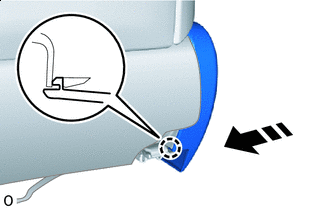
INSTALL FRONT SEAT CUSHION EDGE PROTECTOR RH
-
Install in this Direction (1) Install in this Direction (2) Push in installation direction (1) shown in the illustration to attach the guide.
-
Pull in installation direction (2) shown in the illustration, attach the claw.
-
Install the front seat cushion edge protector RH with the screw.
-
-
INSTALL FRONT SEAT CUSHION EDGE PROTECTOR LH
Tech Tips
Use the same procedure as for the RH side.
-
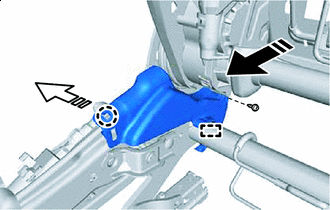
INSTALL LOWER INNER RECLINING ADJUSTER ARM SUB-ASSEMBLY RH
-

Install the lower inner reclining adjuster arm sub-assembly RH with the 4 bolts.
- Torque:
- 32 N*m { 326 kgf*cm, 24 ft.*lbf }
-
-
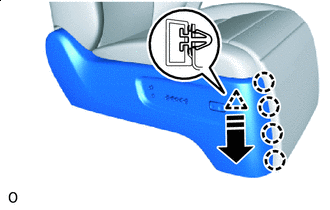
INSTALL FRONT SEAT CUSHION HINGE COVER RH
-
Attach the guide and install the front seat cushion hinge cover RH with the screw.
-
Install the front seat cover.
-
-
INSTALL FRONT SEAT CUSHION HINGE COVER LH
Tech Tips
Use the same procedure as for the RH side.
-
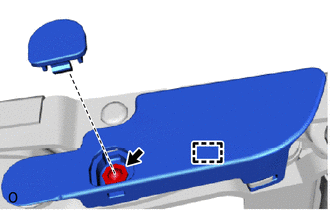
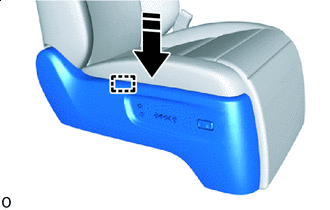
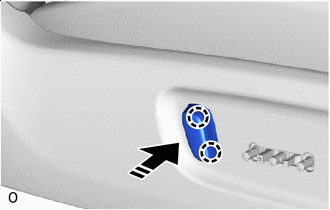
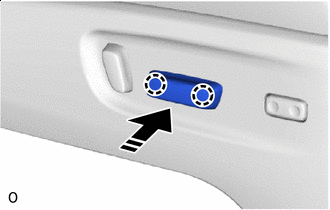
INSTALL FRONT SEAT PLATE SUB-ASSEMBLY RH
-
Install in this Direction Push in the installation direction shown in the illustration and install the front seat plate sub-assembly RH with the screw.
-
-
INSTALL FRONT SEAT PLATE SUB-ASSEMBLY LH
Tech Tips
Use the same procedure as for the RH side.
-
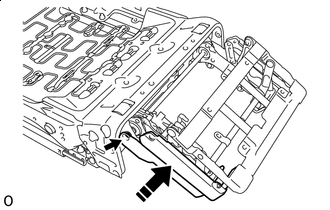
INSTALL NO. 1 SEAT WIRE
-
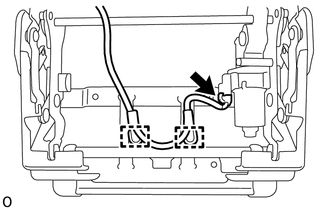
Attach the wire harness clamp.
-
Connect the connector and install the No. 1 seat wire.
-
-
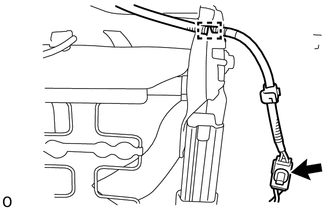
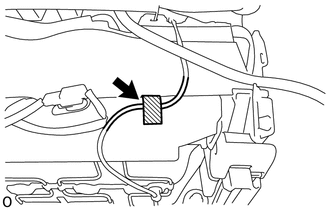
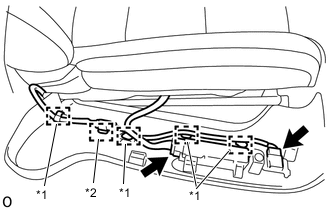
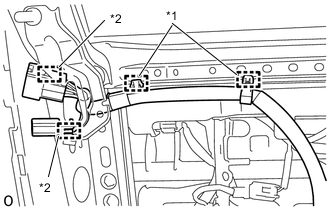
INSTALL FRONT SEAT WIRE RH
-
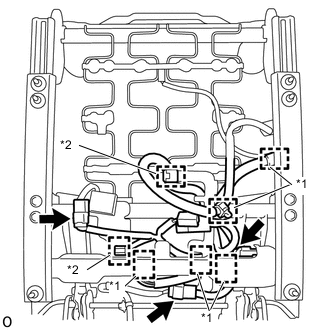
*1 Wire Harness Clamp *2 Connector Clamp w/ Seat Heater:
-
Attach the wire harness clamp and connector clamp.
-
Connect the 3 connectors and install the front seat wire RH.
-
-
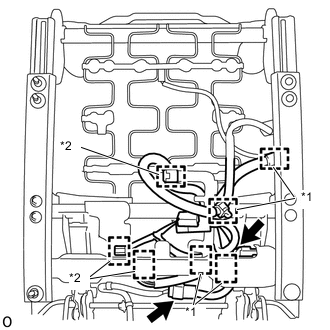
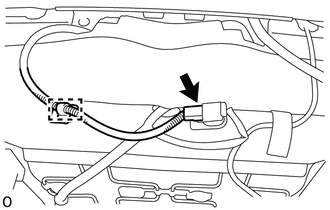
*1 Wire Harness Clamp *2 Connector Clamp w/o Seat Heater:
-
Attach the wire harness clamp and connector clamp.
-
Connect the 2 connectors and install the front seat wire RH.
-
-
-
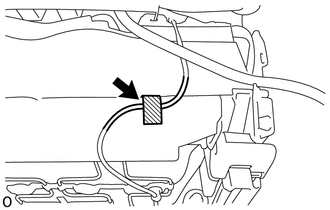
INSTALL FRONT SEAT NO. 2 WIRE RH (w/ Shoulder Switch)
-

Attach the wire harness clamp.
-
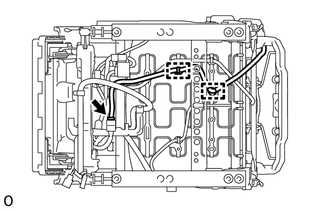
Attach the wire harness clamp.
-
Connect the connector and install the front seat No. 2 wire RH.
-
-
INSTALL FRONT SEAT NO. 2 WIRE RH
-
Connect the connector and install the front seat No. 2 wire RH to the hook.
-
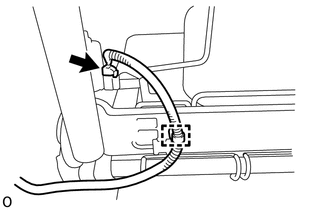
Connect the connector.
-
Attach the wire harness clamp to install the front seat No. 2 wire RH.
-
-
INSTALL FRONT SEAT NO. 1 FOOTREST COVER
-
Install the front seat No. 1 footrest cover with the clip.
-
-
INSTALL FRONT SEAT INNER NO. 1 CUSHION SHIELD RH
-
Align the position of the guide.
-
Attach the clip to install the front seat inner No. 1 cushion shield RH.
-
-
INSTALL FRONT SEAT INNER NO. 1 CUSHION SHIELD LH
Tech Tips
Use the same procedure as for the RH side.
-
INSTALL FRONT SEAT CUSHION HEATER ASSEMBLY RH (w/ Seat Heater System)
-
INSTALL SEAT COVER WIRE
-
Install the seat cover wire.
Tech Tips
-
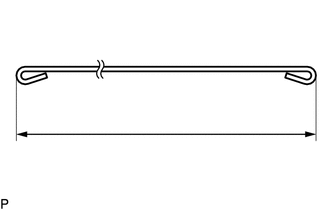
Wire 1000 mm (3.28 ft.) or longer and shaped wire are available as supplied parts.
-
When a wire that is less than 1000 mm (3.28 ft.) in length is needed, cut or shape 1000 mm (3.28 ft.) wire into the dimensions shown in the illustration.
-
Make sure to read the precautions before preparing the wire.
Lentch A 260 mm (10.24 in.) B 300 mm (11.81 in.) C 340 mm (1.12 ft.) D 300 mm (11.81 in.) E 120 mm (4.72 in.) Tech Tips
The dimensions shown in the illustration are the lengths.
-
-
-
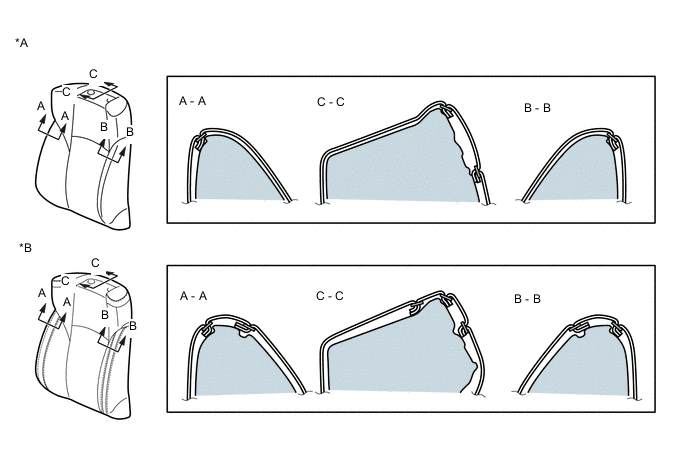
INSTALL SEPARATE TYPE FRONT SEAT CUSHION COVER
Tech Tips
-
Refer to the precautions on wrinkles to avoid creating any on the separate type front seat cushion cover RH when installing the seat cover.
-
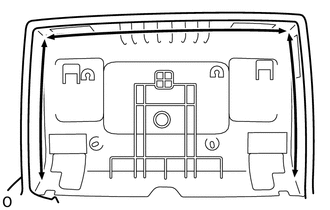
As shown in the illustration, fix all of the cover seam allowances in the same direction.
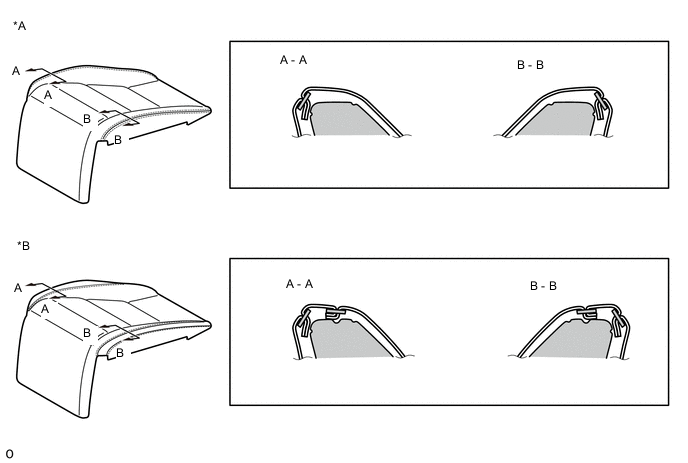
*A w/ Seatback Board *B w/ Seatback Hook
-
Set the separate type front seat cushion cover.
-
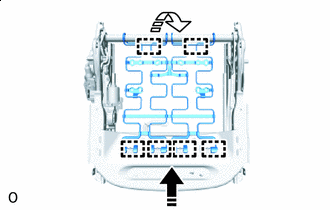
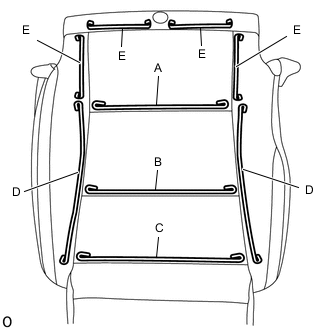
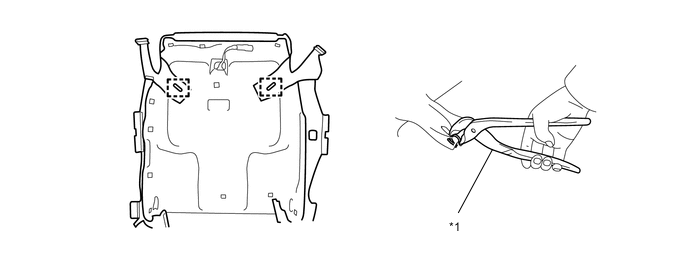
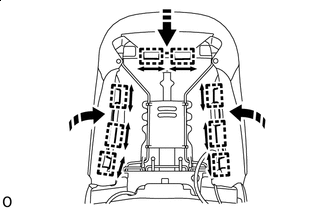
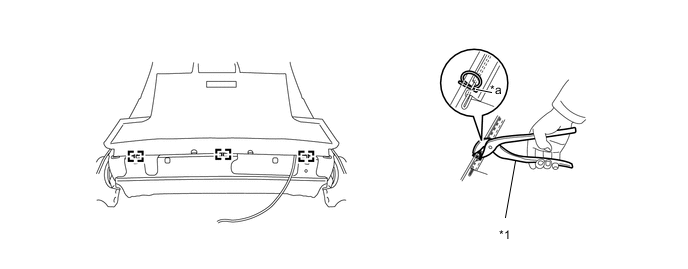
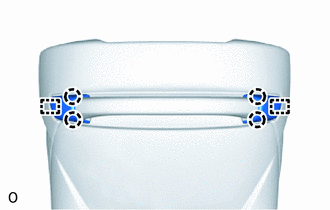
Using hog ring pliers, install the separate type front seat cushion cover to the separate type front seat cushion pad with 17 new hog rings in the order indicated in the illustration.
Note
-
Be careful not to damage the separate type front seat cushion cover.
-
Be sure to securely install the hog rings as shown in the illustration while preventing wrinkles from forming on the separate type front seat cushion cover.
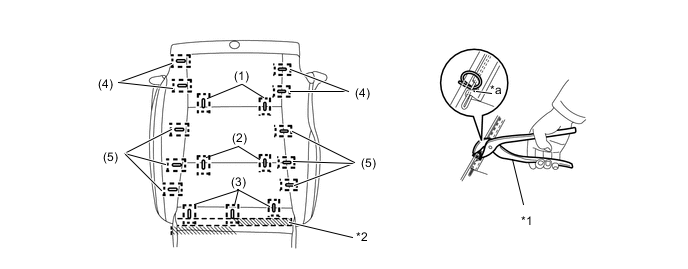
*1 Hog Ring Pliers *2 Fastening Tape *a Cutout - - -
-
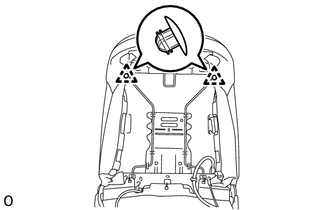
Using hog ring pliers, connect the 2 straps of the separate type front seat cushion cover to the separate type front seat cushion pad with 2 new hog rings.
Note
-
Be careful not to damage the separate type front seat cushion cover.
-
Be sure to securely install the hog rings as shown in the illustration while preventing wrinkles from forming on the separate type front seat cushion cover.
Tech Tips
Install the hog rings at the cutouts if they are there.
*1 Hog Ring Pliers - - -
-
-
INSTALL SEAT CUSHION COVER WITH PAD
-
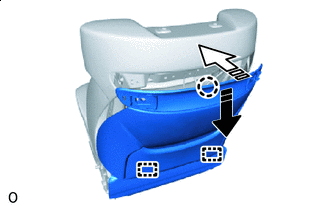
While sliding the part in the direction indicated by the arrow shown in the illustration, align the J hook to install the seat cushion cover with pad.
-
While sliding the part in the direction indicated by the arrow shown in the illustration, install the J hook.
-

Connect the connector.
-
w/ Seat Heater System:
-
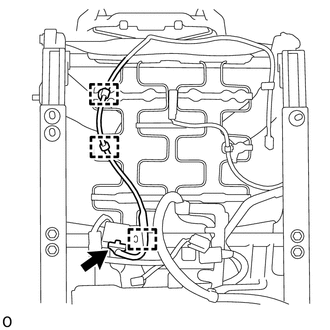
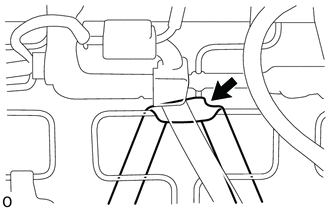
Attach the wire harness clamp to install the seat cushion heater wire harness to the seat cushion spring RH.
-
Connect the connector.
-
-
-
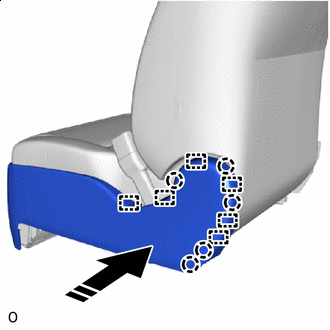
INSTALL FRONT SEAT NO. 2 FOOTREST COVER
-
Install in this Direction Push in the installation direction shown in the illustration to install the hook and guide.
-
Install in this Direction Push up in the installation direction shown in the illustration and install the front seat No. 2 footrest cover with the 2 screws.
-
Install the guide.
-
While sliding the part in the direction indicated by the arrow shown in the illustration, align the part with the J hook to install it.
-
-
INSTALL FRONT SEAT INNER BELT ASSEMBLY RH
-
INSTALL FRONT SEAT AIRBAG ASSEMBLY RH
Tech Tips
Use the same procedure as for the RH side.
-
INSTALL SEATBACK FELT
-
Install the seatback felt.
-
-
INSTALL FRONT SEATBACK HEATER ASSEMBLY LH (w/ Seat Heater System)
-
INSTALL SEAT COVER WIRE
-
Install the seat cover wire.
Tech Tips
-
Wire 1000 mm (3.28 ft.) or longer and shaped wire are available as supplied parts.
-
When a wire that is less than 1000 mm (3.28 ft.) in length is needed, cut or shape 1000 mm (3.28 ft.) wire into the dimensions shown in the illustration.
-
Make sure to read the precautions before preparing the wire.
Lentch A 260 mm (10.24 in.) B 530 mm (20.87 in.) Tech Tips
The dimensions shown in the illustration are the lengths.
-
-
-
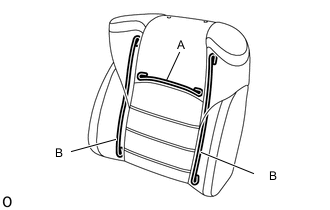
INSTALL SEPARATE TYPE FRONT SEATBACK COVER
Tech Tips
-
When installing the separate type front seatback cover, refer to the precautions in order to prevent wrinkles from forming.
-
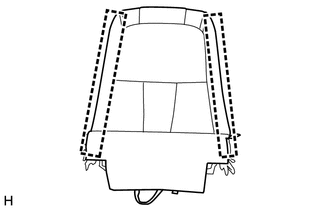
Align the seam allowance in a single direction as shown in the illustration.
*A w/o Seatback Board *B w/ Seatback Board
-
Set the separate type front seatback cover.
-
Attach the 2 fastening tape.
-
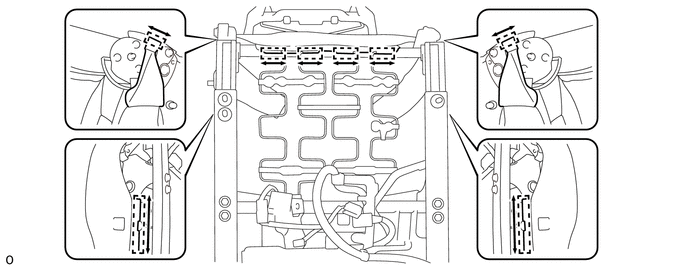
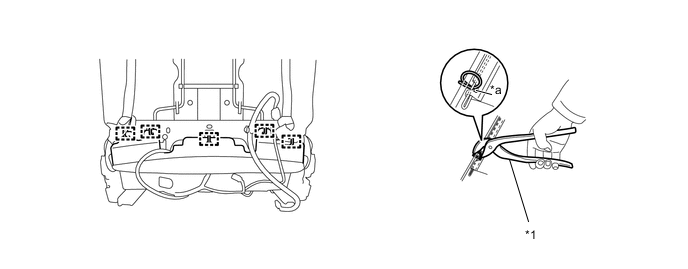
Using hog ring pliers, install the separate type front seatback cover to the separate type front seatback pad with 10 new hog rings in the order indicated in the illustration.
Note
-
Be careful not to damage the separate type front seatback cover.
-
Be sure to securely install the hog rings as shown in the illustration while preventing wrinkles from forming on the separate type front seatback cover.
Tech Tips
Install the hog rings at the cutouts if they are there.
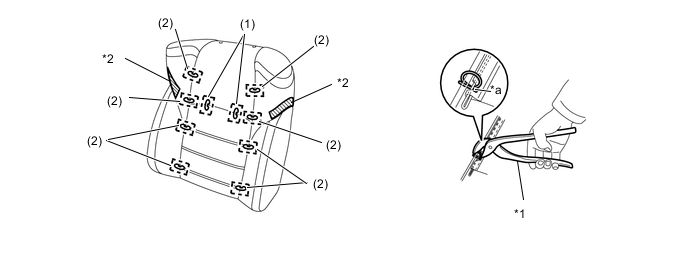
*1 Hog Ring Pliers *2 Fastening Tape *a Cutout - - -
-
-
INSTALL SEATBACK COVER WITH PAD
-
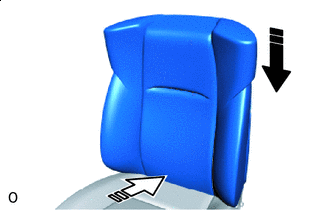
Install in this Direction (1) Install in this Direction (2) Push in installation direction (1) shown in the illustration to temporarily install the seatback cover with pad.
-
Push in the rear end of the seatback cover with pad in installation direction (2) shown in the illustration.
-
Install the separate type front seatback cover with the nut.
- Torque:
- 5.5 N*m { 56 kgf*cm, 49 in.*lbf }
-
w/ Seatback Board:
-
Secure the wire harness of the front seat airbag assembly RH with fastening tape.
-
Connect the connector.
-
Attach the wire harness clamp.
-
-
w/o Seatback Board:
-
Secure the wire harness of the front seat airbag assembly RH with fastening tape.
-
-
-
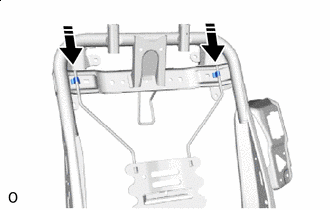
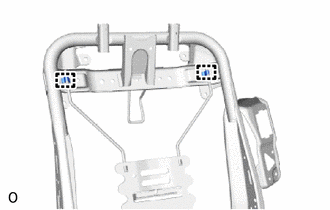
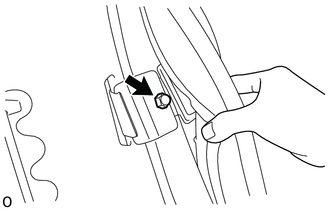
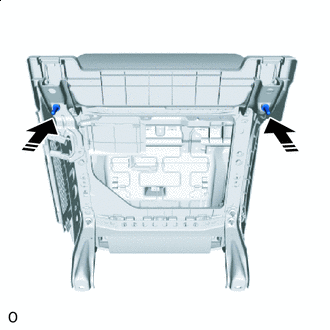
INSTALL FRONT SEAT HEADREST SUPPORT
-
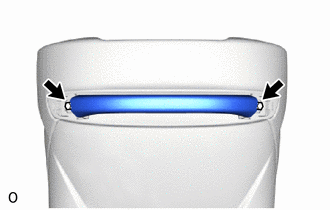
Install in this Direction Push in the installation direction shown in the illustration and attach the claw to install the 2 front seat headrest supports.
-
w/ Seatback Board
-
Install in this Direction While rotating in the direction indicated by the arrow shown in the illustration, install the J hook to install the seatback cover with pad.
-
Attach the clip.
-
Install 5 new hog rings.
*1 Hog Ring Pliers - - *a Cutout - -
-
-
w/o Seatback Board:
-
Close the fastener.
-
Install 3 new hog rings.
*1 Hog Ring Pliers - - *a Cutout - -
-
-
Install the band in the position shown in the illustration.
-
-
INSTALL FRONT SEATBACK BOARD SUB-ASSEMBLY RH (w/ Seatback Board)
-
Install in this Direction (1) Install in this Direction (2) Push in installation direction (1) shown in the illustration to install the guide.
-
Push in installation direction (2) shown in the illustration to attach the claw and install the front seatback board sub-assembly RH.
-
-
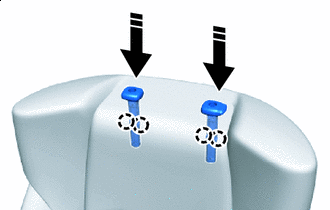
INSTALL ASSIST GRIP (w/ Seatback Board)
-
Install the assist grip with the 2 bolts.
- Torque:
- 7.5 N*m { 76 kgf*cm, 66 in.*lbf }
-
-
INSTALL ASSIST GRIP PLUG (w/ Seatback Board)
-
Attach the claw and guide install the 2 assist grip plugs.
-
-
INSTALL FRONT POWER SEAT SWITCH (w/ Shoulder Switch)
-
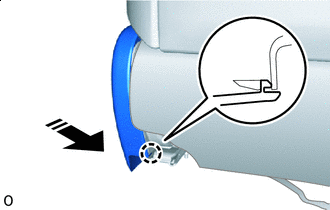
INSTALL FRONT SEAT INNER CUSHION SHIELD RH
-
Install in this Direction Push in the installation direction shown in the illustration and attach the guide and claw.
-
Install in this Direction Push in the installation direction shown in the illustration to attach the claw.
-
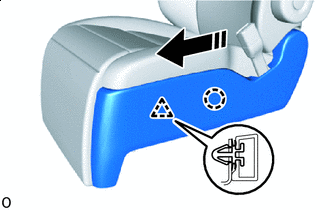
Install in this Direction Push in the installation direction shown in the illustration to attach the clip.
-
Attach the claw.
-
Follow the installation direction shown in the illustration and attach the clips in order, starting from the top.
-
-
INSTALL FRONT POWER SEAT SWITCH (for Ottoman)
-
INSTALL FRONT POWER SEAT SWITCH RH
-
INSTALL FRONT SEAT CUSHION SHIELD RH
-
*1 Wire Harness Connector *2 Connector Clamp Connect the 2 connectors.
-
Attach the wire harness clamp and connector clamp.
-
Install in this Direction Push in the installation direction shown in the illustration and attach the claws in order, starting from the top.
-
Attach the clip.
-
Install in this Direction Push in the installation direction shown in the illustration to install the guide.
-
Install in this Direction Push in the installation direction shown in the illustration to attach the claw and guide.
-
Install in this Direction Push in the installation direction shown in the illustration to attach the claw.
-
-
INSTALL POWER SEAT SWITCH KNOB RH (for Reclining)
-
Install in this Direction Push in the installation direction shown in the illustration and attach the claw to install the power seat switch knob RH.
-
-
INSTALL POWER SEAT SWITCH KNOB RH (for Slide)
-
Install in this Direction Push in the installation direction shown in the illustration and attach the claw to install the power seat switch knob RH.
-
-
INSTALL FRONT SEAT LEG COVER
-
Install in this Direction Push in the installation direction shown in the illustration to install the front seat inner leg cover.
-
-
INSTALL FRONT SEAT LEG ASSEMBLY RH
-

Install the front seat leg assembly RH with the 5 nuts.
- Torque:
- 19.5 N*m { 199 kgf*cm, 14 ft.*lbf }
-
*1 Wire Harness Clamp *2 Connector Clamp Attach the wire harness clamp and connector clamp.
-
-
INSTALL SEAT ADJUSTER COVER CAP RH
Install in this Direction
-
Push in the installation direction shown in the illustration to install the 2 seat adjuster cover caps RH.
-
-
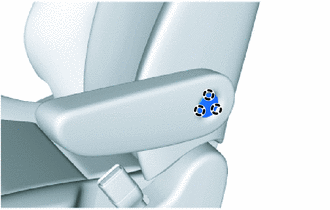
INSTALL FRONT SEAT INNER ARMREST ASSEMBLY RH (w/ Armrest)
-
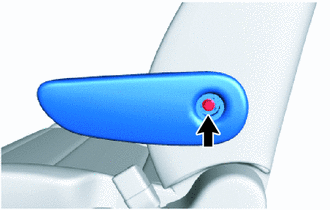
Install the bolt and front seat inner armrest assembly RH.
-
-
INSTALL NO. 1 SEAT ARMREST CAP (w/ Armrest)
-
Attach the claw and install the No. 1 seat armrest cap.
-
-
INSTALL FRONT SEAT HEADREST ASSEMBLY
-
Install the front seat headrest assembly.
-