FRONT SEAT ASSEMBLY(for Driver Side Power Seat) INSTALLATION
CAUTION / NOTICE / HINT
Tech Tips
-
Use the same procedure for RHD and LHD vehicles.
-
The procedure listed below is for LHD vehicles.
PROCEDURE
-
INSTALL FRONT SEAT ASSEMBLY LH
-
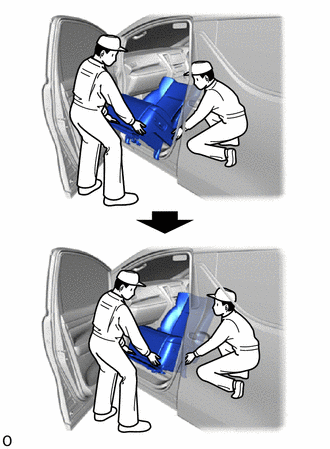
Place the front seat assembly LH in the vehicle, as shown in the illustration.
Note
Do not damage the front seat assembly LH, body exterior or interior parts.
-
Tilt the front seat assembly LH toward the rear of the vehicle.
Note
Do not damage the front seat assembly LH or interior parts.
-
Connect the connector.
-
Connect the connector of the front seat airbag assembly LH.
-
Align the adjuster pin of the front seat assembly LH with the hole in the body.
-
Temporarily install the front seat assembly LH with the 4 bolts.
-
Operate the power seat switch knob LH (for Slide) to slide the front seat assembly LH to the rearmost position.
-
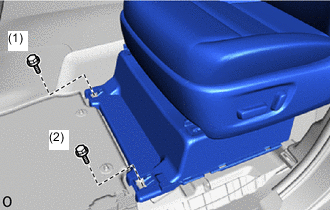
Tighten the 2 bolts on the front side of the front seat assembly LH in the order shown in the illustration.
- Torque:
- 39 N*m { 398 kgf*cm, 29 ft.*lbf }
-
Operate the power seat switch knob LH (for Slide) to slide the front seat assembly RH to the frontmost position.
-
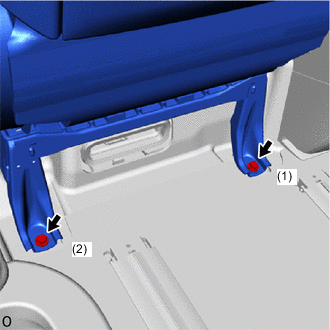
Tighten the 2 bolts on the rear side of the front seat assembly LH in the order shown in the illustration.
- Torque:
- 39 N*m { 398 kgf*cm, 29 ft.*lbf }
-
-
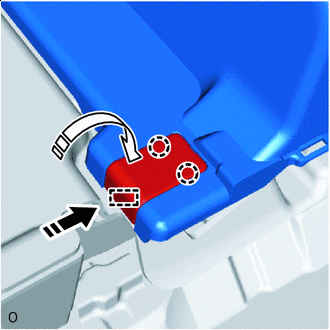
INSTALL FRONT SEAT NO. 1 LEG COVER
-

Installation in this Direction (1) 
Installation in this Direction (2) for Inner Side:
-
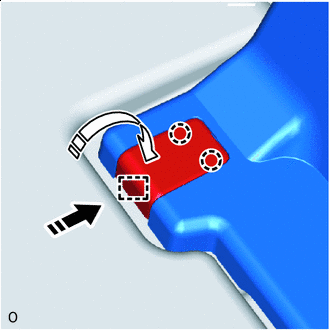
Push in installation direction (1) shown in the illustration and attach the hook to install the front seat No.1 seat leg cover.
-
Push the part closed in installation direction (2) shown in the illustration to attach the claw.
-
-
Installation in this Direction (1) Installation in this Direction (2) for Outer Side:
-
Push in installation direction (1) shown in the illustration and attach the hook to install the front seat No.1 seat leg cover.
-
Push the part closed in installation direction (2) shown in the illustration to attach the claw.
-
-
-
INSTALL RH SEAT FRONT SEAT LEG COVER
-
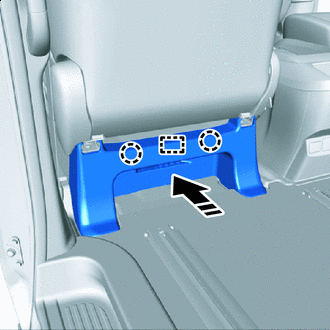
Installation in this Direction Operate the power seat switch knob LH (for Slide) to slide the front seat assembly LH to the frontmost position.
-
Push in the installation direction shown in the illustration and align the claw and guide.
-
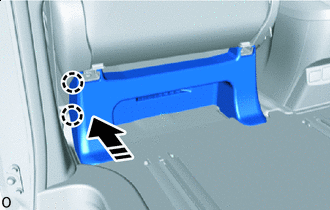
Installation in this Direction Push in the installation direction shown in the illustration to attach the claw.
-
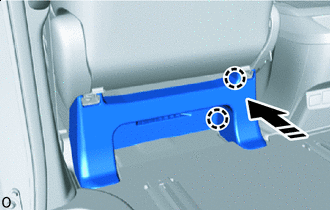
Installation in this Direction Push in the installation direction shown in the illustration to attach the claw and install the front seat leg cover LH.
-
Return the floor carpet to its original position.
-
-
INSTALL NO. 3 FLOOR CARPET MOULDING
-
Temporarily install the 2 No. 3 floor carpet mouldings.
-
Using a screwdriver, rotate the screw portion 90° clockwise and lock it to install the 2 No. 3 floor carpet mouldings.
-
-
INSTALL REAR DOOR SCUFF PLATE LH
-
INSTALL DOOR SCUFF PLATE ASSEMBLY LH
-
INSTALL COWL SIDE TRIM BOARD LH
-
CONNECT CABLE TO NEGATIVE BATTERY TERMINAL
Note
When disconnecting the cable, some systems need to be initialized after the cable is reconnected.
-
INSPECT SRS WARNING LIGHT
-
INSPECT SEAT BELT WARNING LIGHT