FRONT SEAT SIDE AIRBAG ASSEMBLY(for Manual Seat) INSTALLATION

CAUTION / NOTICE / HINT
CAUTION:
-
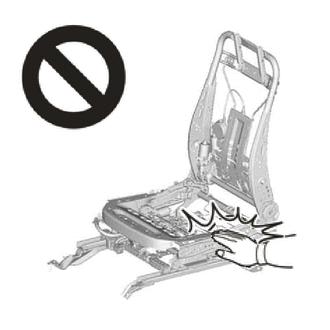
Wear protective gloves. Sharp areas on the parts may injure your hands.
-
There is risk of injury.
-
If the front seat side airbag was deployed, replace the front seat airbag assembly, separate type front seatback frame sub-assembly, separate type front seatback cover and separate type front seatback pad with the necessary parts in accordance with the extent of the collision damage.
-
Replace any other damaged parts as necessary.
Tech Tips
-
Use the same procedure for the RH and LH sides.
-
The procedure listed below is for the RH side.
PROCEDURE
-
INSTALL FRONT SEAT AIRBAG ASSEMBLY RH
-
Install the front seat airbag assembly RH with 2 new nuts.
- Torque:
- 5.5 N*m { 56 kgf*cm, 49 in.*lbf }
Note
-
The nuts must not be reused.
-
Make sure that the separate type front seatback frame sub-assembly is not deformed. If it is, replace it with a new one.
-
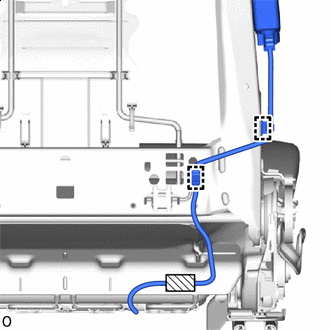

Fastener Attach the wire harness clamp and fastener.
-
Attach the wire harness clamp.
-
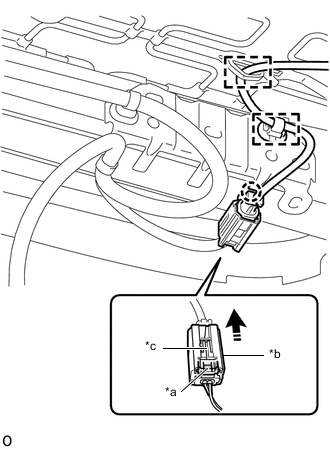
*a Housing Lock *b CPA *c CPA Upper Part 
Connect in this Direction Attach the claw to connect the airbag connector.
-
Attach the wire harness clamp.
-
Before connecting the connector, check that the position of the housing lock is correct as shown in the illustration.
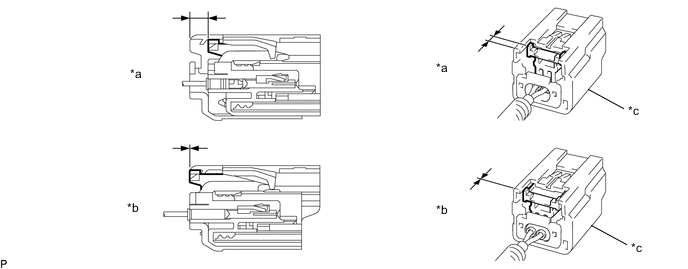
*a Correct *b Incorrect *c CPA - - -
While holding the CPA be sure to engage the connectors until they are locked and check that the CPA is in its original position (when locking, make sure that a click sound can be heard).
Note
-
Be careful not to damage the side airbag connector or wire harness.
-
When connecting the connector, make sure to push it straight in.
-
Do not hold any parts other than the yellow CPA when connecting the connector.
-
If the upper portion of the yellow CPA is held when connecting the connector, the partial connection prevention mechanism will not function due to deformation of the yellow CPA. Therefore, hold the sides of the yellow CPA.
-
-
-
INSTALL SEATBACK FELT
-
INSTALL SEPARATE TYPE FRONT SEATBACK COVER WITH PAD
-
INSTALL FRONT SEAT HEADREST SUPPORT
-
INSTALL FRONT SEATBACK HOOK
-
INSTALL FRONT SEAT INNER ARMREST ASSEMBLY RH
-
INSTALL NO. 1 SEAT ARMREST CAP
-
INSTALL FRONT SEAT INNER CUSHION SHIELD RH
-
INSTALL FRONT SEAT CUSHION SHIELD RH
-
INSTALL VERTICAL ADJUSTING HANDLE RH (w/ Vertical Adjuster)
-
INSTALL RECLINING ADJUSTER RELEASE HANDLE RH
-
INSTALL FRONT NO. 1 SEAT LEG COVER
-
INSTALL FRONT SEAT LEG ASSEMBLY RH
-
INSTALL FRONT SEAT ASSEMBLY
-
CONNECT CABLE TO NEGATIVE BATTERY TERMINAL
Note
When disconnecting the cable, some systems need to be initialized after the cable is reconnected.
-
PERFORM DIAGNOSTIC SYSTEM CHECK
-
CHECK SRS WARNING LIGHT