DOOR COURTESY LIGHT BULB REPLACEMENT
PROCEDURE
-
REMOVE COURTESY LIGHT ASSEMBLY
-
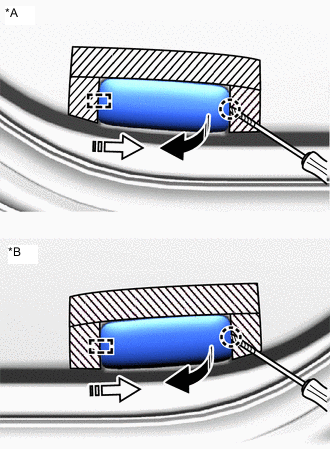
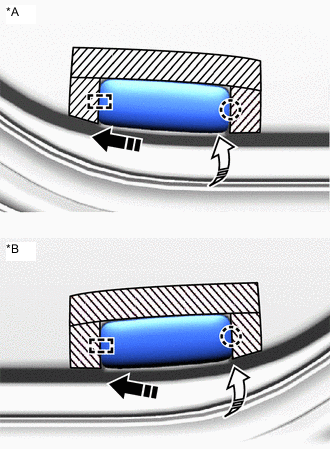
*A for LH Side *B for RH Side 
Protective Tape 
Remove in this Direction (1) 
Remove in this Direction (2) Put protective tape around the courtesy light assembly.
-
Using a thin-bladed screwdriver, detach the claw and guide.
Tech Tips
Tape the thin-bladed screwdriver tip before use.
-
Disconnect the connector and remove the courtesy light assembly.
-
-
REMOVE COURTESY LIGHT BULB
-
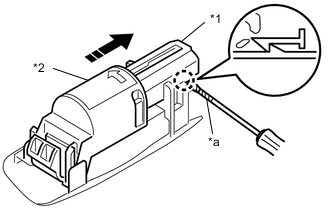
*1 Housing *2 Cover *a Protective Tape Remove in this Direction Using a thin-bladed screwdriver, detach the claw as shown in the illustration.
Tech Tips
Tape the thin-bladed screwdriver tip before use.
-
Remove the housing and cover.
-

Remove in this Direction Remove the cover as shown in the illustration.
-

Remove in this Direction Remove the courtesy light bulb as shown in the illustration.
-
-
INSTALL COURTESY LIGHT BULB
-
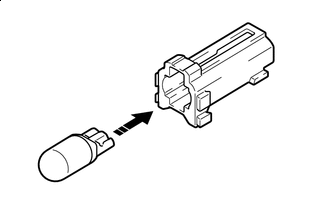
Install in this Direction Install the courtesy light bulb as shown in the illustration.
-

Install in this Direction Install the cover as shown in the illustration.
-
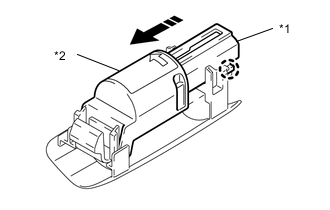
*1 Housing *2 Cover Install in this Direction Attach the claw to install the housing and cover as shown in the illustration.
-
-
INSTALL COURTESY LIGHT ASSEMBLY
-
Connect the connector.
-
*A for LH Side *B for RH Side Protective Tape Install in this Direction (1) Install in this Direction (2) Attach the guide and claw to install the courtesy light assembly as shown in the illustration.
-
Remove the protective tape.
-