SEAT RAIL REMOVAL
CAUTION / NOTICE / HINT
The necessary procedures (adjustment, calibration, initialization or registration) that must be performed after parts are installed, removed or replaced during the seat rail removal/installation are shown below.
| Replacement Part or Procedure | Necessary Procedures | Effects/Inoperative Functions when not Performed | Link |
|---|---|---|---|
| Disconnect cable from negative (-) battery terminal | Drive the vehicle until stop and start control is permitted (approximately 5 to 60 minutes) | Stop and Start System (for 2AR-FE) | |
| Stop and Start System (for 2GR-FKS) | |||
| Memorize steering angle neutral point | Panoramic View Monitor System | ||
| Initialize back door lock | Power Door Lock Control System | ||
| Initialize servo motor | Air Conditioning System | ||
| Reset slide door close position | Power Slide Door System | ||
| Reset back door close position | Power Back Door System |
PROCEDURE
-
PRECAUTION
Note
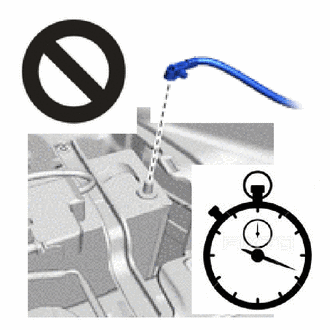
After turning the engine switch off, waiting time may be required before disconnecting the cable from the negative (-) battery terminal. Therefore, make sure to read the disconnecting the cable from the negative (-) battery terminal notices before proceeding with work.
-
DISCONNECT CABLE FROM NEGATIVE BATTERY TERMINAL
CAUTION:
-
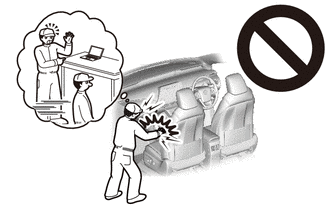
Wait at least 90 seconds after disconnecting the cable from the negative (-) battery terminal to disable the SRS system.
-
If the airbag deploys for any reason, it may cause a serious accident.
Note
When disconnecting the cable, some systems need to be initialized after the cable is reconnected.
-
-
REMOVE REAR NO. 1 SEAT ASSEMBLY LH
-
for Manual Captain Seat:
-
for Power Captain Seat with Memory:
-
for Power Captain Seat without Memory:
-
-
REMOVE REAR NO. 1 SEAT ASSEMBLY RH
-
for Manual Captain Seat:
-
for Power Captain Seat with Memory:
-
for Power Captain Seat without Memory:
-
-
REMOVE REAR NO. 2 SEAT ASSEMBLY LH
-
REMOVE REAR NO. 2 SEAT ASSEMBLY RH
-
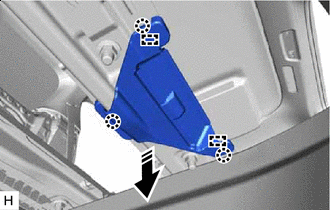
REMOVE REAR SEAT STOPPER
Tech Tips
Use the same procedure for the opposite side.
-
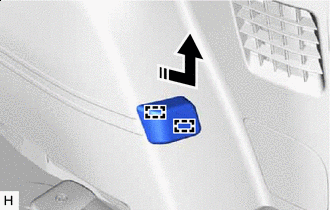

Remove in this Direction Pull as shown in the illustration to detach the guide and remove the rear seat stopper.
-
-
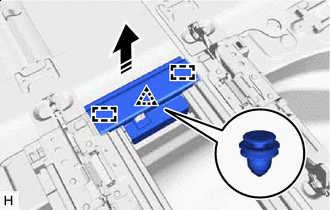
REMOVE REAR SEAT TRACK SLIDE STOPPER
-
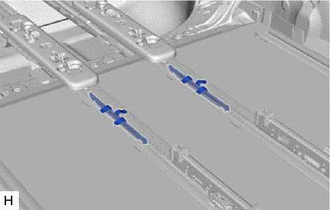
Remove the 2 rear seat track slide stoppers.
-
-
REMOVE REAR DOOR SCUFF PLATE LH
-
REMOVE REAR DOOR SCUFF PLATE RH
-
REMOVE REAR NO. 1 FLOOR BOARD ASSEMBLY
-
REMOVE REAR NO. 2 FLOOR BOARD ASSEMBLY
-
REMOVE REAR NO. 3 FLOOR BOARD ASSEMBLY
-
REMOVE UTILITY BOX SUB-ASSEMBLY
-
REMOVE BACK DOOR SCUFF PLATE
-
REMOVE REAR UPPER NO. 2 FLOOR BOARD PLATE
-
REMOVE REAR UPPER NO. 1 FLOOR BOARD PLATE
-
REMOVE DECK SIDE GARNISH RH
-
REMOVE DECK SIDE GARNISH LH
-
REMOVE NO. 2 LUGGAGE COMPARTMENT TRIM HOOK
-
REMOVE NO. 1 LUGGAGE COMPARTMENT TRIM HOOK
-
REMOVE ROPE HOOK ASSEMBLY
-
REMOVE REAR QUARTER TRIM PANEL ASSEMBLY LH
-
REMOVE REAR QUARTER TRIM PANEL ASSEMBLY RH
-
REMOVE PARKING BRAKE ECU ASSEMBLY
-
REMOVE REAR NO. 2 SEAT TRACK ASSEMBLY LH
-
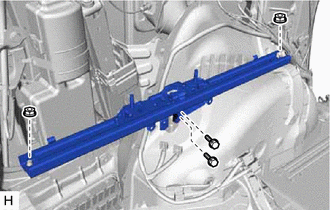
Remove the 2 bolts, 2 nuts and rear No. 2 seat track assembly LH.
-
-
REMOVE REAR NO. 2 SEAT TRACK ASSEMBLY RH
-

Remove the 2 bolts, 2 nuts and rear No. 2 seat track assembly RH.
-
-
REMOVE REAR SEAT LOCK STRIKER COVER
Tech Tips
Use the same procedure for the opposite side.
-
Remove in this Direction (1) 
Remove in this Direction (2) Pull the part in removal direction (1) shown in the illustration to detach the claw.
-
Pull the part in removal direction (2) shown in the illustration to detach the guide and remove the rear seat lock striker cover.
-
-
REMOVE NO. 3 FLOOR CARPET MOULDING
-
Using a screwdriver, rotate the screw portion of the clip 90° counterclockwise to unlock it.
Tech Tips
Tape the screwdriver tip before use.

*A for Manual Captain Seat *B for Power Captain Seat *1 Protective Tape - - -
for Manual Captain Seat:
Detach the claw and remove the 8 No. 3 floor carpet mouldings.
-
for Power Captain Seat:
Detach the claw and remove the 6 No. 3 floor carpet mouldings.
-
-
REMOVE NO. 4 FLOOR CARPET MOULDING (for Power Captain Seat)
-
Using a screwdriver, rotate the screw portion of the clip 90° counterclockwise to unlock it.
Tech Tips
Tape the screwdriver tip before use.
*1 Protective Tape - - -
Detach the claw and remove the 2 No. 4 floor carpet mouldings.
-
-
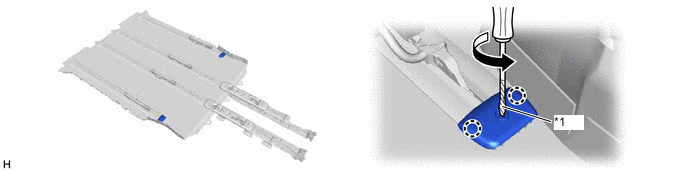
REMOVE LOWER NO. 1 SEAT TRACK RAIL PROTECTOR
Tech Tips
Use the same procedure for the opposite side.
-
Using a screwdriver, turn it in the direction indicated by the arrow shown in the illustration to detach the claw and remove the lower No. 1 seat track rail protector.
Tech Tips
Tape the screwdriver tip before use.

*A for Manual Captain Seat *B for Power Captain Seat *1 Protective Tape - -
-
-
REMOVE LOWER NO. 2 SEAT TRACK RAIL PROTECTOR
Tech Tips
Use the same procedure for the opposite side.
-
Using a screwdriver, turn it in the direction indicated by the arrow shown in the illustration to detach the claw and remove the lower No. 2 seat track rail protector.
Tech Tips
Tape the screwdriver tip before use.

*A for Manual Captain Seat *B for Power Captain Seat *1 Protective Tape - -
-
-
REMOVE LOWER SEAT TRACK RAIL PROTECTOR (for Captain Seat Type)
Tech Tips
Use the same procedure for the opposite side.
-
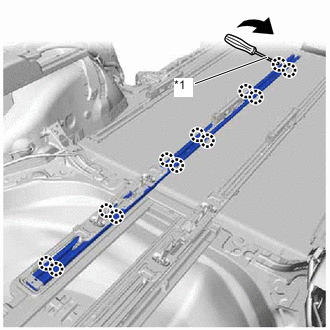
*1 Protective Tape Using a screwdriver, turn it in the direction indicated by the arrow shown in the illustration to detach the claw and remove the 2 lower seat track rail protectors.
Tech Tips
Tape the screwdriver tip before use.
-
-
REMOVE REAR UPPER NO. 3 FLOOR BOARD PLATE
-
Remove in this Direction Pull the part as shown in the illustration to detach the clip and guide and remove the rear upper No. 3 floor board plate.
-
-
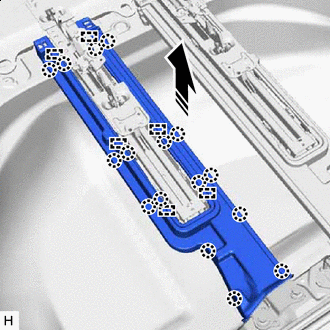
REMOVE DECK RAIL COVER
-
Remove in this Direction Pull as shown in the illustration to detach the claw and guide and remove the deck rail cover.
-
-
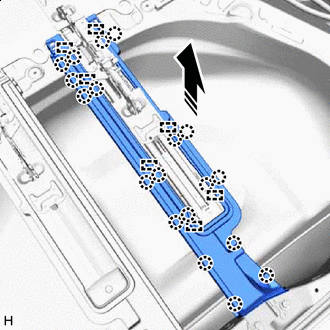
REMOVE NO. 2 DECK RAIL COVER
-
Remove in this Direction Pull as shown in the illustration to detach the claw and guide and remove the No. 2 deck rail cover.
-
-
REMOVE NO. 1 DECK RAIL COVER
-
Remove in this Direction Pull as shown in the illustration to detach the claw and guide and remove the No. 1 deck rail cover.
-
-
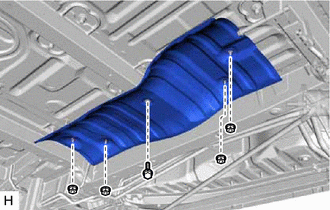
REMOVE FUEL TANK ASSEMBLY
Tech Tips
Perform this procedure when removing and installing the rail on the inner side.
-
for 2AR-FE:
-
for 2GR-FKS:
-
-
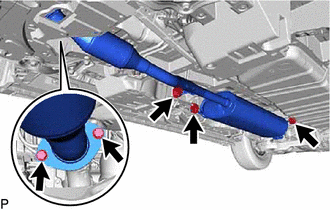
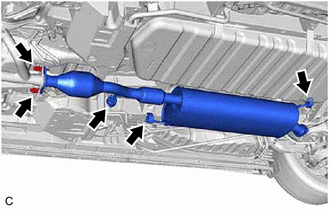
REMOVE CENTER EXHAUST PIPE ASSEMBLY (TWC: Rear Catalyst) (for 2AR-FE)
Tech Tips
Perform this procedure when removing and installing the rail on the inner side.
CAUTION:
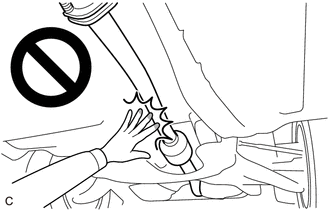
To prevent burns, do not touch the engine, exhaust pipe or other high temperature components while the engine is hot.
-

Remove the 2 bolts and 2 compression springs.
-
Remove the 2 bolts.
-
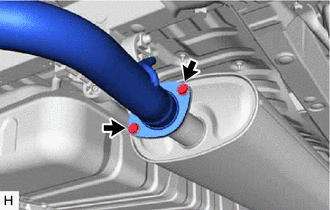
Disconnect the 3 exhaust pipe supports and remove the center exhaust pipe assembly (TWC: Rear Catalyst).
-
Remove the exhaust pipe gasket from the front exhaust pipe assembly.
-
-
REMOVE EXHAUST FORKED PIPE SUB-ASSEMBLY (TWC: Rear Catalyst) (for 2GR-FKS)
Tech Tips
Perform this procedure when removing and installing the rail on the inner side.
CAUTION:
To prevent burns, do not touch the engine, exhaust pipe or other high temperature components while the engine is hot.
-
Remove the 2 bolts.
-
Remove the 2 bolts and 2 compression springs.
-
Disconnect the 3 exhaust pipe supports and remove the exhaust forked pipe sub-assembly (TWC: Rear Catalyst).
-
Remove the exhaust pipe gasket from the front No. 3 exhaust pipe sub-assembly.
-
-
REMOVE CENTER NO. 2 FLOOR HEAT INSULATOR SUB-ASSEMBLY
Tech Tips
Perform this procedure when removing and installing the rail on the inner side.
-
Remove the bolt, 4 nuts and center No. 2 floor heat insulator sub-assembly.
-
-
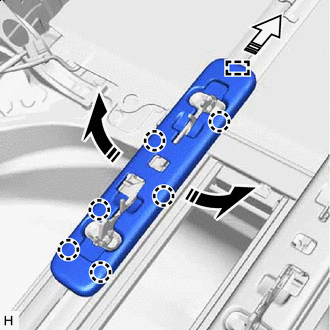
REMOVE REAR OUTER SEAT TRACK ASSEMBLY LH
-

for Manual Captain Seat:
-
Remove the 7 nuts from the bottom of the vehicle, and then remove the rear outer seat track assembly LH from inside the vehicle.
-
-
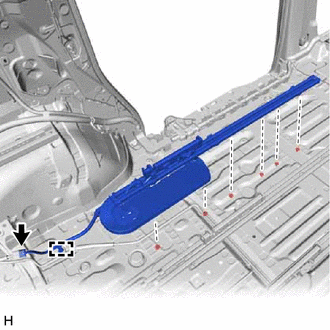
for Power Captain Seat:
-
Fold up the rear floor mat assembly RH.
-
Disconnect the connector.
-
Detach the clamp and disconnect the wire harness.
-
Remove the 6 nuts from the bottom of the vehicle, and then remove the rear outer seat track assembly LH from inside the vehicle.
-
-
-
REMOVE REAR OUTER SEAT TRACK ASSEMBLY RH
-
for Manual Captain Seat:
Tech Tips
Use the same procedure as for the LH side.
-
for Power Captain Seat:
Tech Tips
Use the same procedure as for the LH side.
-
-
REMOVE REAR SEAT TRACK ASSEMBLY LH
-
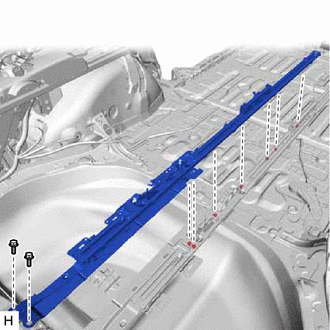
for Manual Captain Seat:
-
Remove the 7 nuts from the bottom of the vehicle, and then remove the 2 bolts and rear seat track assembly LH from inside the vehicle.
-
-
for Power Captain Seat:
-
Remove the 7 nuts from the bottom of the vehicle, and then remove the 2 bolts and rear seat track assembly LH from inside the vehicle.
-
-
-
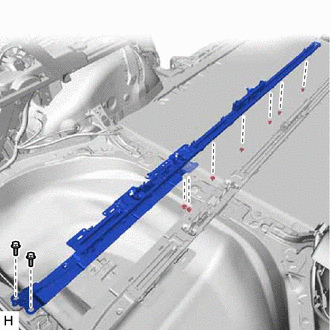
REMOVE REAR NO. 1 SEAT TRACK ASSEMBLY RH
-
for Manual Captain Seat:
Tech Tips
Remove using the same procedure described for the rear seat track assembly LH side.
-
for Power Captain Seat:
Tech Tips
Remove using the same procedure described for the rear seat track assembly LH side.
-