REAR NO. 2 SEAT ASSEMBLY INSTALLATION
CAUTION / NOTICE / HINT
Tech Tips
The procedure listed below is for the LH side. Use the same procedure for the LH and RH sides, unless otherwise specified.
PROCEDURE
-
INSTALL REAR NO. 2 SEAT ASSEMBLY LH
-


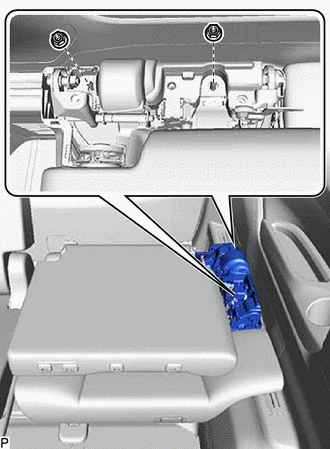
Install in this Direction (1) 
Install in this Direction (2) Bring the rear No. 2 seat assembly LH into the vehicle through the back door, and then move the rear No. 2 seat assembly LH as shown in the illustration to temporarily install it.
Note
Do not damage the rear No. 2 seat assembly LH, body and body interior.
-
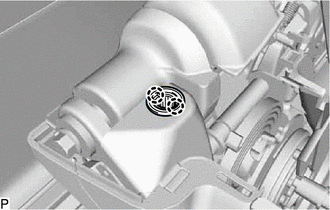
Connect the rear No. 2 seat outer belt assembly.
-
Temporarily install the 2 nuts.
-
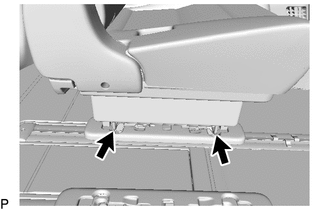
Align the inner leg with the lock position of the inner rail and lock it.
Note
If the above procedure is not performed, the seat rail cover may become damaged.
-
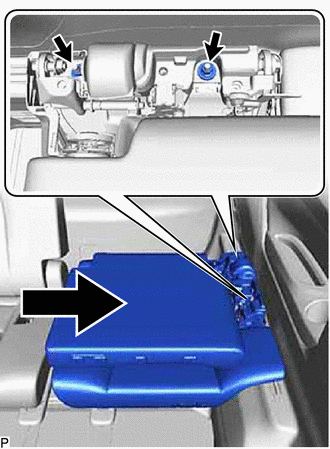
With the rear No. 2 seat assembly LH pushed toward the outside of the vehicle, tighten the nuts to install the rear No. 2 seat assembly LH as shown in the illustration.
- Torque:
- 42 N*m { 428 kgf*cm, 31 ft.*lbf }
Note
-
If this procedure is difficult to perform alone, perform this procedure with 2 or more people.
-
When pushing the seat, make sure that the alignment marks are aligned.
-
If the nuts are tightened without pushing the seat, the inner lock may not operate normally.
-
After installing the seat, check that the inner lock operates normally and there is no interference between the inner lock and lock cover.
-
Check that the slide operation of the rear No. 2 seat assembly LH are normal. If there is a malfunction, loosen the 2 nuts and perform the procedure again.
-
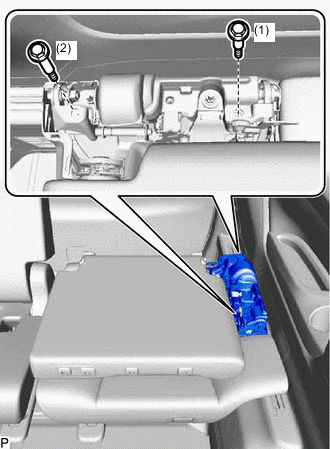
Remove the 2 stopper bolts in the order shown in the illustration.
-
Check that the flip up operation of the rear No. 2 seat assembly LH are normal. If there is a malfunction, loosen the 2 nuts and perform the procedure again.
Note
Before removing the stopper bolts, check that the inner leg is securely locked to the inner rail.
-
-
INSTALL REAR SEAT HEADREST ASSEMBLY
-
Install the rear seat headrest assembly.
-
-
INSTALL NO. 2 SEAT HEADREST ASSEMBLY
-
Install the No. 2 seat headrest assembly.
-
-
INSTALL NO. 2 SEAT TRACK LOCK PLATE COVER
-

Insert the claw and guide and install the No. 2 seat track lock plate cover.
-
-
INSTALL SEAT TRACK UPPER RAIL COVER LH
-
Attach the claw and install the grommet.
-
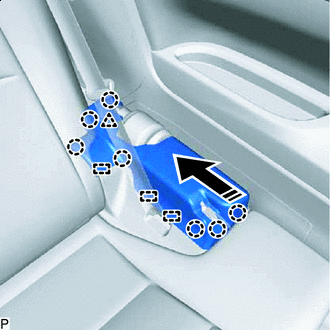
Install in this Direction Twist the handle, move the seat track upper rail cover LH in the direction indicated by the arrow shown in the illustration, attach the claw and clip and insert the guide to install the seat track upper rail cover LH.
-
-
INSTALL RECLINING ADJUSTER RELEASE HANDLE LH
-
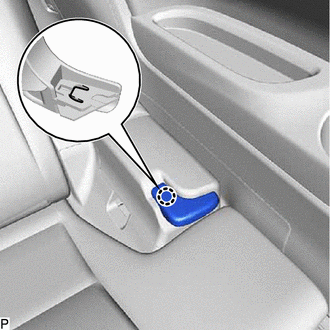
Attach the claw to install the reclining adjuster release handle LH.
-