FRONT AIR CONDITIONING UNIT(for LHD) DISASSEMBLY
PROCEDURE
-
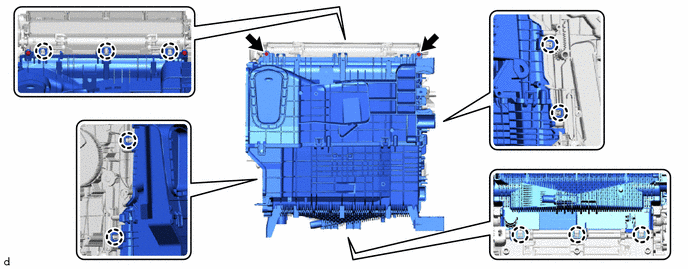
REMOVE NO. 2 COOLER WIRING (w/ PTC Heater)
-
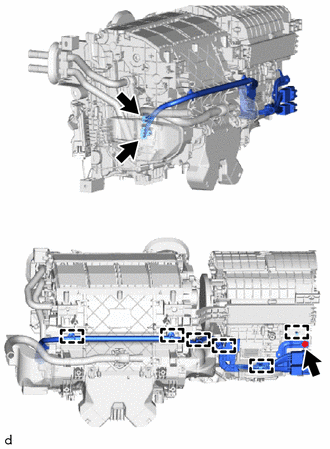
Disconnect the 2 connectors.
-
Remove the 2 screws.
-
Detach the harness clamp and guide and remove the No. 2 cooler wiring.
-
-
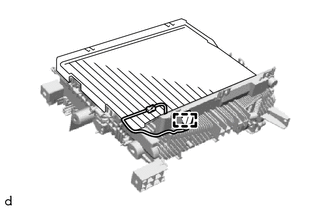
REMOVE NO. 3 AIR DUCT SUB-ASSEMBLY
-
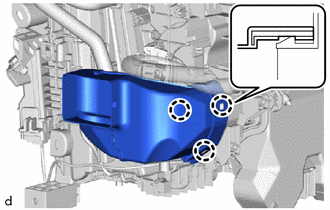
Detach the claw and remove the No. 3 air duct sub-assembly.
Note
-
When removing, do not crack or deform the lower heater case of the air conditioning radiator assembly.
-
If the No. 3 air duct sub-assembly is reused, it may fall off or abnormal noise may occur. Therefore, make sure to replace with a new one.
-
-
-
REMOVE NO. 2 AIR DUCT SUB-ASSEMBLY
-
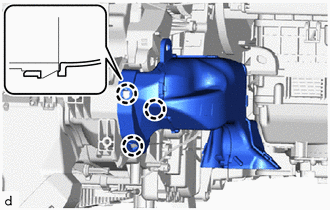
Detach the claw and remove the No. 2 air duct sub-assembly.
Note
-
When removing, do not crack or deform the lower heater case of the air conditioning radiator assembly.
-
If the No. 2 air duct sub-assembly is reused, it may fall off or abnormal noise may occur. Therefore, make sure to replace with a new one.
-
-
-
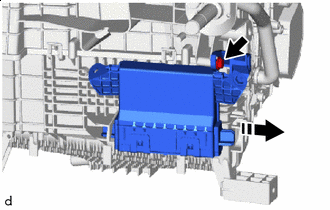
REMOVE QUICK HEATER ASSEMBLY (w/ PTC Heater)
-
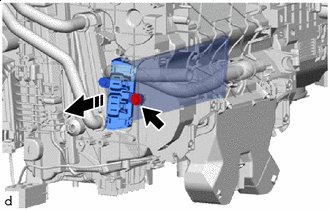

Remove in this Direction Remove the screw and quick heater assembly.
-
-
REMOVE HEATER COVER (w/o PTC Heater)
-
Remove in this Direction Remove the screw and heater cover.
-
-
REMOVE BLOWER ASSEMBLY
-
REMOVE AIR DUCT SUB-ASSEMBLY
-
Detach the claw and remove the air duct sub-assembly.
-
-
REMOVE AIR CONDITIONING HARNESS ASSEMBLY
-
Disconnect the 3 connectors.
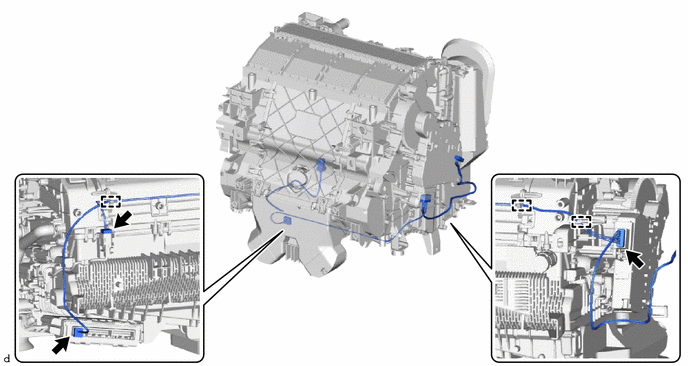
-
Detach the clamp and remove the air conditioning harness assembly.
-
-
REMOVE AIR CONDITIONING AMPLIFIER ASSEMBLY
-
Remove in this Direction Remove the screw and air conditioning amplifier assembly.
-
-
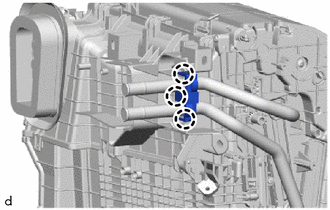
REMOVE NO. 1 AIR CONDITIONING RADIATOR DAMPER SERVO SUB-ASSEMBLY
-

Remove the 3 screws and No. 1 air conditioning radiator damper servo sub-assembly.
-
-
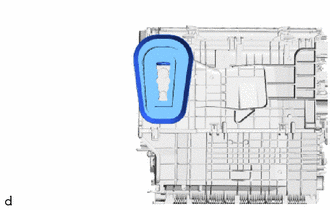
REMOVE HEATER RADIATOR UNIT SUB-ASSEMBLY
-
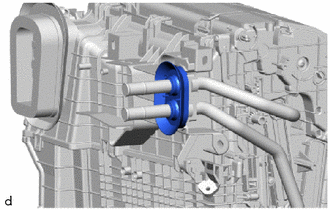
Remove the heater grommet.
-
Detach the claw and remove the heater clamp.
-
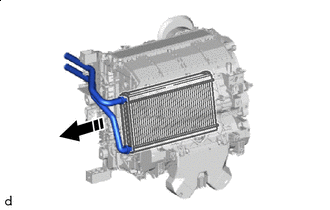
Remove in this Direction Remove the heater radiator unit sub-assembly.
-
-
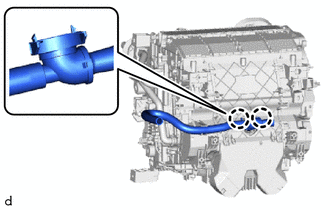
REMOVE COOLER EXPANSION VALVE
-
Remove the cooling unit parts.
-
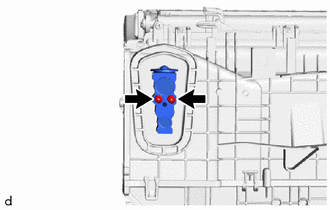
Using a 4 mm hexagon socket wrench, remove the 2 bolts and cooler expansion valve.
-
Remove the 2 O-rings from the No. 1 cooler evaporator sub-assembly.
-
-
REMOVE NO. 1 COOLER EVAPORATOR SUB-ASSEMBLY
-
Remove the 2 screws.
-
Detach the claw and remove the upper heater case from the lower heater case.
-
Detach the connector clamp.
-
Remove the No. 1 cooler evaporator sub-assembly together with the No. 1 cooler thermistor from the upper heater case.
-
-
REMOVE NO. 1 COOLER THERMISTOR